Homemade Apple Cider Vinegar | Healthy, Simple and Frugal
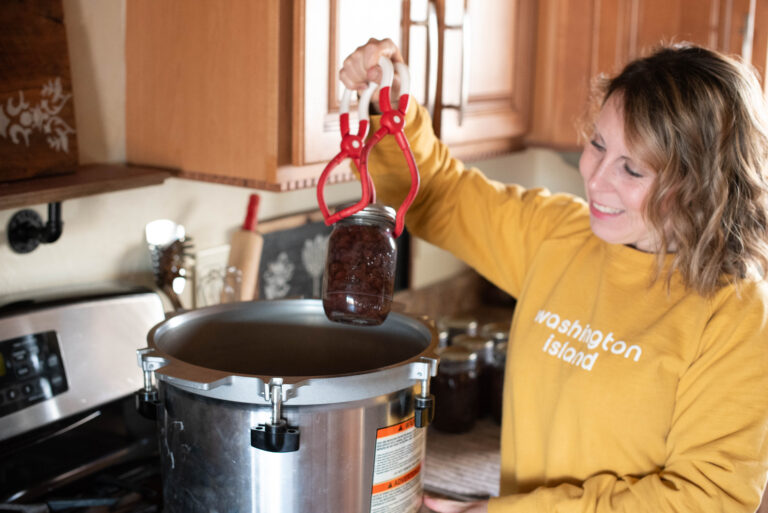
This fall, make an easy homemade apple cider vinegar from fresh picked orchard apples. It’s economical and multi-purpose by nature, all made in the cozy comfort of your own kitchen.

There’s nothing quite like the scent of a bushel of fresh picked apples. Here in Wisconsin, they whisper that summer is still here, but fall is lingering nearby.
Deer hunters delight in the treasure trove of fallen apples, while home cooks fill kitchens with delicious baked goods and preserves to be enjoyed all winter long. I can taste the apple pie already!
A few years back, I discovered that I can make my own apple cider vinegar with apple scraps before disposing them to the compost pile. I became most excited about the fact I could make a large amount of vinegar to store on hand all by myself.
In other words, I could do something super simple to be more self-sufficient! And I get to enjoy all the other amazing benefits of apple cider vinegar (ACV) that you’ll read below.
I’m super passionate about everyone learning to make homemade apple cider vinegar because anyone can do it including busy moms and dads. The effort is minimal, but the rewards are plentiful.

What Are the Benefits of Homemade Apple Cider Vinegar?
Easy to Make – While processing fresh picked apples this fall, throw the scraps into jars instead of the garbage or compost pile. Add sugar and water and that’s it. You’ll have homemade apple cider vinegar in a few short months.
Frugal – Homemade apple cider vinegar is frugality and practicality at its finest. Utilize the apple scraps for a pantry staple item, then toss them in the compost pile.
It’s also less expensive and produces a bulk amount, saving you money. You’ll save time too since you won’t have to run to the store to buy it. Simply grab a jar off your pantry shelf!
Healthy – The health benefits of ACV are numerous and profound. These are just a few examples.
- It aids in digestion because it increases stomach acid production. Adequate stomach acid ensures thorough breakdown of nutrients so the body can properly absorb them. Basically, ACV helps prevent nutrient deficiencies with a healthy diet. Take a teaspoon before every meal either straight or diluted in water.
- The acetic acid in apple cider vinegar prevents unwanted yeast and bacteria in the digestive track.
- ACV contains lots of minerals and antioxidants, most notably potassium and magnesium. Potassium aids in proper water retention, muscle and heart function and breakdown of carbohydrates for energy from food. Magnesium has many roles in the human body, especially in enzyme production, which are necessary for food breakdown.
- Apple cider vinegar aids in weight loss. It slows down the rise of blood sugar after a meal, decreasing the need for insulin. The less insulin a body needs, the easier weight management becomes.
Versatile – While it’s great for your health, ACV has many other uses in the home. Keep reading to learn how to use apple cider vinegar in your home.
How Can Homemade Apple Cider Vinegar Be Used Around the Home?
I’d be lost without apple cider vinegar in my home. I use it so much and it’s super easy to make, which is why I’m passionate about encouraging others to do so as well! Here are more reasons why apple cider vinegar is useful around the home.
Beauty Aid – Homemade apple cider vinegar is excellent as a hair conditioner. It has a similar acidity to hair, which helps condition and remove buildup from the scalp. For those lucky enough to have curly locks, it’s also a detangler.
ACV also doubles as a facial toner. Dilute with water in a 2:1 ratio. Two parts water to one part ACV. Dip a cotton ball in the solution and gently rub all over face, avoiding the eyes.
Pet Care – Believe it or not, our pets often mimic us humans in nutrition and cleanliness needs. Add a 1/2 teaspoon to a water bowl for good digestion or carefully use to clean out ears to prevent scratching. ACV can also be used as a fur conditioner after bathing your pet or to make homemade bug spray for them and your family.

In the Kitchen – Apple cider vinegar is a keystone item in my pantry. I use it to soak grains and legumes (black beans, oatmeal, etc.) before cooking to breakdown phytic acid. Use it to make homemade salad dressings and in pastry recipes calling for vinegar.
Helpful Hints
- Any variety of apple or apple scraps can be used to make homemade apple cider vinegar. However, the less sugar a variety contains, the longer it will take to ferment into vinegar. Think green apples versus Pink Lady apples.
- When fermenting anything, sometimes mold will form. This is where personal preference and discretion is advised. Sometimes, if a light layer of mold grows on the top layer of apples, it can be carefully scooped or wiped away. Underneath that, the ferment is okay to use. However, if there is a large presence of mold, it’s best to use caution and toss to the compost pile. I’m not too worried about germs, but if you are, it’s better not to stress and simply toss it out if you’re ever in doubt.
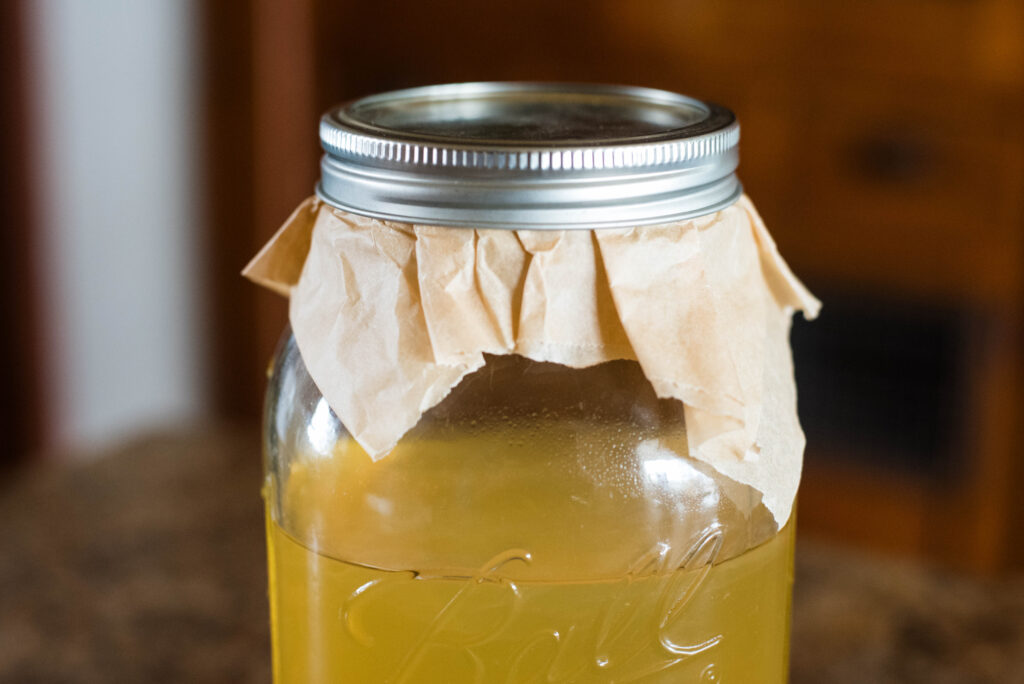
- When storing the final jars of ACV, cover with parchment paper before twisting on the lid. It prevents the lid from rusting.
What Is A SCOBY?
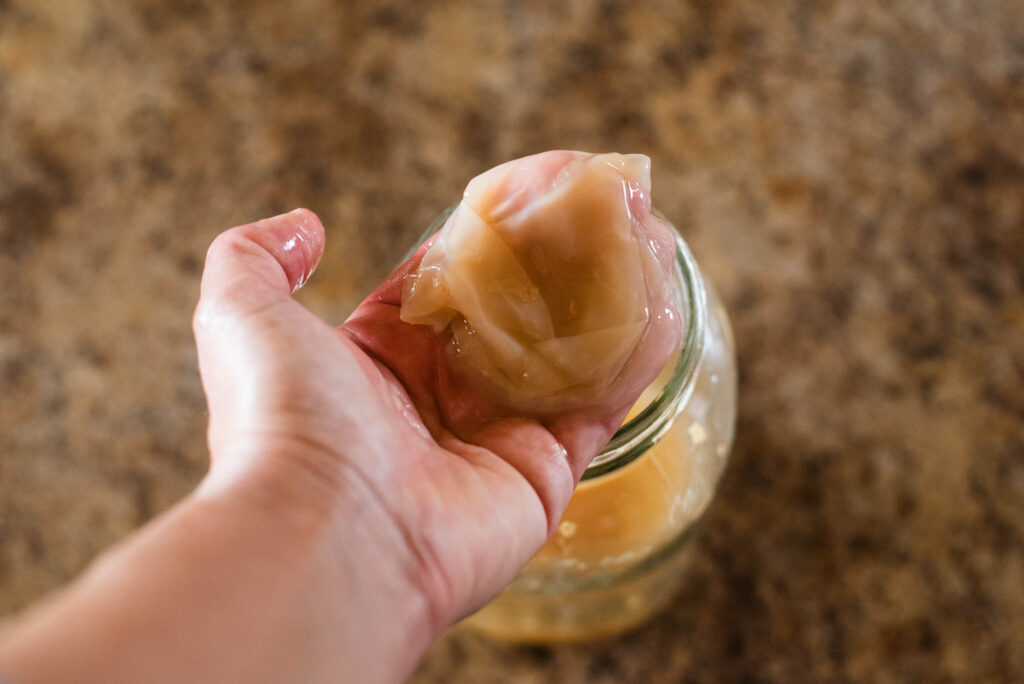
- A SCOBY is a Symbiotic Culture Of Bacteria and Yeast. Once the sugar water is shaken or stirred with the apples, it won’t need to be done again. Typically a SCOBY forms on top of the apples as the ferment gets stronger and turns to vinegar.
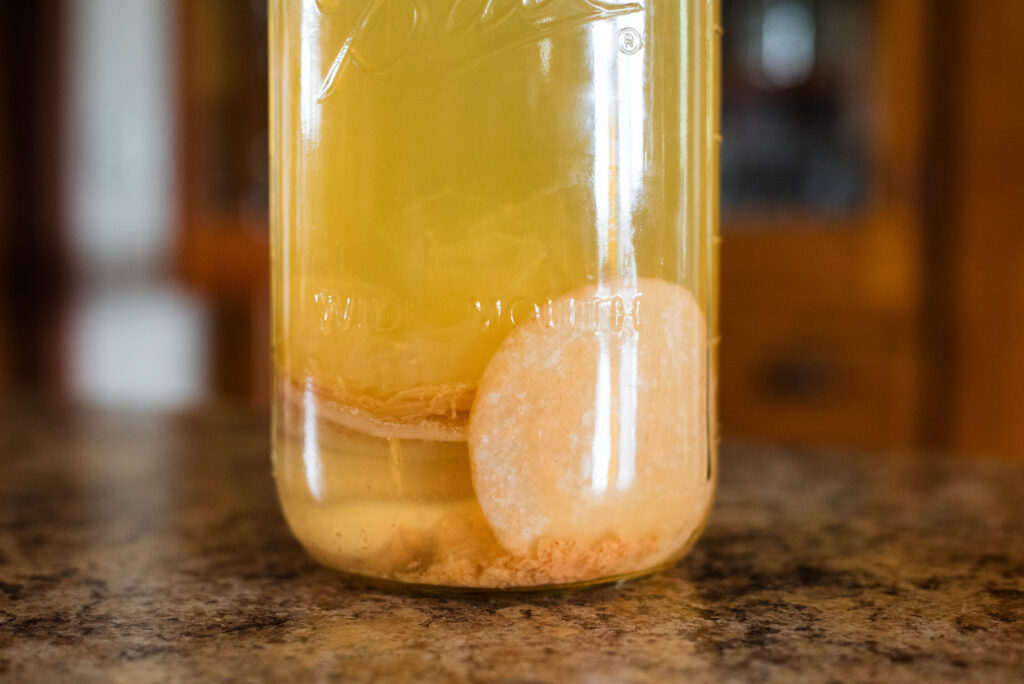
It indicates the ferment is strong and full of nutrients and probiotics. Generally, I transfer the SCOBY into the jar with the final filtered vinegar to keep it strong. It can also be used to inoculate another jar of freshly made ACV similar to a sourdough starter. Or cut into pieces and give to your dog for a healthy treat. Otherwise, it can go to the compost.
How to Make Homemade Apple Cider Vinegar
What You’ll Need
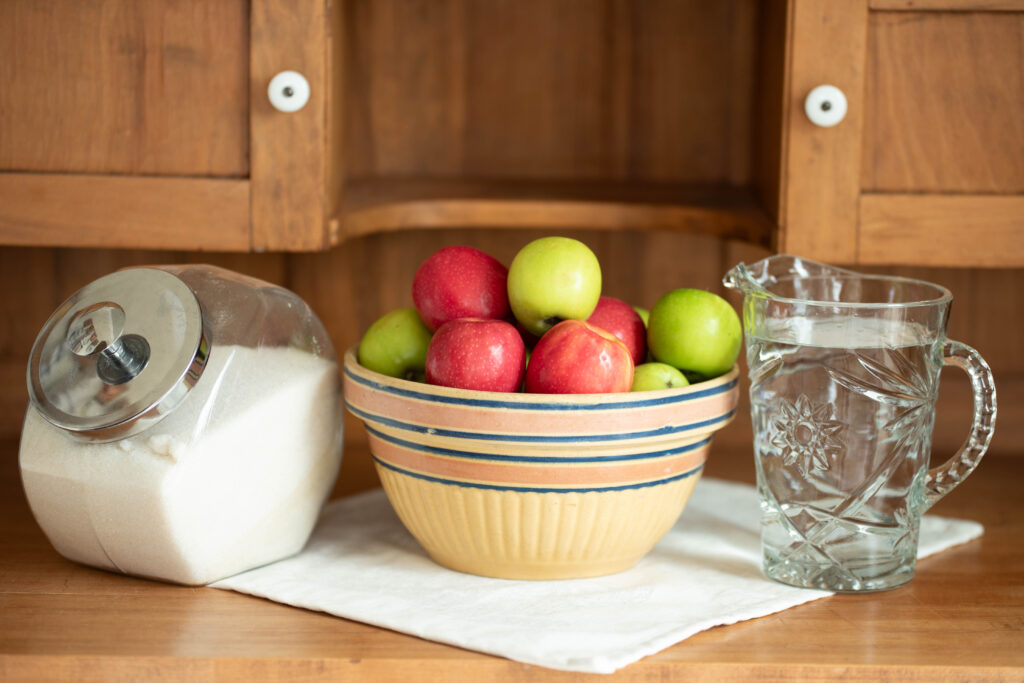
Apples – Either use whole apples or apple scraps. If you’re baking with apples this fall, it’s easy to gather a bulk amount of scraps to use, but if not, scraps can be saved in the freezer until you have enough.
Sugar – I will always advocate for high quality ingredients. While regular sugar can be used, I encourage organic cane sugar. It’s unbleached and unprocessed without chemicals, making it a healthier option. Raw honey or real maple syrup can also be used, but the organic sugar is a more economical option.
Filtered Water – It’s important to use filtered water or well water because it doesn’t contain the harsh chemicals from city tap water. The chemicals are unhealthy to consume plus the apples won’t ferment into vinegar due to the chlorine.
Equipment – Cutting board, sharp knife, half-gallon Mason jars with lids, measuring cups, towel, parchment paper and jars for storing final product
Step-by-Step Instructions
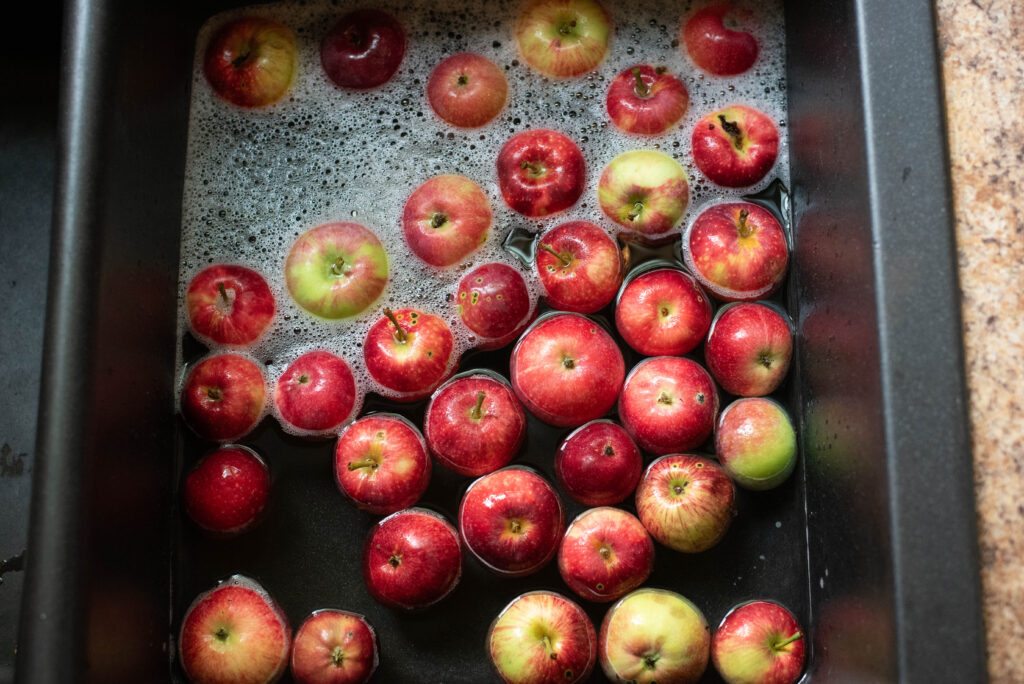
Wash apples with warm water and a natural soap such as Branch Basics or Dr. Bronner’s.
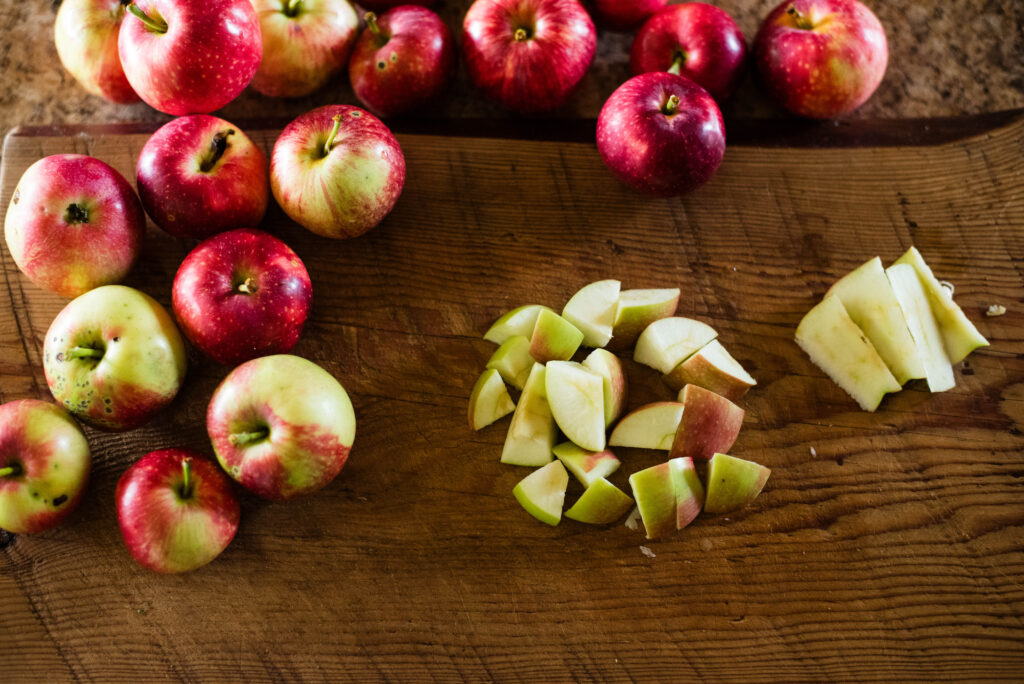
Next, gather apple scraps of cores, seeds and skins. Or cut up whole apples into one inch chunks.
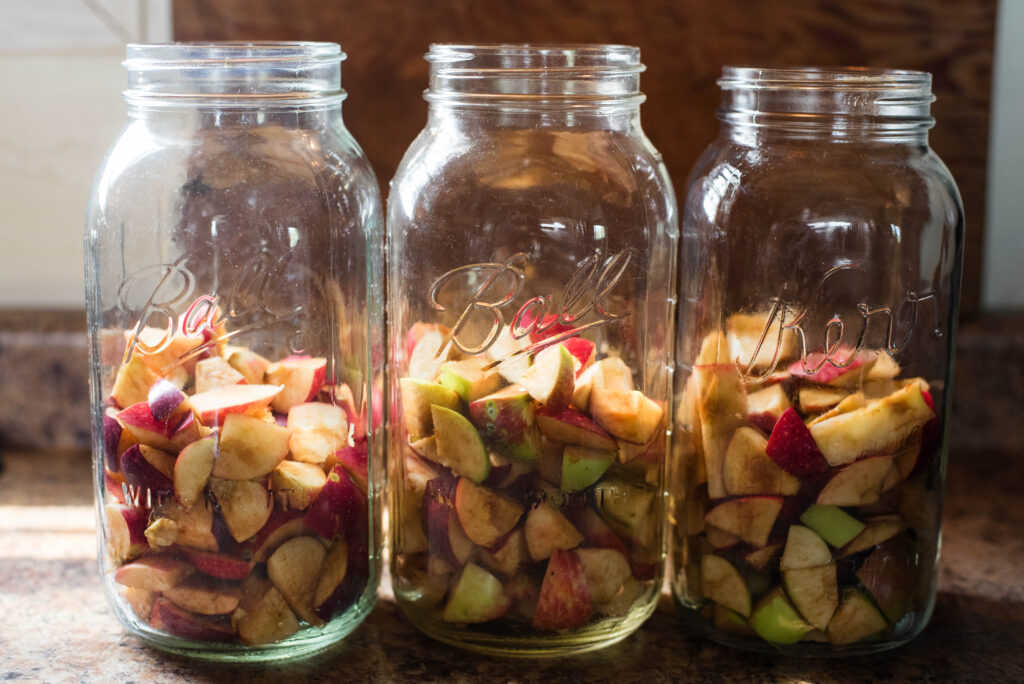
Fill a half-gallon size jar half-way full with apple chunks or scraps.

Next, add sugar to another half-gallon size jar and fill with filtered water. Well water is also okay to use.
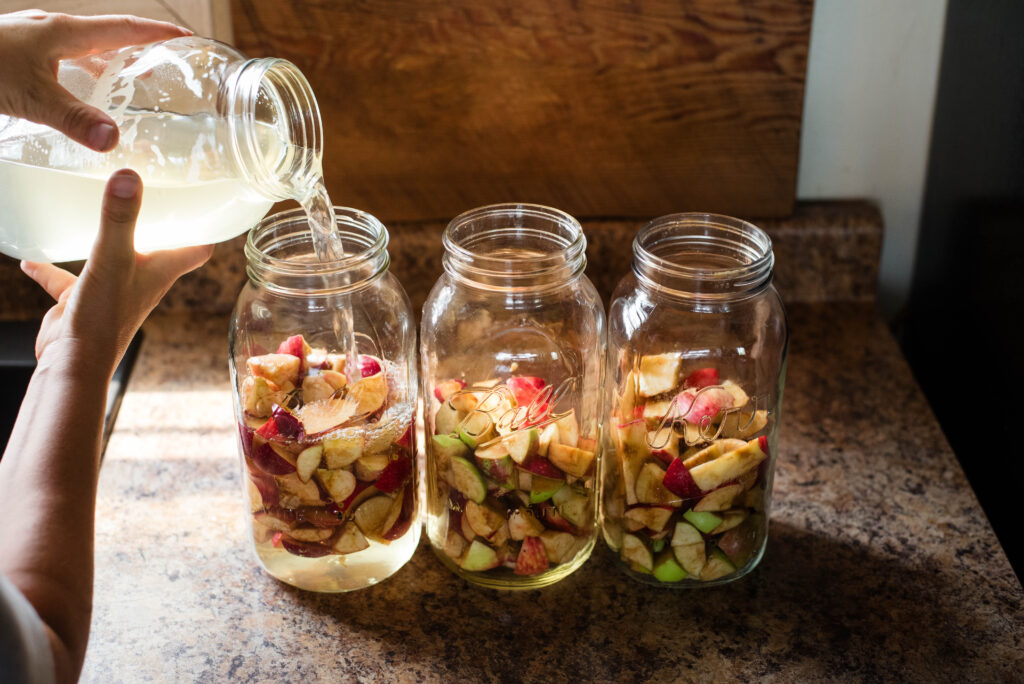
Pour sugar water into jars until the apples rise to the rim of the jar.
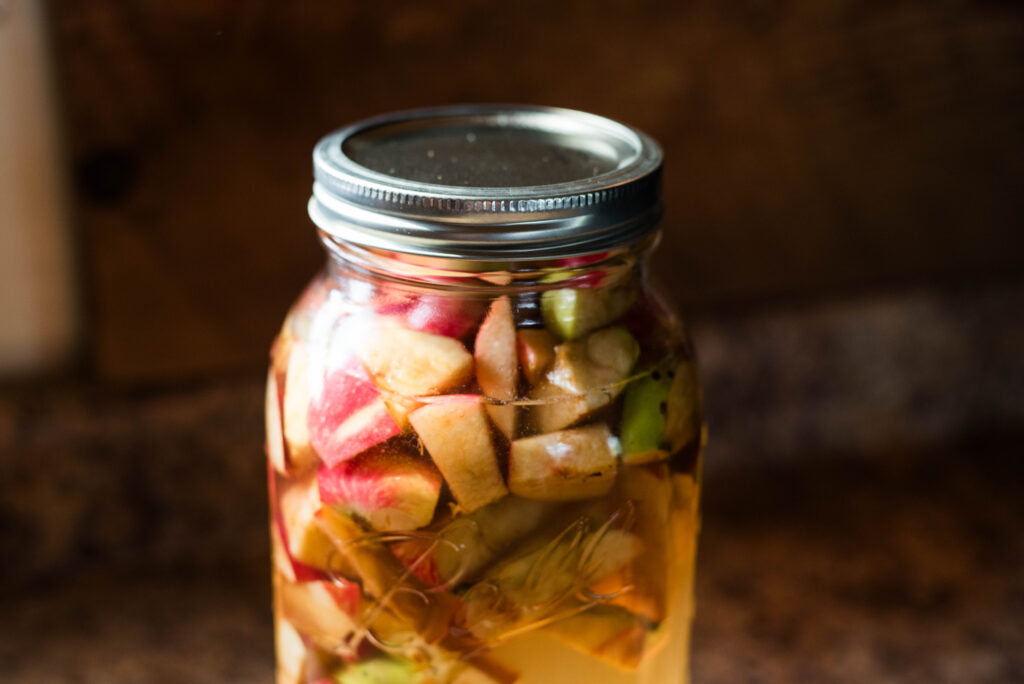
Cover tightly with a lid and gently shake to properly mix the apples with the sugar water. Then loosen the lid so that air from the fermentation can escape, but keep it tight enough to keep fruit flies out.
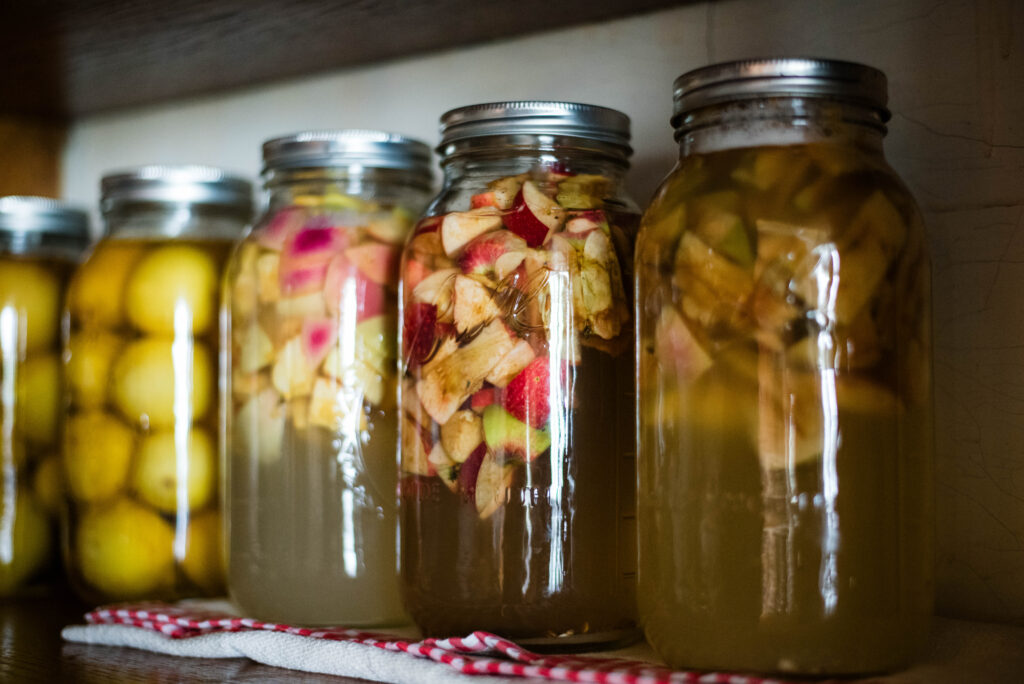
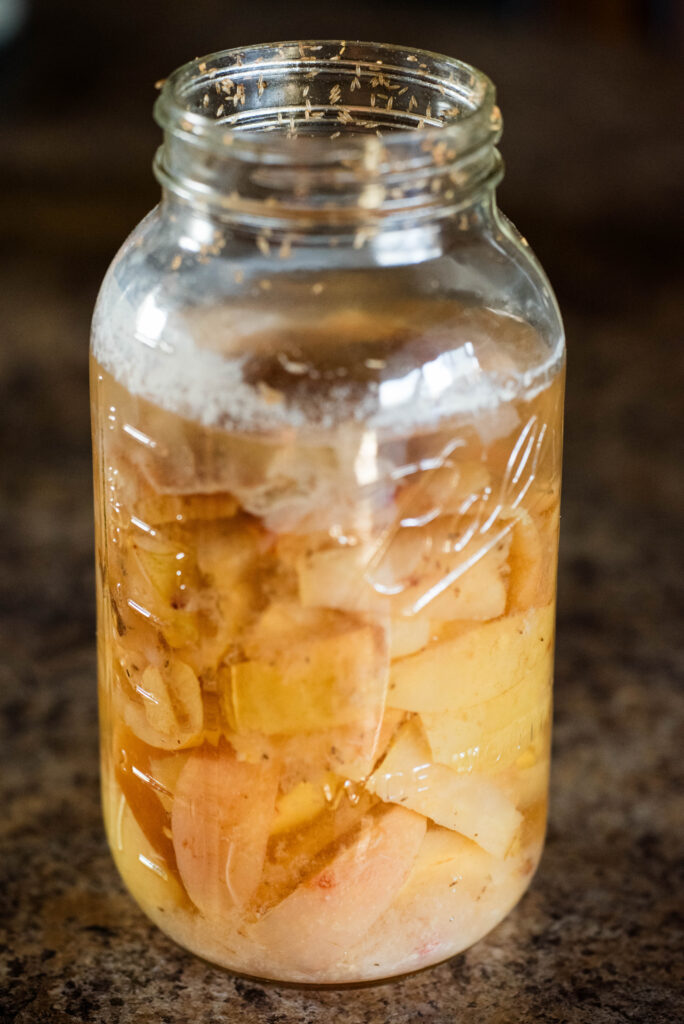
Place jars in a cupboard or another out of the way area in the kitchen on top of a towel. Leave sit for three-four months. No need to shake or stir once they are resting.
As the mixture turns to vinegar, a SCOBY might form on top of the apples. It’s okay if one doesn’t form. The apples will still turn to vinegar. A SCOBY indicates that it’s a strong ferment with lots of nutrients and probiotics. It will vary in thickness.
Final Steps for Storage
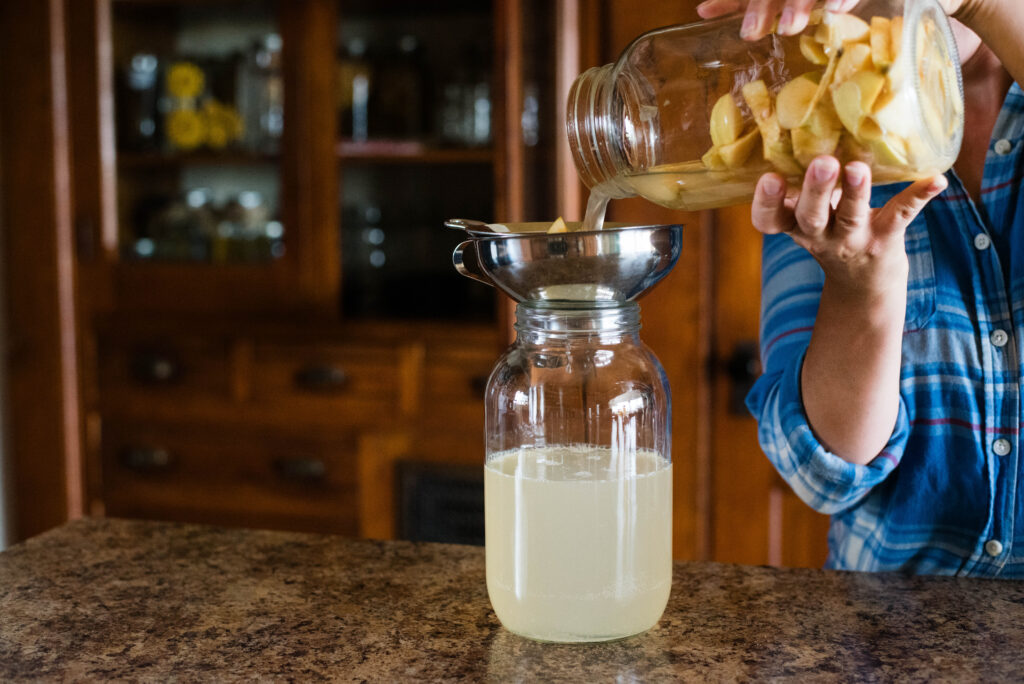
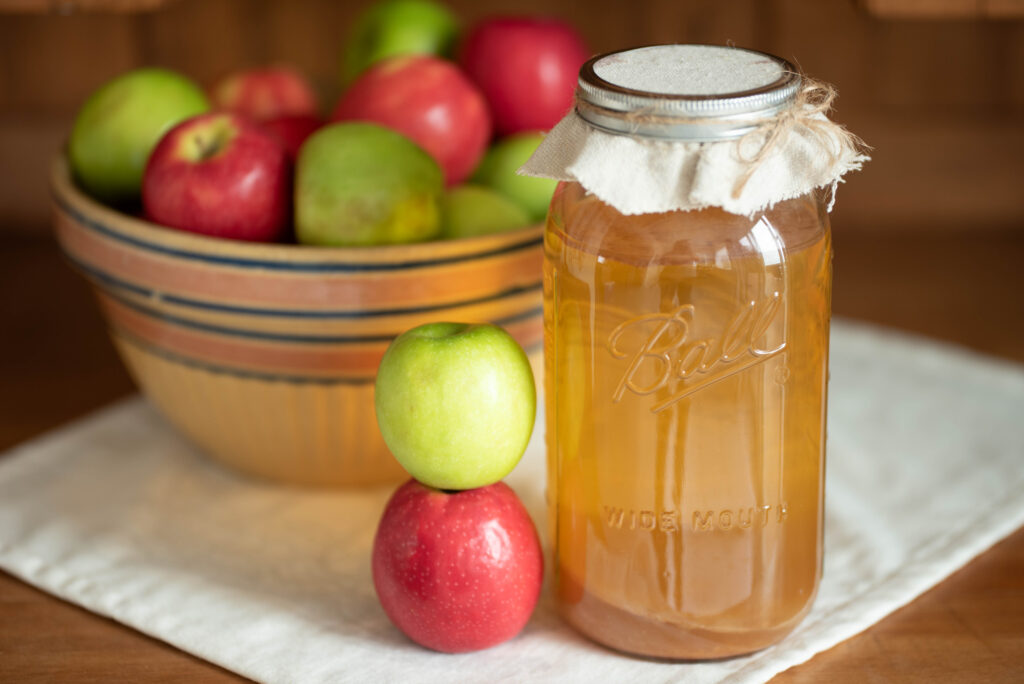
After a few months, it’s time to filter out the apple scraps and store the vinegar for future use. Place a strainer inside a funnel and set inside the rim of a jar you’ll use for storage. Pour the vinegar through the strainer and place the SCOBY inside the jar with the newly filtered liquid. Discard scraps to the compost pile or in the garbage.

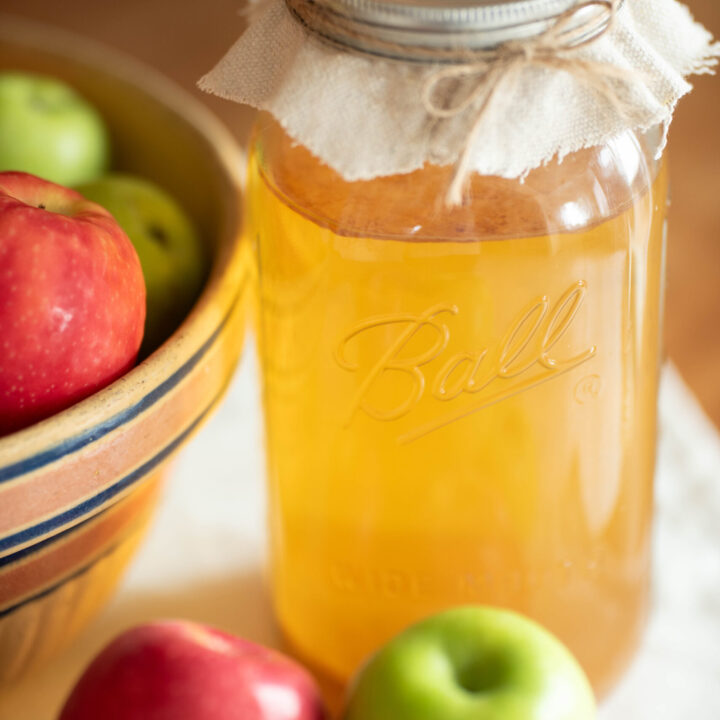
When storing apple cider vinegar, it’s very important to cover the jar with a piece of parchment paper first, then screw the lid on tight. The parchment paper prevents the lid from rusting.
A WORD OF CAUTION:
If your lids aren’t on tight enough during the fermentation process, it’s possible fruit flies can get inside the jars. If there’s only a few, carefully scoop off the first layer of apple scraps. The vinegar will be okay to use. However, if an infestation happened, maggots may grow everywhere inside the jar. I know, SUPER GROSS!!! In that case, the whole ferment needs to tossed out.
FAQ’s
Is there an exact strength of homemade apple cider vinegar?
To know the exact strength of each jar of homemade apple cider vinegar, you need to order a pH test kit. I’ve never done this, but check out Amazon.
Can homemade apple cider vinegar be used for canning and pickling?
No, it’s not advised to use homemade ACV because the pH strength isn’t known. It needs to be strong enough for safe canning and pickling to prevent mold and bacteria growth. Unless you use a test kit to know the official strength of a particular jar, stick to store bought ACV for canning and pickling needs.
What is a SCOBY?
A SCOBY is a Symbiotic Culture Of Bacteria and Yeast. It indicates that the ferment is strong and full of nutrients and probiotics.
Can an ACV SCOBY be used to make homemade kombucha?
No, the two SCOBY’s contain different sets of bacteria and yeast.
How long does it take for homemade apple cider vinegar to ferment?
A minimum of three months is recommended for a strong vinegar.
I’d love to know if you make your own homemade apple cider vinegar or have any questions for me. Let me know in the comments below!
Happy Fall!
-Becky
Homemade Apple Cider Vinegar
This fall, make an easy homemade apple cider vinegar from fresh picked orchard apples. It's economical and multi-purpose by nature, all made in the cozy comfort of your own kitchen.
Ingredients
- Enough whole apples or apple scraps to fill at minimum half of a half-gallon Mason jar
- 1/2 cup of sugar per half gallon of water used
- Half-gallon of filtered or well water
Instructions
- Wash apples with warm water and a natural soap such as Branch Basics or Dr. Bronner's.
- Next, gather apple scraps of cores, seeds and skins. Or cut up whole apples into one inch chunks.
- Fill a half-gallon size jar half-way full with apple chunks or scraps.
- Next, add sugar to another half-gallon size jar and fill with filtered water. Well water is also okay to use.
- Pour sugar water into jars until the apples rise to the rim of the jar.
- Cover tightly with a lid and gently shake to properly mix the apples with the sugar water. Then loosen the lid so that air from the fermentation can escape, but keep it tight enough to keep fruit flies out.
- Place jars in a cupboard or another out of the way area in the kitchen on top of a towel. Leave sit for three-four months. No need to shake or stir once they are resting.
- As the mixture turns to vinegar, a SCOBY might form on top of the apples. It's okay if one doesn't form. The apples will still turn to vinegar. A SCOBY indicates that it's a strong ferment with lots of nutrients and probiotics. It will vary in thickness.
- After a few months, it's time to filter out the apple scraps and store the vinegar for future use. Place a strainer inside a funnel and set inside the rim of a jar you'll use for storage. Pour the vinegar through the strainer and place the SCOBY inside the jar with the newly filtered liquid. Discard scraps to the compost pile or in the garbage.
- When storing apple cider vinegar, it's very important to cover the jar with a piece of parchment paper first, then screw the lid on tight. The parchment paper prevents the lid from rusting.
Notes
- Any variety of apple or apple scraps can be used to make homemade apple cider vinegar. However, the less sugar a variety contains, the longer it will take to ferment into vinegar. Think green apples versus Pink Lady apples.
- Once the sugar water is shaken or stirred with the apples, it won't need to be done again. Typically a SCOBY forms on top of the apples as the ferment gets stronger and turns to vinegar. A SCOBY is a Symbiotic Culture Of Bacteria and Yeast. It indicates the ferment is strong and full of nutrients and probiotics. Generally, I transfer the SCOBY into the jar with the final jar of filtered vinegar to keep it strong. It can also be used to inoculate another jar of freshly made ACV similar to a sourdough starter. Or cut into pieces and give to your dog. Otherwise, it can go to the compost.
- When fermenting anything, sometimes mold will form. This is where personal preference and discretion is advised. Sometimes, if a light layer of mold grows on the top layer of apples, it can be carefully scooped or wiped away. Underneath that, the ferment is okay to use. However, if there is a large presence of mold, it's best to use caution and toss to the compost pile. I'm not too worried about germs, but if you are, it's better not to stress and simply toss it out if you're ever in doubt.
- When storing the final jars of ACV, cover with parchment paper before twisting on the lid. It prevents the lid from rusting.
I’m a wife and homemaker inspiring old-fashioned skills always with a cup of coffee in hand. Homemade Recipes. Gardening. Preserving. Healthy Living.
Never Miss a Post