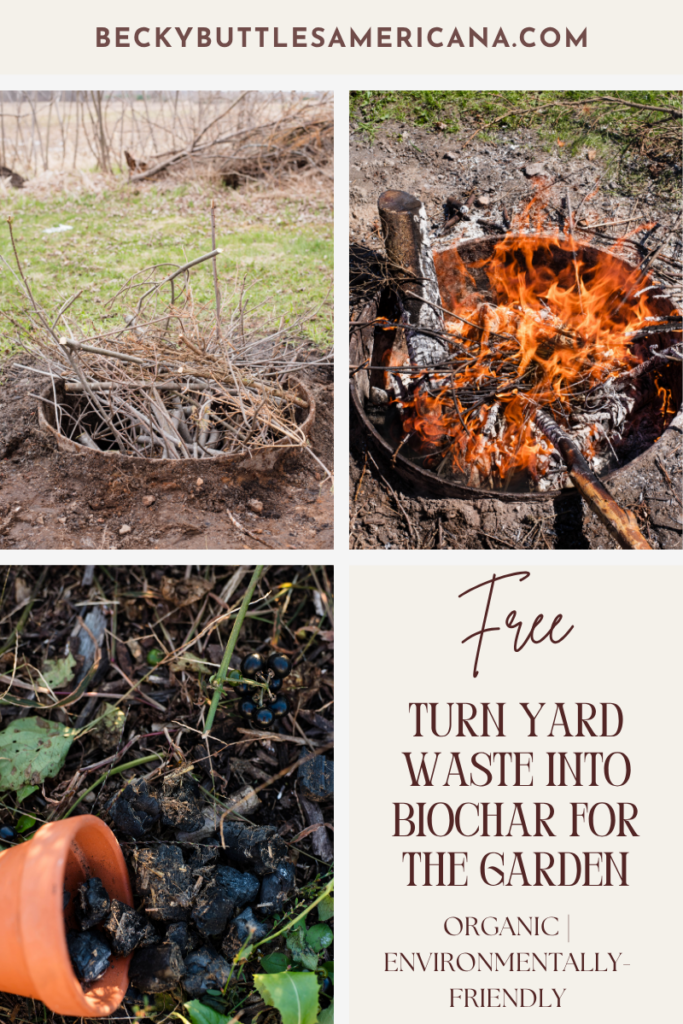
How To Make Biochar For The Garden
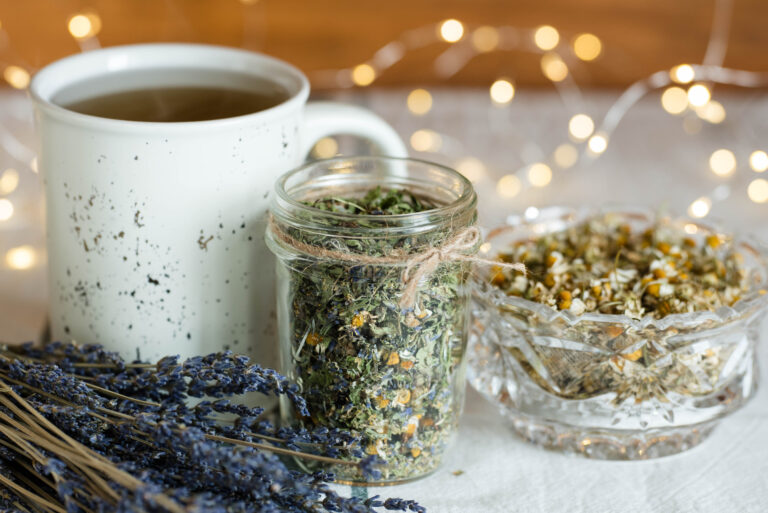
Biochar for the garden is rooted in ancient wisdom and grows a healthier harvest. Repurpose natural elements for a non-toxic, economical and environmentally sustainable soil amendment. This time-tested method creates better health for you and for Mother Nature.
For me, organic gardening and cooking from scratch go hand-in-hand. Tightly knitting the two together can achieve true health.
That’s why readers see articles on both topics on my blog. I don’t know how to have one without the other.
It’s okay if gardening isn’t for you due to time, space or lack of interest. You can still be healthy through locally grown organic food.
With a little effort, I encourage you to find local CSA’s (Community Supported Agriculture farms) or local farmer’s markets with organic crops. If family, friends or neighbors ask if you want their extra garden produce, say yes!
However, if you’ve been bitten by the gardening bug and want to take charge of your health and food security, organic gardening is the way to go. Start slow with minimal crops and financial input. Focus on soil health with the space you have before expanding into a bigger gardening experience.
After all, our ancestors grew food for centuries before overwhelming gardening advice became abundant on the Internet and social media. It’s easy to be confused and truthfully the money I’ve spent on soil amendments hasn’t helped me produce a better harvest.
That’s why I was excited to read an article this spring in a homesteading magazine about biochar for the garden. I also heard about its benefits on a recent podcast I listened to.
Come to find out, all I needed were resources already laying around our property. Yes, there’s a few tools you can buy to make the process easier, but I simply went with what I had on hand.
Biochar is easy to make and perfect for all gardens from in-ground to containers. Even someone living in a high-rise apartment in a big city can make their own. It’s also the perfect combination of all-natural, economically sustainable and environmentally friendly too.
What is Biochar?
Biochar is a porous, carbon-rich, highly absorbent natural material made by burning biomass.
The biomass used to make this material is typically wood from trees. However, solid animal waste and other natural resources also produce biochar (International Biochar Initiative).
For the home gardener, this includes tree trimmings, perennial landscape clippings, weeds and spent plants at the end of the garden season.
Essentially, you’re taking one natural material and turning it into another nutrient-rich, natural material meant to improve soil health. For a gardener, it’s a financially friendly way to grow a better harvest.
What are the Benefits of Biochar in the Garden?
The topic of biochar in the garden is a vast one that expands way beyond the home gardener.
Biochar might be a new topic for readers, but it’s actually rooted in ancient Amazonian culture. Today in America, the initiative is strong to embrace this old technique to improve forests, farm lands and even home gardens.
Biochar is often called by it’s other name, terra preta, meaning “dark earth.” Anthropologists discovered many of these dark earth areas in the Amazon where natural biomass burned. Today, these areas are still fertile and perfect for growing food.
Clearly, for the home gardener, biochar stands the test of time and its benefits are worth the effort. Here’s why I’m passionate about anyone growing food to give it a try.
Better Soil Fertility – Biochar’s porous nature and large surface area help soil retain moisture and nutrients especially nitrogen and phosphorous. Its physical makeup is home to microorganisms and fungi that live on its surface.
As plant roots grow deep, they become tangled with the biochar pieces. The microorganisms and fungi help the plant uptake the nutrients embedded in the biochar. Thus, homegrown food is more nutrient dense.
Economical – Biochar is an economical choice for a couple reasons. First, you don’t need to buy anything extra to make biochar. All you need is the biomass and a space to light the fire. The most commonly used biomass is wood.
Use tree and brush trimmings, logs or landscape matter from fall or spring cleanup around your yard. If you don’t have access to these items yourself, keep reading for ideas on how to access them for free.
Second, due to its high carbon content, biochar persists in soil for thousands of years. For the home gardener, this means that a one-time application helps soil retain its fertility without any further input of time or money. Fertile soil also yields more crop production.
Now that’s what I call a bang for your buck! Or not, since you don’t need to spend any extra money to make it 🙂
Environmentally Friendly – To make biochar, you burn one natural material and turn it into another and return it to the soil. I can’t think of a better way to care for the environment.
In terms of forest management, dead trees turn into biochar and return to the same area to re-fertilize the soil and create a new forest. For the home gardener, you’re taking yard waste and re-fertilizing the soil, which creates a nutrient dense pantry for your family.
Biochar also reduces carbon dioxide and nitrous oxide, making the air we breathe cleaner. Don’t we all want healthy lungs?
One Time Project – Growing your own food is a satisfying journey, but it’s time consuming. Especially if you are an organic gardener. The good news about making your own biochar is that it’s a one time project. If you make enough to cover your garden area, you won’t have to make it again since biochar doesn’t break down.
Helpful Hints for Making Biochar
- For the healthiest, most organic biochar, use biomass free from synthetic materials. Wood needs to be free from paint or other finishes and the fire lit with paper or cardboard free from soy colored ink. Use tree and brush trimmings, medium-sized logs or landscape waste.
- Layer larger sized logs on the bottom of the pile before layering with smaller sized pieces. Also, light the fire from the bottom instead of the top down. This way, the flame creates a more even burn through the pile. That’s important since you’ll want the majority of the biomass burned at once instead of throwing pieces back in to burn later.
- Wear safety gear including shoes or boots, hair ties for long hair, and safety goggles. Have all equipment gathered and in place before starting the fire. This includes a hose to extinguish the fire when the biochar is complete and for fires that get out of control.
- Once it’s cool, infuse biochar with a nutrient-rich material. Freshly made biochar doesn’t contain nutrients; rather it attracts nutrients and retains them. Therefore, infusing it before adding to your garden helps make a better nutrient balance in the soil. Use manure or another organic material like liquid fish fertilizer.
Free Resources
- If you don’t have access to biomass on your property, there are free resources in your community. Contact local landscaping companies and ask if you can have tree branches, twigs and trimmings for free or a set price. Take a walk in a park and gather branches and twigs. Be careful though not to take protected elements. In a suburb, ask neighbors who have yard waste if you can have it. If you live in an apartment, ask friends or co-workers who live in the suburbs for their waste. Ask local schools or municipalities for their trimmings.
- If you need equipment to break down larger pieces of biomass, ask neighbors or friends to borrow theirs. This is especially handy if you live in an apartment and don’t have the need to buy these tools or place to store them.
- There are many options for places to burn biochar. A bonfire area or in-ground fire pit in the country work great. In the suburbs, a grill or driveway fire pit work as well. In an apartment, use a grill on the patio if you can. Otherwise, use a grill at a nearby park. Be sure to cut pieces small enough to fit in the burn area of your choice.
How to Make Biochar
What You’ll Need
- Biomass – Typically tree branches with a medium-sized circumference or untreated lumber and larger logs for on the bottom of the burn pile
- Shovel
- Water source – A hose or containers filled with rainwater
- Metal container – A metal garbage can works great, otherwise use what you have on hand. I ended up using plastic totes. Metal is better though since the biochar uptakes toxins from the plastic.
- Nutrient rich material – Manure or liquid fish fertilizer contain lots of nitrogen. Like free biomass, ask around in your community for manure. Many farmers will gladly let you take it for free.
- Spigot – It’s optional to install on the metal container to drain the liquid once the biochar infuses with the other material. I don’t have one, but I came up with a method to drain my biochar and it worked great. I didn’t have to spend any extra money, although I do recommend purchasing one to make the process easier. I’ll be purchasing one if I make biochar again.
Step-by-Step Instructions
With a quick Google search, you’ll find there’s lots of methods for making biochar. This is a step-by-step on how I made biochar for my garden. My goal is to encourage everyone to embrace gardening with simple, practical ideas with little to no financial input.
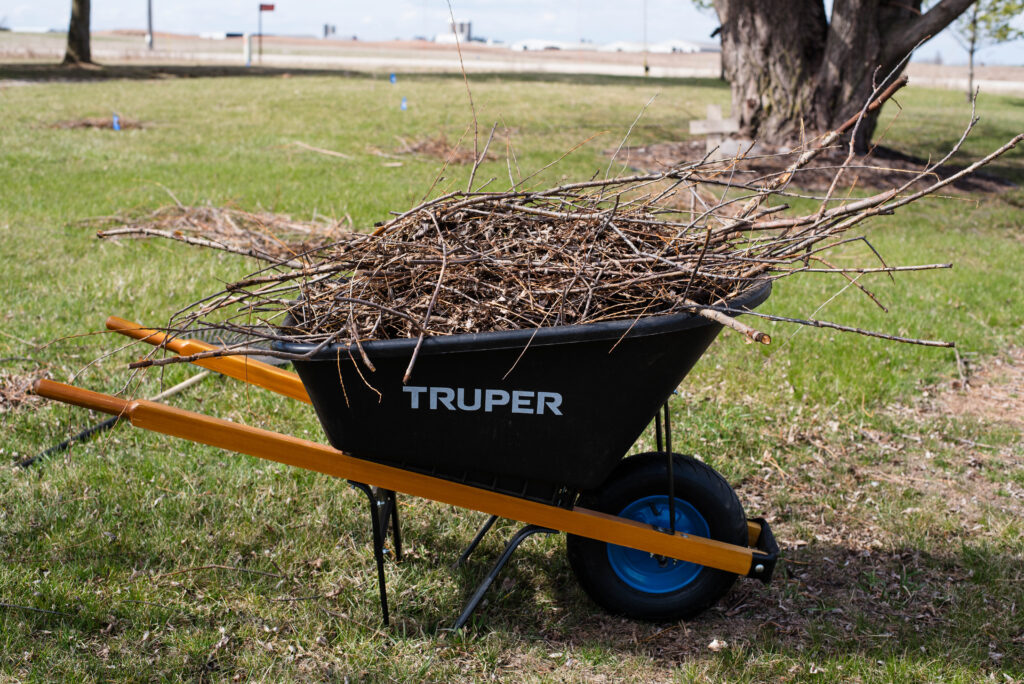
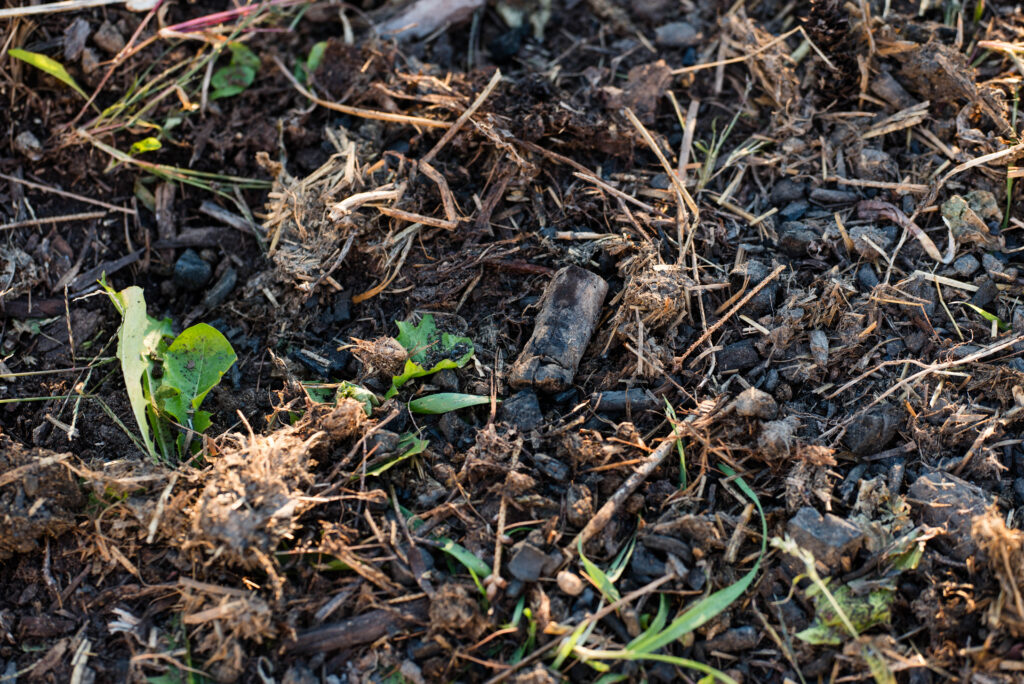
To start, clean out all the debris that’s currently in the burn area. I shoveled everything out into a wheel barrow and hauled it away to our weed area.
Be sure to remove all rusty objects. They pose a safety threat if they end up in your garden.

If using an in-ground burn pit, clean out enough space to hold a large amount of biomass. If using a driveway burn pit or grill, clean out any previous debris. Gather all necessary equipment before continuing the process. Once the fire is lit, the process goes fast and I don’t advise walking away for long periods of time.
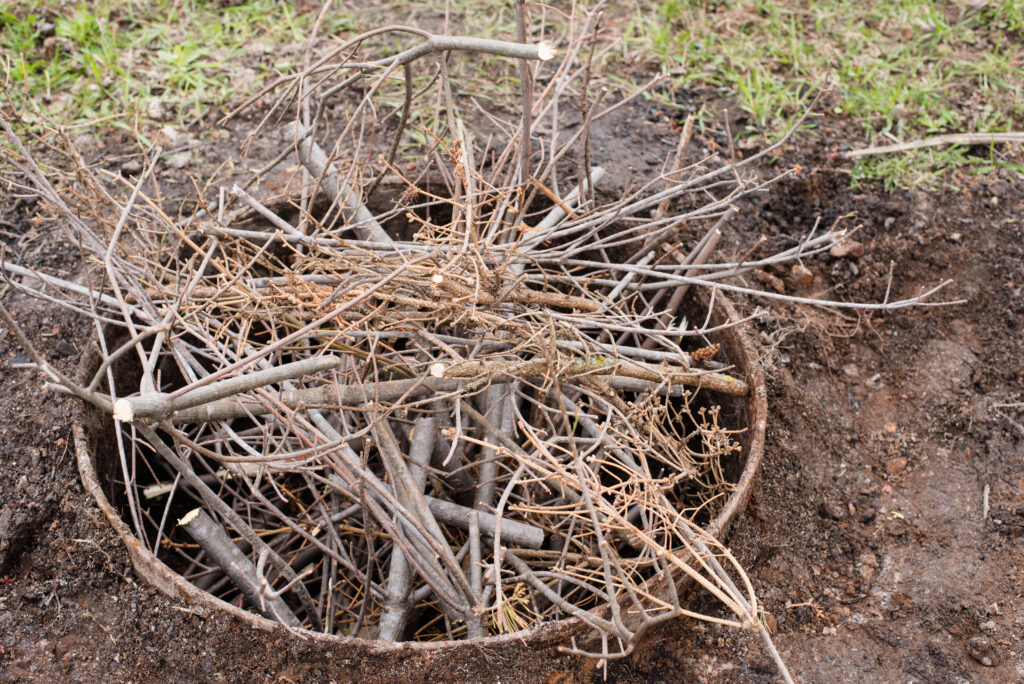
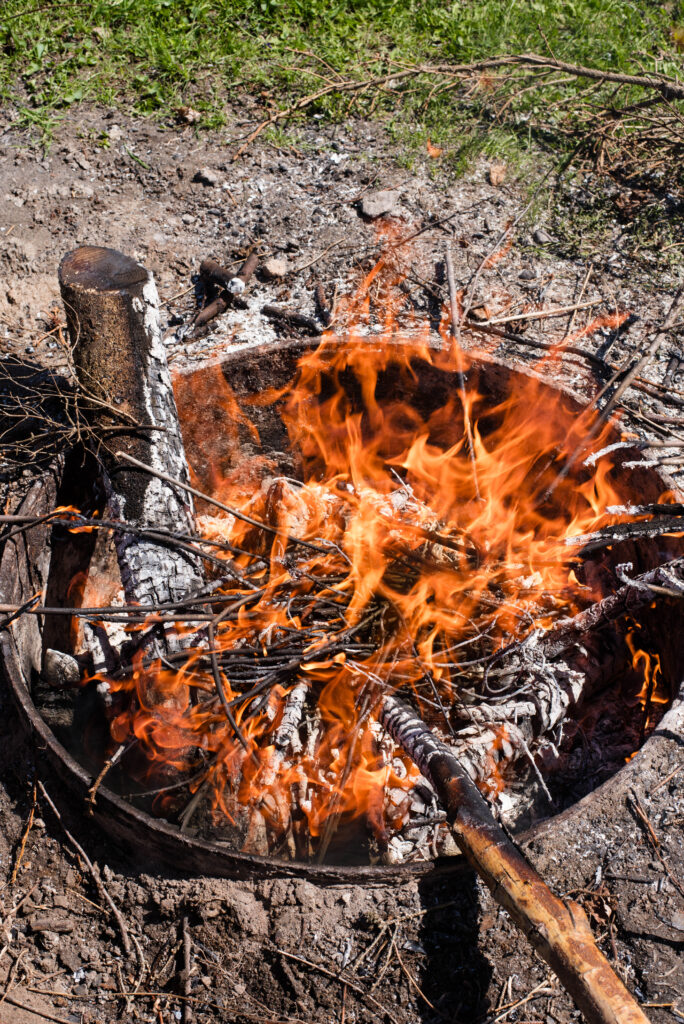
Next, begin layering the biomass in the burn area. On a bonfire or in-ground area, layer large logs on the bottom. If using a driveway burn pit or grill, layer medium-sized branches on the bottom like the ones shown here. Cut all biomass so that it properly fits into the chosen burn area.
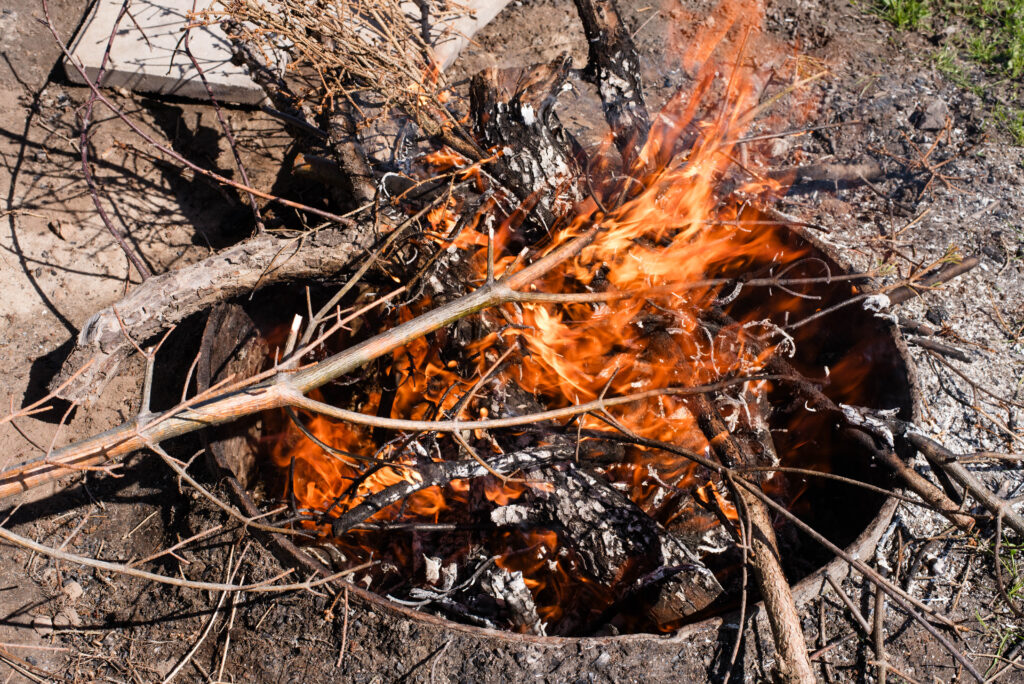
Light the fire at the bottom of the base by the larger logs or branches so it burns evenly.
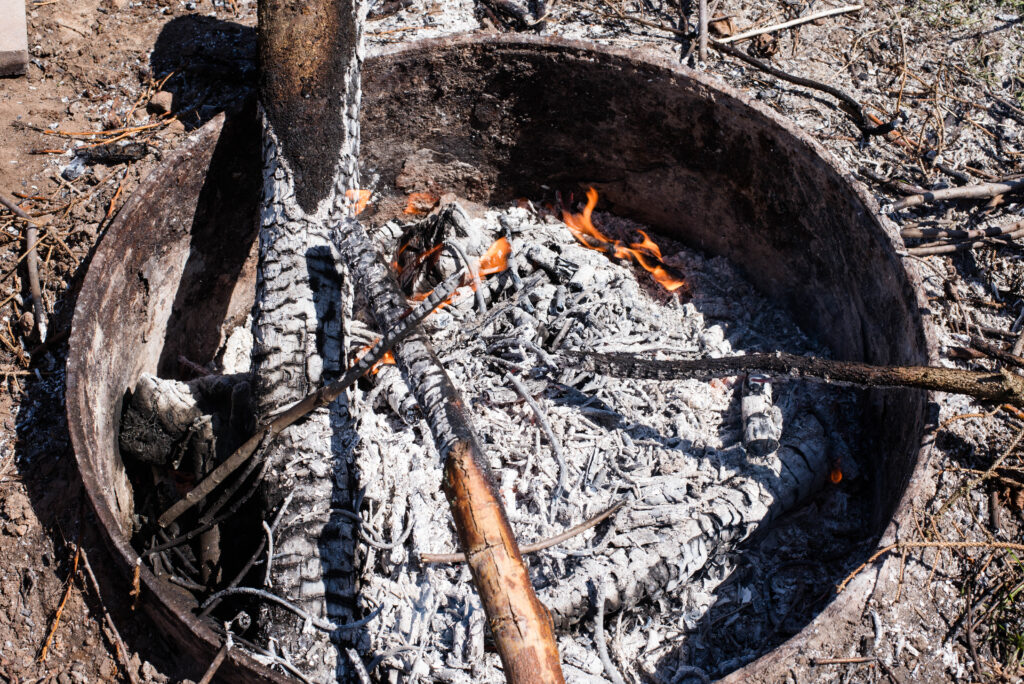
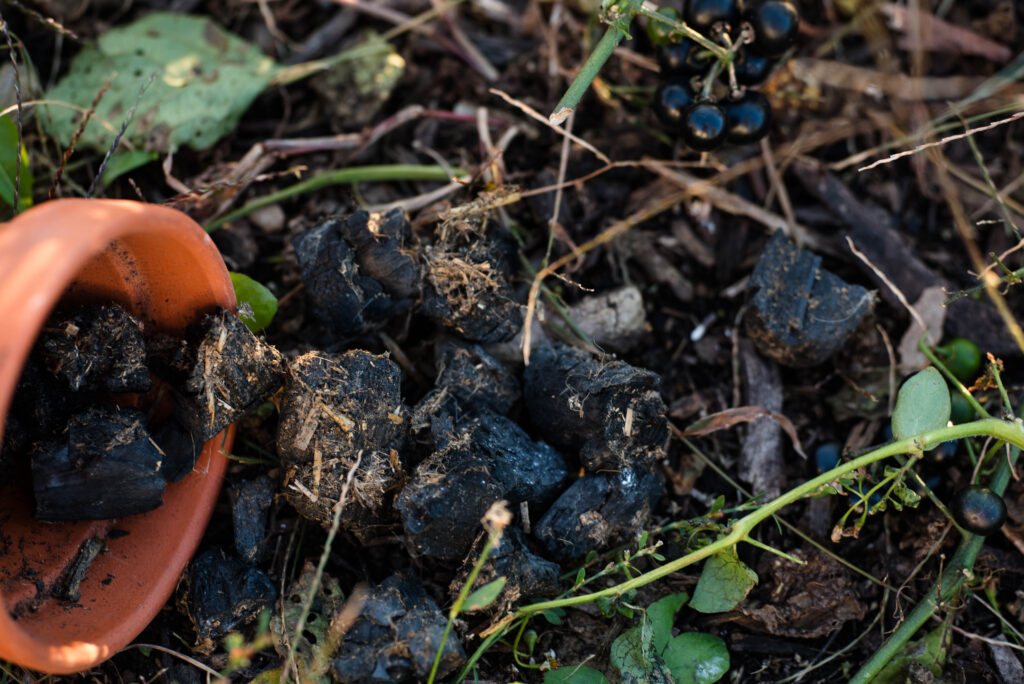
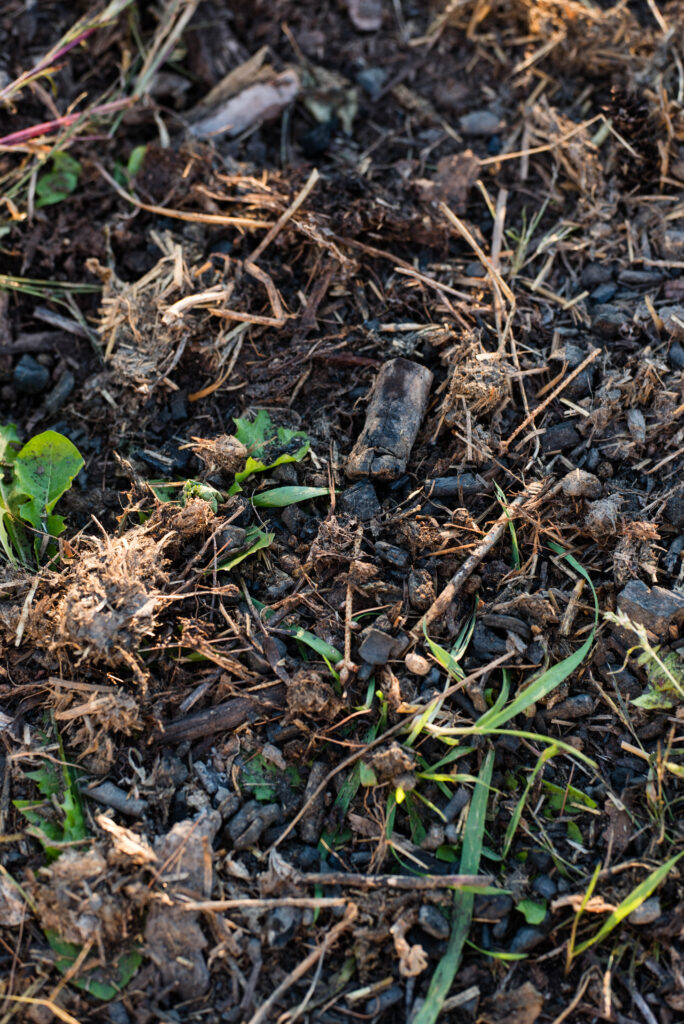
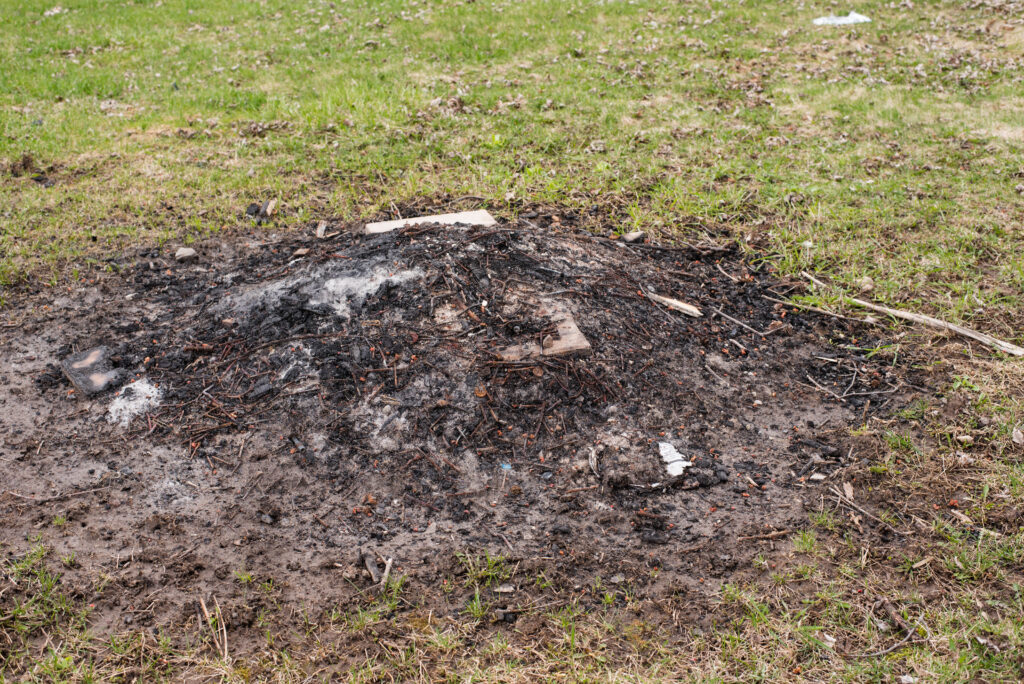
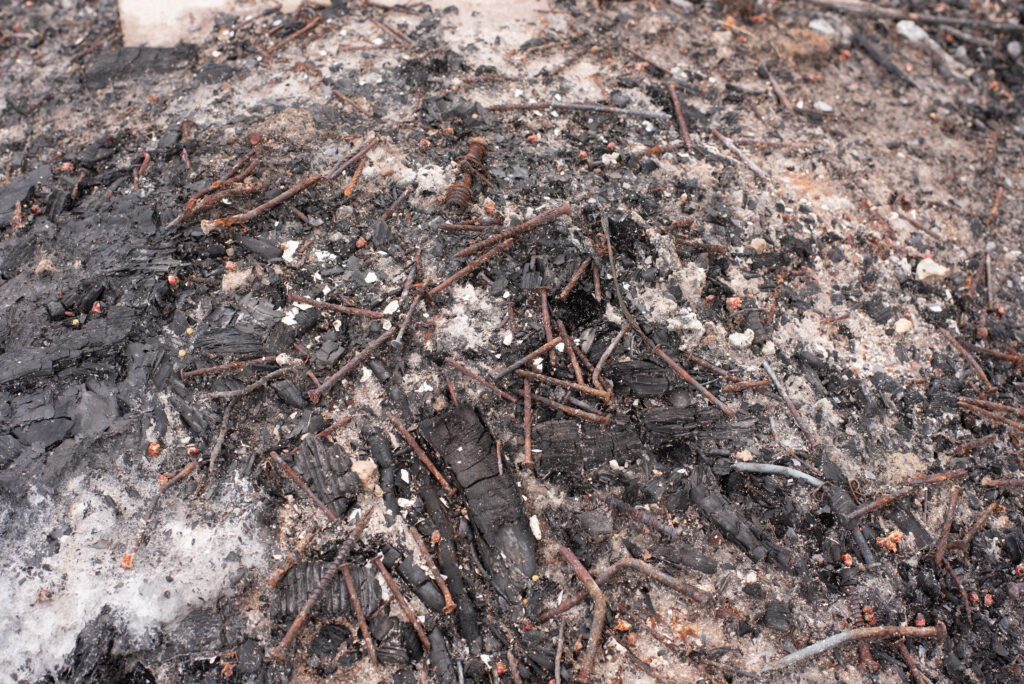
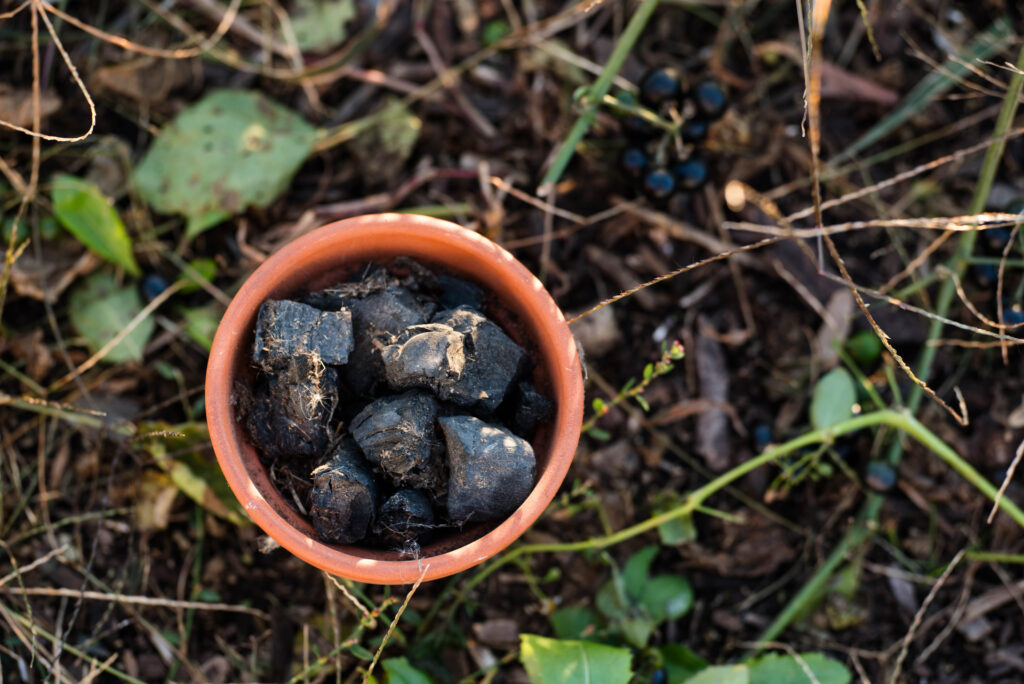
As the fire begins to turn to coals, that’s when it’s time to put the fire out. The goal is to prevent the wood from turning to ashes. Ash is a different type of organic matter. We want the wood right before it burns into ash. That’s the biochar.
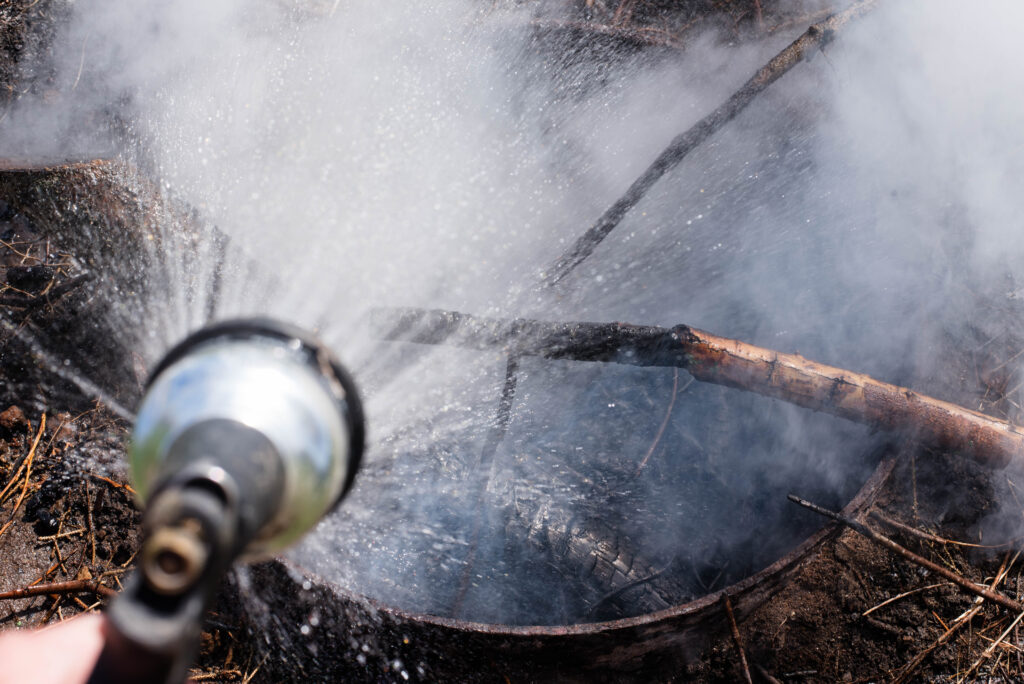
Take a hose or buckets of rain water and wet the pile of char until it stops smoking. Be patient since this takes longer than you might think. Even when the pieces stop smoldering, the matter is still hot, so handle with caution.
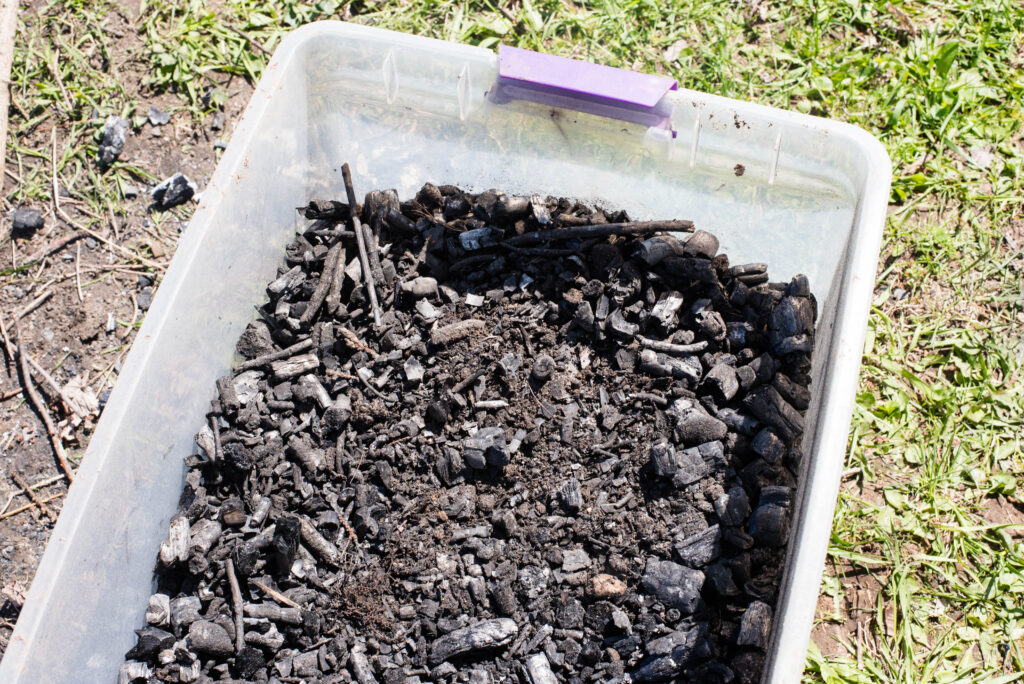
Next, take the shovel and scoop out the biochar into a metal container. I used plastic totes since that’s all I had on hand, but it’s not preferable. The biochar absorbs the toxins in the plastic, which is what we’re trying to avoid in organic gardening. Also, the plastic melts if the matter isn’t cool enough.

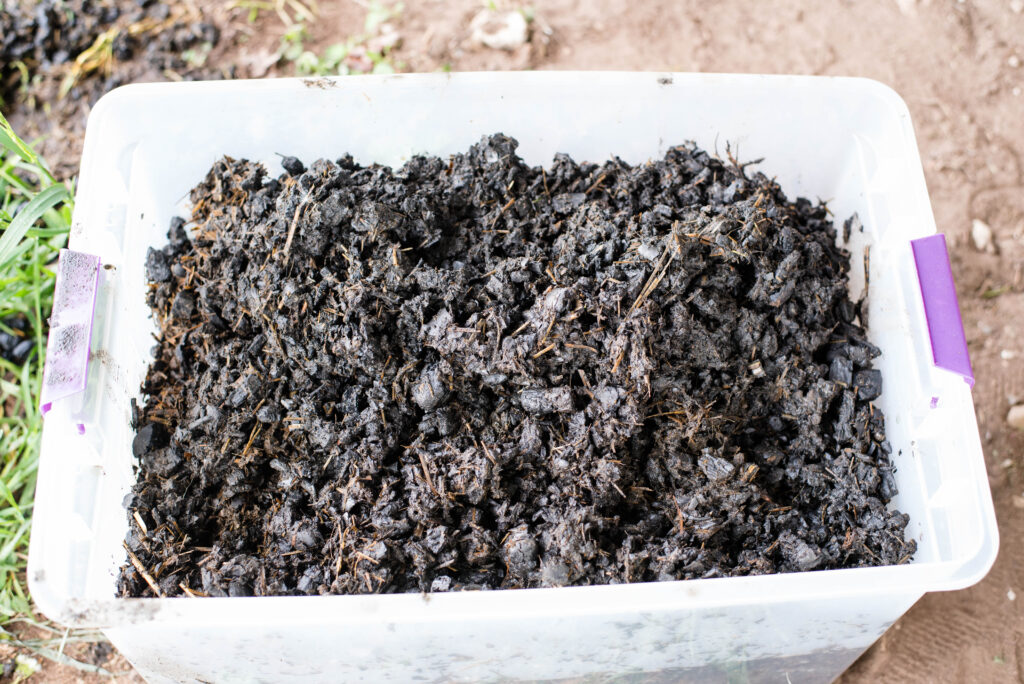
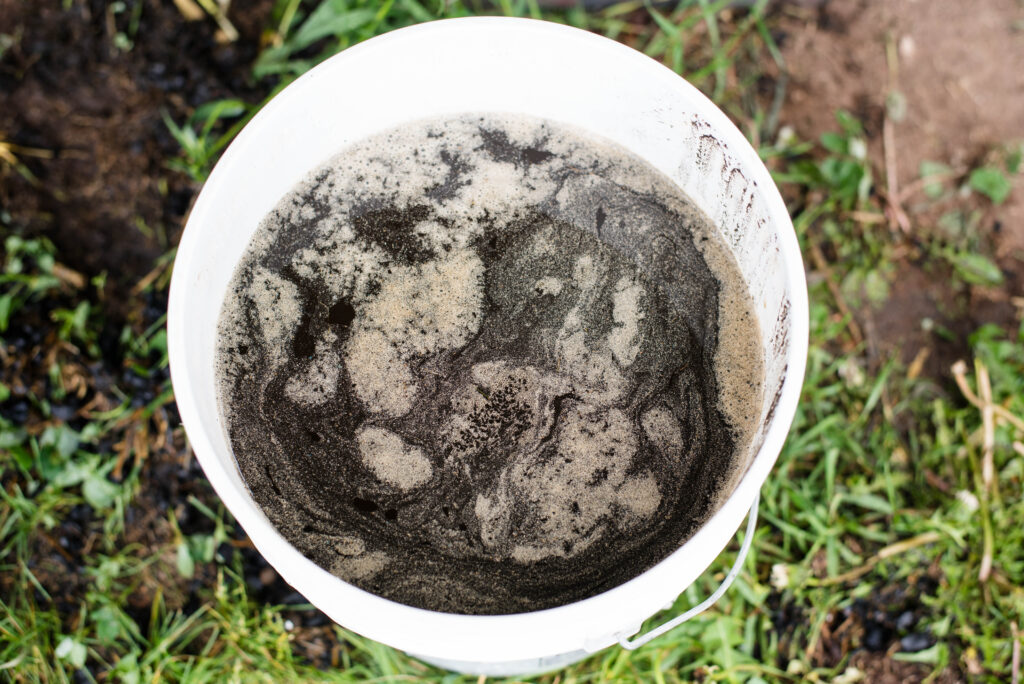
Now the biochar needs to infuse with a nutrient dense material like manure or liquid fish fertilizer or something similar. Mix the liquid according to the instructions and add enough to soak all the biochar. I used rabbit manure since that’s what I had available for free. If using manure, thoroughly mix with the biochar then add enough water to cover the whole mix. Soak for a minimum of two weeks.
After two weeks, it’s time to drain the liquid from the biochar. This is easiest if a spigot is installed on the metal container used. I didn’t have that so I improvised with an old window screen. I placed it over a bucket and scooped the biochar mixture onto the screen to drain the water. While this method worked and I didn’t have to spend any extra money, I do recommend the spigot. Its cleaner and quicker.
The liquid drained from the biochar infusion process can be used as a concentrate added to watering cans to water potted plants. Or it can be dumped straight on to a compost pile.
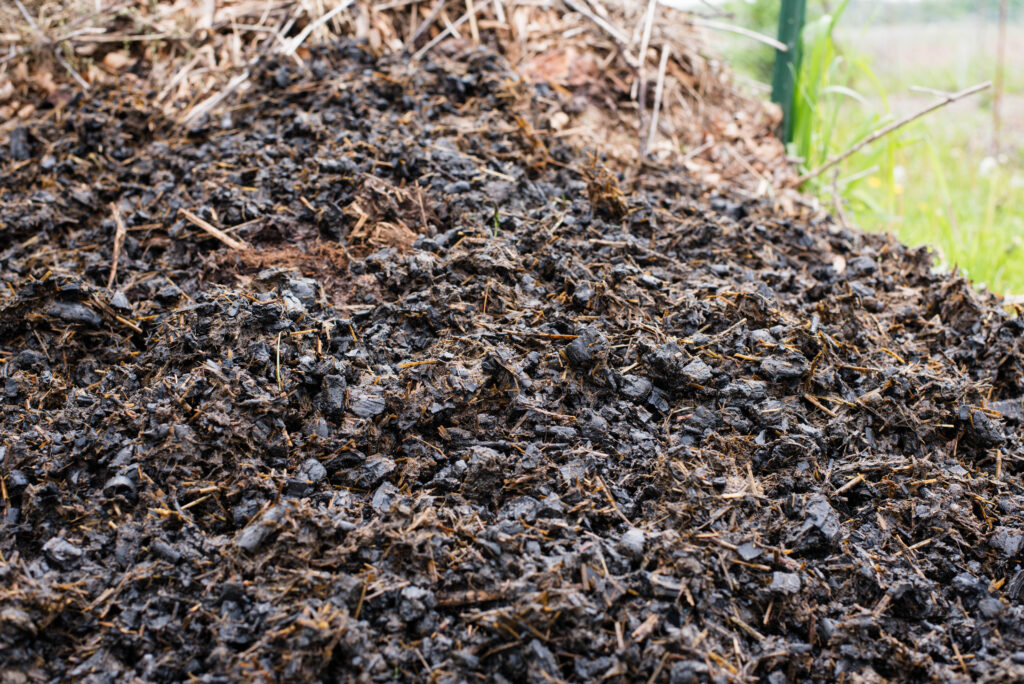
The newly infused biochar is now ready for the garden. It’s recommended though to dry it out first. That way it distributes more evenly across the garden soil. I scooped mine on top of my compost pile for a few weeks. Others often lay it out on a tarp.
The pieces of biochar distributed on garden soil are ideally about 1/2 inch in size. Break up larger pieces by crushing with your foot or a shovel. Remember the charred pieces are light and airy and easy to break apart. Don’t crush too fine though or the biochar can’t properly do it’s job.
When distributing on garden soil, start with a very light application per square foot. The soil needs time to adapt to the new rich amendment. It’s best to add biochar right before tilling so it reaches down below the ground surface.
FAQ’s
When is the best time of year to make biochar?
Biochar can be made any time of the year. It doesn’t decompose and it stores easily in a metal container until you’re ready to use it.
How much biochar is used in garden soil?
Start by using 10% volume or in other words a very light application. For poor quality soils like sand or clay work up to 20% by volume. I have clay soil and applied a light layer in the fall. In the spring when we till, I’ll add another light layer.
What is biomass and how does it turn into biochar?
Biomass is natural material like tree branches and logs, landscape waste and manure. It turns into biochar by burning until it reaches the coal stage. The coals are put out with water, the charred pieces infuse with another nutrient dense material and then the biochar is ready for garden soil.
Can biochar replace compost as a garden soil amendment?
It depends on the current health of your garden soil. After infusion, biochar is nutrient dense and may provide enough nutrition for your crops. Experiment with using only biochar for a growing season and then assess your crop yield. Adjust if needed and add compost the following season along with the biochar.
What can you do with extra biochar?
Sell extra biochar to fellow community gardeners who can’t make it themselves. You’ll make some extra money and spread the benefits of biochar throughout your community. Or donate it to a local community or school garden.
For more information on biochar, check out the US Biochar Initiative website.
For any questions, leave them in the comments below! I’m happy to help in your gardening journey. Tag me with your photos on Instagram @beckybuttlesamericana.
Thanks for stopping by my blog – Becky
About Becky
I’m a wife and homemaker inspiring old-fashioned skills always with a warm beverage in hand. Homemade Recipes. Gardening. Preserving. Healthy Living.
Never Miss a Post