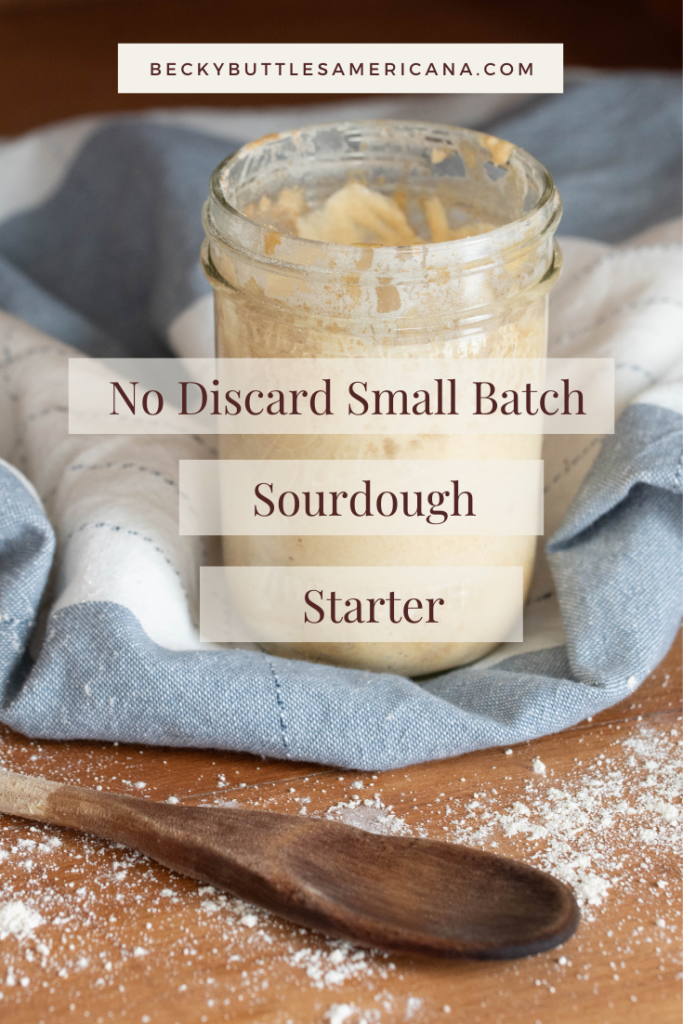
Sourdough Starter | How to Make a No-Discard Small-Batch
A sourdough starter is an old-fashioned pantry staple still perfect for the modern kitchen. My no discard, small batch starter is practical, frugal and simple to maintain. Everyone can enjoy nourishing homemade baked goods with this easy sourdough method.
I absolutely love the art of sourdough baking. It’s fluid and flexible and the final results are delicious. I find keeping a sourdough starter both fun and challenging with the satisfaction of self-sufficiency in my heart.
I also love the idea that sourdough is an old tradition that sustained our pioneer ancestors. It likely pre-dates them too since bread is a huge talking point in the Bible. While they ate mostly unleavened bread, flour did exist and at some point bread took a turn and sourdough became a culinary skill.
Its purpose throughout history remains stable in our modern kitchens today. Sourdough bread creates meals all on its own from sandwiches to bread bowl salads. Or it stretches a protein rich soup for a large family or turns it into leftovers for a married couple. It’s also healthier on the gut than regular store-bought bread or baked goods.
No matter how you use it, sourdough baking is a great kitchen skill to tuck in your pocket. And while it is easy to do, I’ve discovered the daily method of feeding and discarding a starter a bit overwhelming for a family of two.
Luke and I simply don’t need bread or sweet treats every day. In the last couple of months, I’ve learned I can keep a healthy active starter with a small volume. But I was still discarding a little bit of starter and using flour every day.
Since I’m passionate about keeping sourdough in my repertoire, I went searching for a solution. What follows is my no-discard, small-batch sourdough method.
Why You’ll Love Using a Sourdough Starter
Old-fashioned kitchen skill – A sourdough starter is a time tested, self-sufficient pantry item. It’s risen loaves of bread, stretched meals and provided sustenance to people for hundreds of years. No store-bought yeast required!
Easy to make and maintain – With just two simple ingredients, a sourdough starter is cost-effective and requires little time investment. It’s even better with my no-discard, small-batch method since you’ll use less flour. A little patience comes in handy too, but it’s worth the delicious effort.
Better nutritional value – Sourdough baked goods are easier for digestion and provide more nutrition for nourishment than non-fermented bread products. Learn why with my brief science lesson down below.

The Science of a Sourdough Starter
You don’t need a chemistry degree to make a sourdough starter or bake delicious homemade breads and pastries. But the concept of sourdough baking is fun and insightful.
So let me quickly introduce the science of a sourdough starter to you. I’ll keep it simple, I promise!
The Anatomy of a Wheat Berry
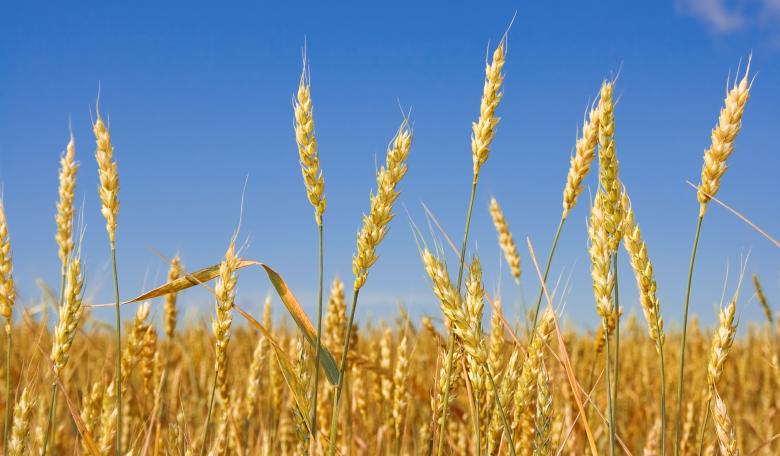
Flour is the main component of a sourdough starter, which comes from ground wheat berries. Each individual wheat berry has three layers.
- Bran – The bran is the outer most layer of the berry. It’s made mostly of fiber and no sugar molecules. It also contains phytic acid, which is the organic form of phosphorus that the germ (inner most layer or embryo) needs when the berry sprouts into a new seed.
- Endosperm – This is the middle layer of a wheat berry. It’s where the majority of the starchy sugars reside. It’s also separated from the bran and the germ to comprise all-purpose flour.
- Germ – The germ is the inner most layer of a wheat berry, otherwise known as the embryo. It’s the most nutrient dense part of a wheat berry containing minerals, healthy fats and some sugars. That makes sense since it needs those nutrients to sprout into a new plant.
Sourdough Fermentation Process
How does flour ferment into a sourdough starter? The wheat berries contain wild yeast and enzymes, which activate the fermentation process when mixed with water and placed in a warm environment.
The two microbes are naturally present on the outer and inner layers of the wheat berry. The enzymes break down the complex starches, protein and simple sugars, which makes them available for the wild yeast to feed on. Glucose and fructose are the two simple sugars that yeast like.
When water and warmth activate the yeast and enzyme fermentation action, the by-products are carbon dioxide, alcohol and lactic acid bacteria. The bacteria feed off of maltose, the third simple sugar found in flour. This bacteria is made of lactic and acetic acids, which lowers the pH of the sourdough or bread, giving it the tangy or “sour” flavor.
The carbon dioxide creates the air bubbles that get entrapped in the gluten strands, which creates the rising action of bread. The ethanol (alcohol) by-product of fermentation also aids the rising action, while providing a greater depth of flavor and assists the preservation or shelf-stability of the final baked good.
Why is Sourdough Starter Healthy?
More Available Nutrients
Remember the phytic acid present in the outer bran layer of the wheat berry? Essentially, it’s meant as nutrition for the plant itself when the seed sprouts and matures. Us humans lack the enzymes needed to properly digest phytic acid, which is why there is a lot of gastrointestinal problems especially here in America.
More specifically, phytic acid binds to essential minerals like iron, zinc, calcium and magnesium both in the gut and in flour itself rendering them unavailable for absorption and proper bodily function. The acids and enzymes in a fermented sourdough starter break down these phytic acids, making minerals readily available and the baked goods easier to digest.
So here’s some food for thought. If you’re taking vitamins and supplements and not eating sourdough baked goods, it’s likely you’re throwing away money and not reaping their healthy benefits since the phytic acids bind to them.
Lowers Blood Sugar Levels
As you read in the science lesson above, flour contains sugar in the form of glucose, fructose and maltose. In other words, a cookie or a muffin’s sugar content doesn’t just come from a cup of cane sugar. Yikes! Talk about a sugar bomb in your body.
That might seem harmless if you have good self-control and only eat a cookie on occasion. But who eats just one, say at Christmastime? And what about a scoop of jam on a piece of toast? Sugar is sneaky, it’s in everything and it wrecks havoc on human health. That’s why I’m so passionate about limiting gluten and sugar intake in general.
And that’s why I encourage a sourdough starter for baking homemade goods. The fermentation process pre-digests the simple sugars before baking, therefore minimizing what the body needs to digest and lowering blood sugar levels and insulin resistant issues.
Three Components of a Sourdough Starter
I emphasize the science of sourdough because it’s important for a healthy, robust starter and its effectiveness at rising and fermenting baked goods. The three important components include flour, water and environment.
Flour
The type of flour used is essential to create a successful starter. As stated above, wild yeast, enzymes and bacteria are needed for the fermentation process.
It stands to reason then, that whole grain flour (which contains the bran, endosperm and germ) has more surface area for those microbes and makes for a stronger starter with better rising action. Therefore, I recommend using a whole grain flour to mix up a brand new sourdough starter. You’ll have faster results and bake fresh bread in no time flat!
Organic, un-bleached all-purpose flour can be used, but you’ll need a little more patience to get that starter active and bubbly. DO NOT use the least expensive name brand or generic non-organic bleached all-purpose flour.
It contains chemicals (i.e. glyphosate or Roundup) from the growing process in addition to the bleaching agents. They also inhibit yeast activity in a starter.
I recommend any organic whole grain flour found in grocery stores like Bob’s Red Mill brand. I also use Jovial Foods whole grain einkorn (typically found in stores or online) or einkorn flour from Azure Standard.
Water
It’s important to use filtered, non-chlorinated water for your sourdough starter. City tap water contains many chemicals that aren’t good for human consumption and prevent the yeast, enzymes and bacteria from proper fermentation.
Well water is okay to use, but be cautious if you have the salt sensitivity turned up high on a water softener. The sodium inhibits yeast activity and creates a gummy mixture.
I recommend a Berkey water filter even for well water. We live by conventional farm fields and I’m concerned about the chemical runoff plus we have a water softener.
Environment
The third element needed for a sourdough starter is the environment it’s kept in. The fermentation process needs a warm environment for activation. Room temperature is generally warm enough year round, unless you live in a seasonal climate. Not to worry though, a starter is still doable even in the winter!
If your kitchen is cold, place your starter in the oven with the light on. It creates the perfect environment for rising a starter. Be cautious though, since it’s easy to hit the pre-heat button and accidentally kill your starter. I unfortunately know from experience!
How to Make A No-Discard Small-Batch Sourdough Starter
What You’ll Need
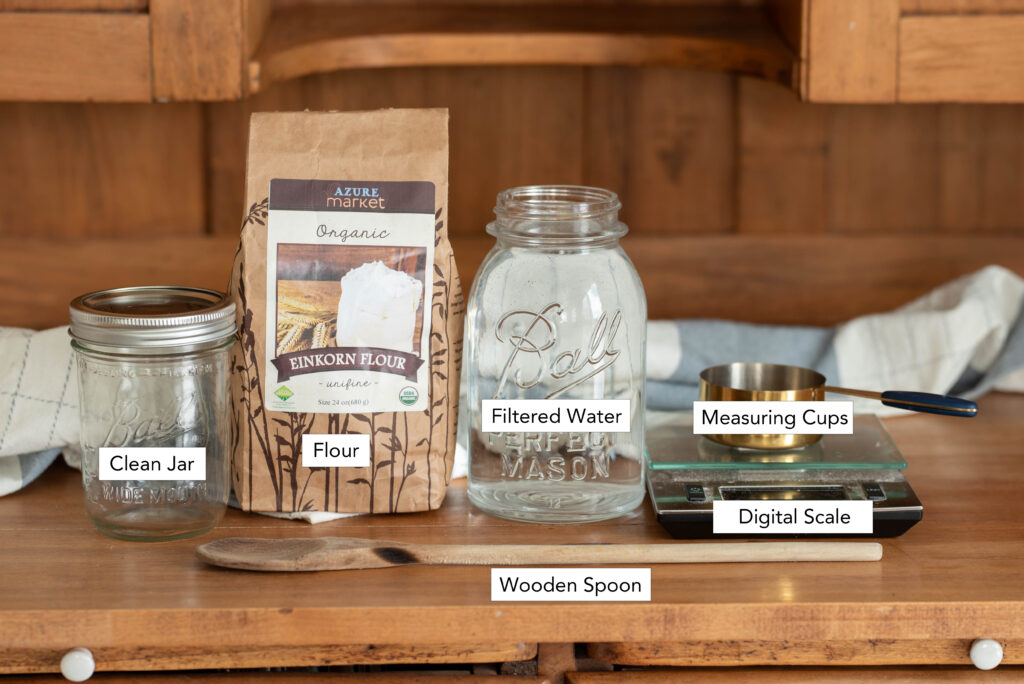
Flour – see notes above
Filtered, non-chlorinated water – see notes above
Clean jar with a lid, beeswax or plastic wrap, digital scale or measuring cups
Wooden or stainless-steel spoon
Step-by-Step Instructions
Please note that a sourdough starter is generally made in a 1:1 ratio of equal parts flour to water. How much flour used depends on how much starter you need for baking.
All starters begin in this manner regardless if you keep a small or large batch. Remember, the art of keeping a starter is fluid and flexible and quite forgiving!
Make a Brand New Starter
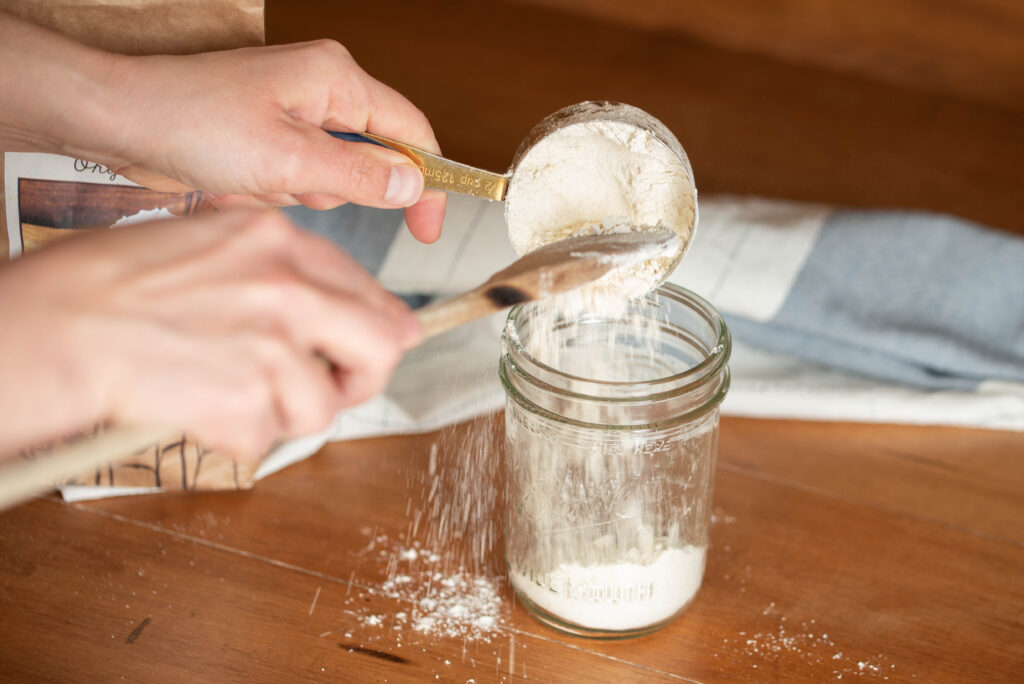
Begin by measuring flour into a clean jar.
For a small batch starter, I recommend using a 1/2 cup (70g) of flour. For a large batch starter, use 1 cup (140g) of flour.
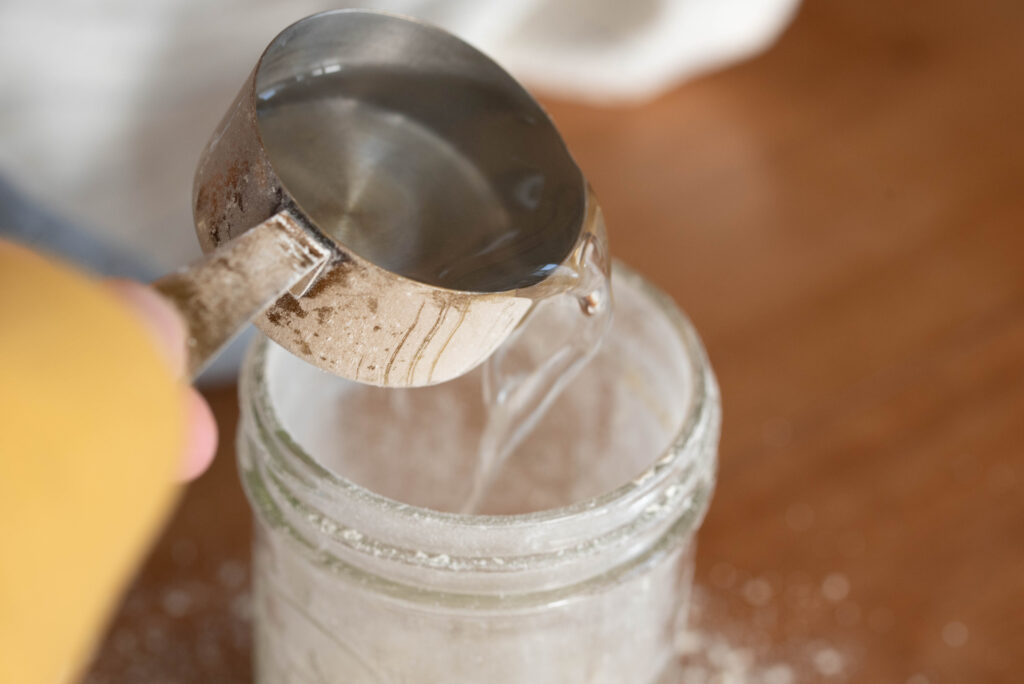
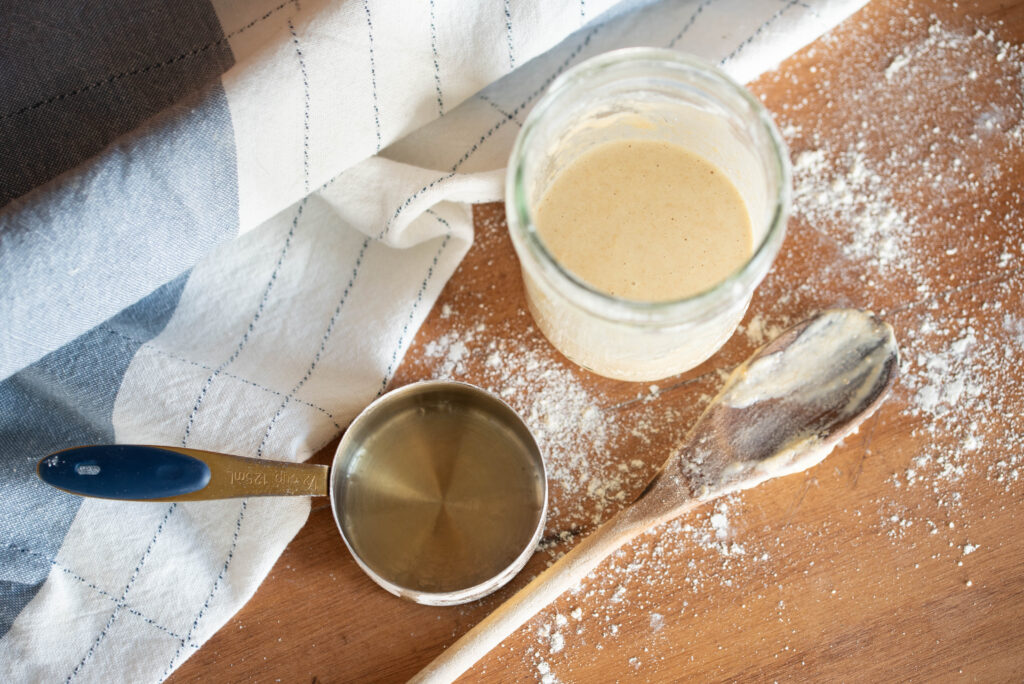
Next, add the water to the flour. Either 1/2 cup (118g) or 1 cup (236g) depending on the amount of flour used.
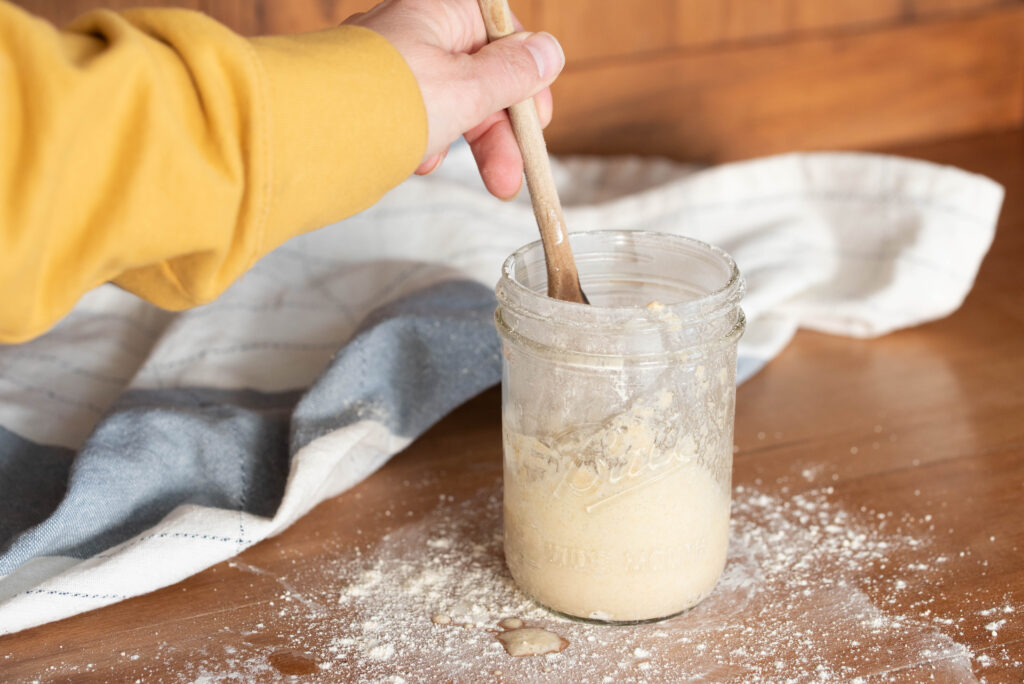
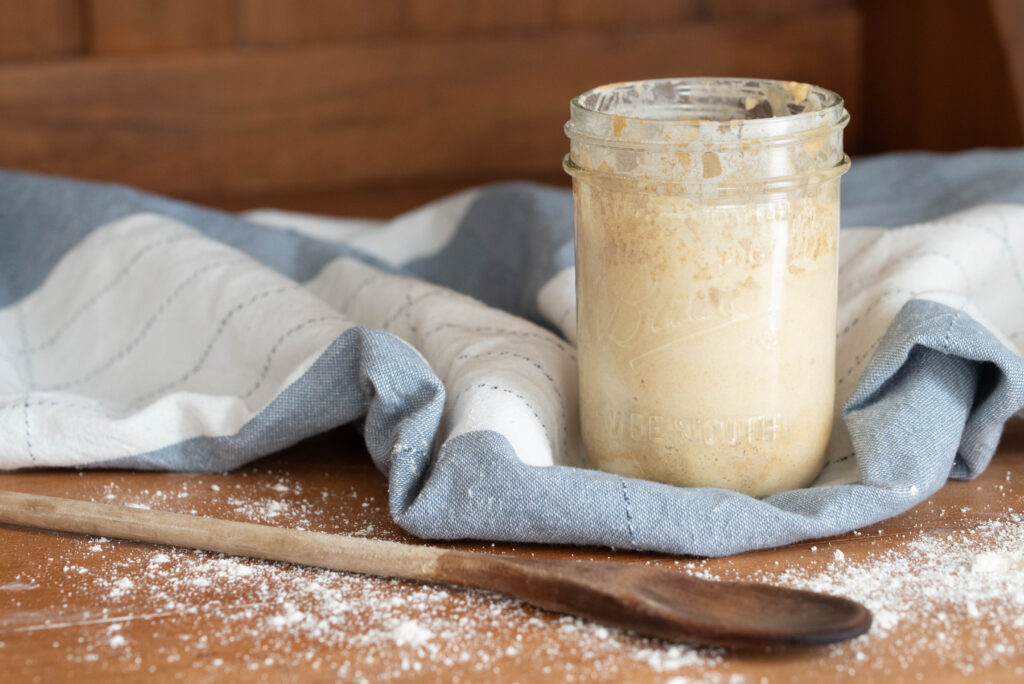
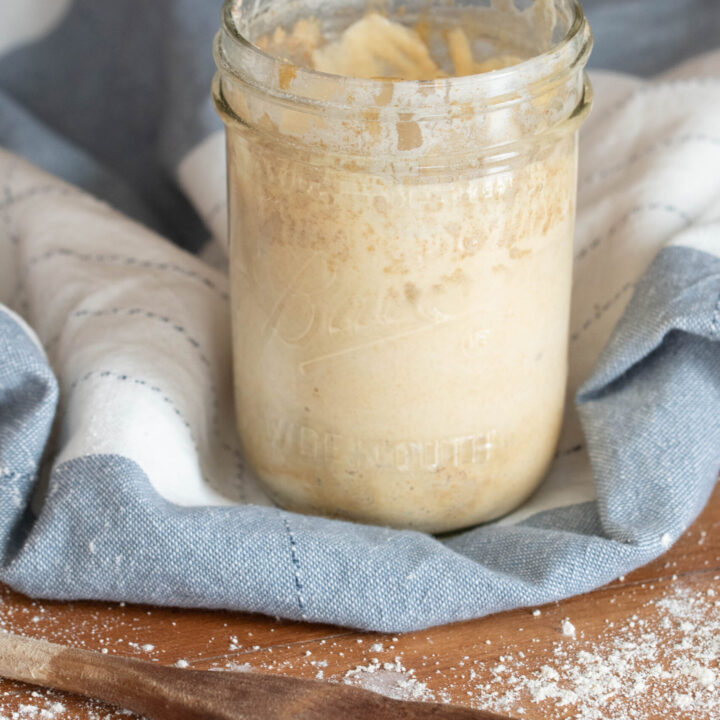
Mix together with a wooden or stainless-steel spoon. The mixture is runny and resembles thin pancake batter.
Cover with a lid (do not screw on tight) or a beeswax or plastic wrap. Set aside in a warm place for 24 hours.
The next day, discard half the starter into another container. Keep it for baking a sourdough discard recipe.
Repeat the same feeding and discarding process as day 1. With the remaining starter, add the 1:1 ratio of flour and water. Set aside in a warm area for another 24 hours.
Continue this same process for 5 days.
Keep a Long-Term Starter
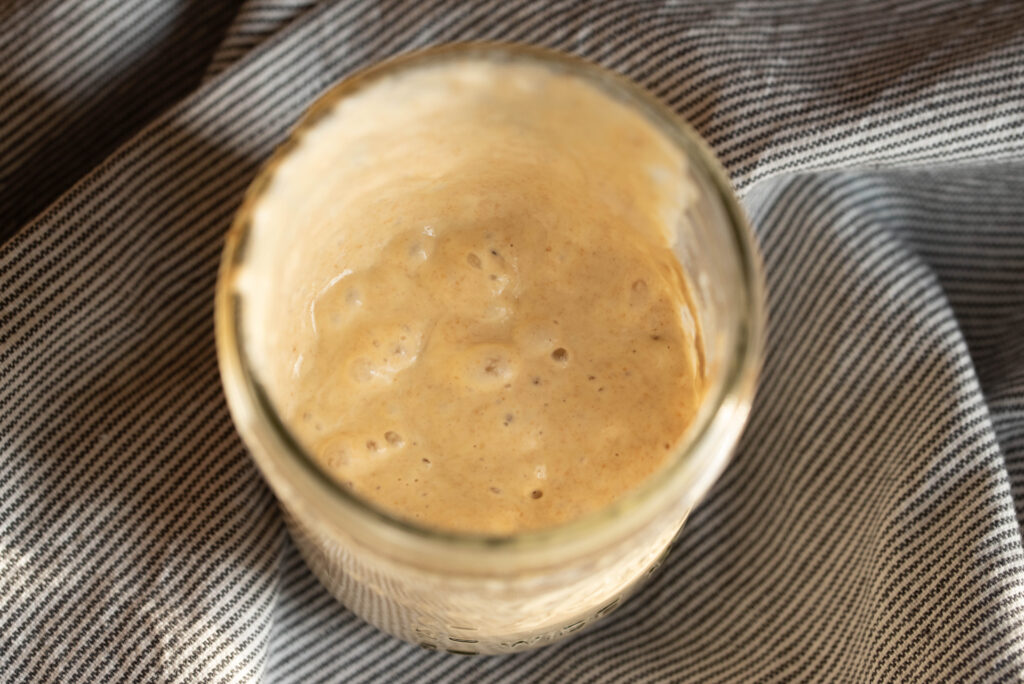
By day 6 or 7, the starter should be active and bubbly, doubling in size. If not, be patient and continue the feeding process.
Once the starter consistently rises, feed every 12 hours to increase the yeast activity.
At this point, the starter is strong enough to bake bread.

The longer you keep a starter, the stronger the yeast activity becomes (see notes below).
If you have a large family and bake a lot, I recommend regular feedings and discarding. Use the discard for cooking and baking. It won’t go to waste.
If you have a small family and don’t have a need for daily or weekly sourdough baked goods, it’s time for this no-discard method.
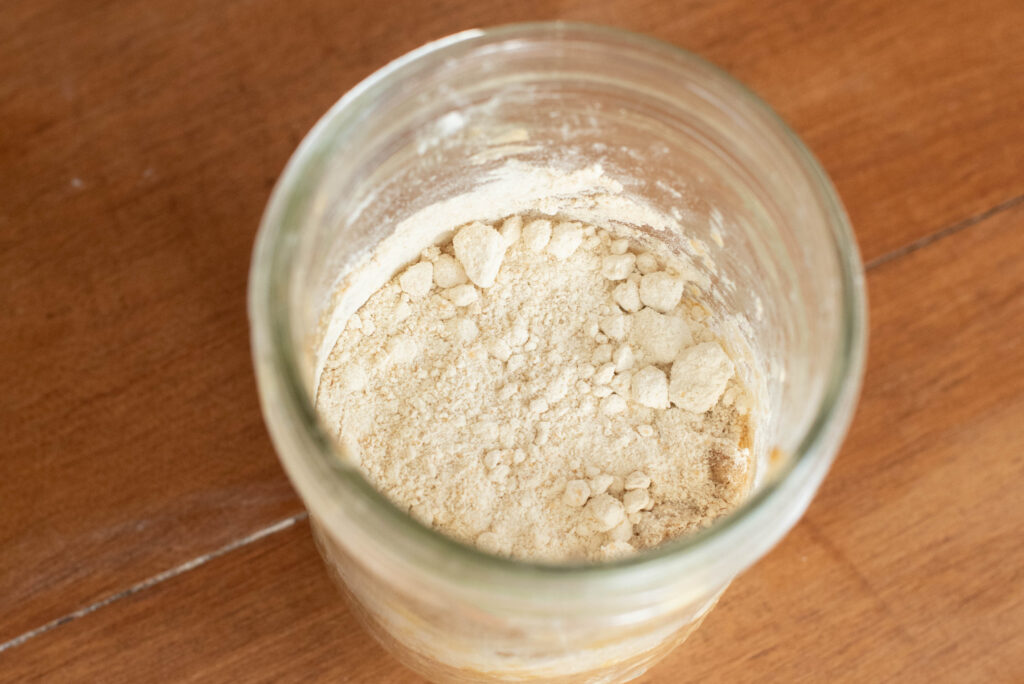
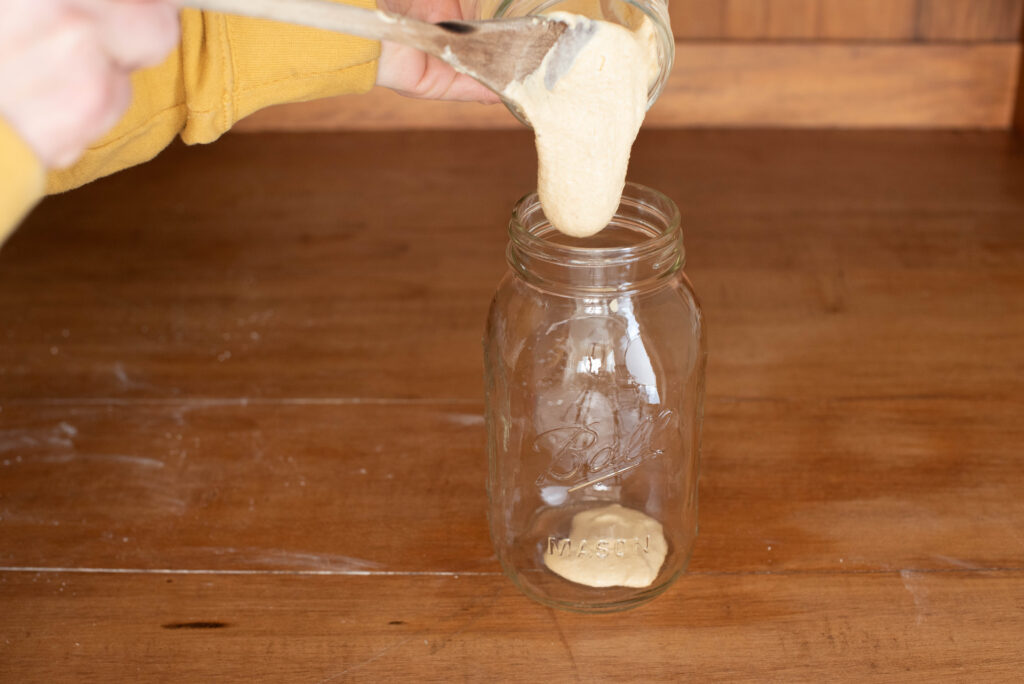
When it’s time to feed the starter, add enough flour to turn it into a thick paste (see previous photo). Cover with a layer of flour to help keep it dry. Do not add water.
Place the thick, un-hydrated starter in the fridge until you’re ready to use it again.
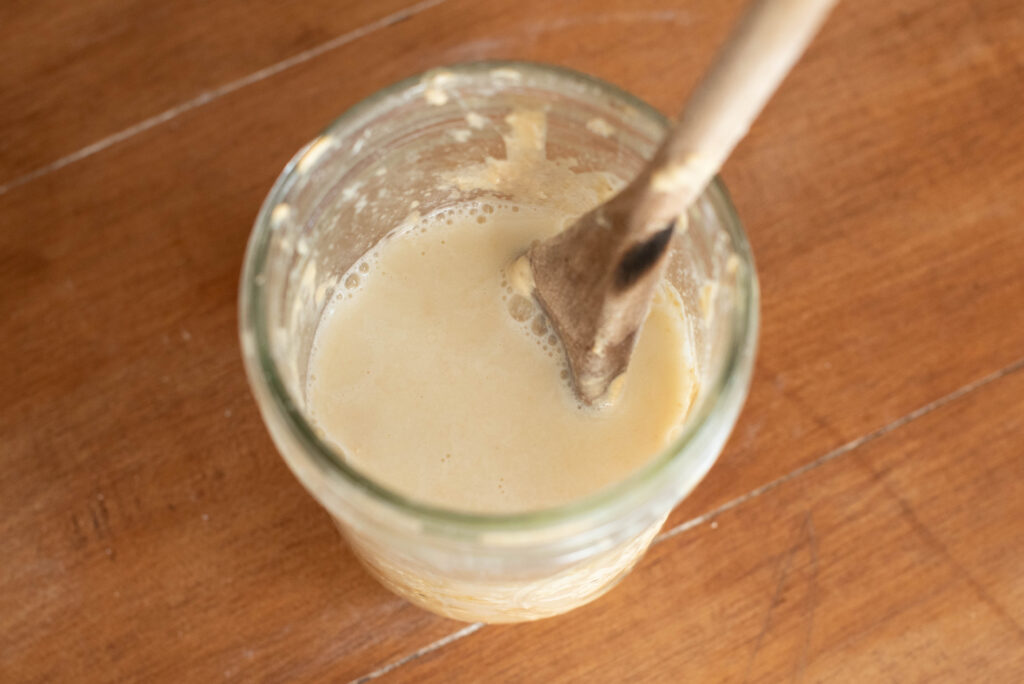
When you’re ready to bake again with the starter, remove from the fridge.
Add enough water to hydrate it to your preferred consistency. Generally, pancake batter is the reference point.
Let it rise then proceed with baking. Return it to its resting phase with flour when baking is complete.
Helpful Hints
- When the starter is active and strong, it should double in volume. Place a rubber band or draw a line with a marker at the beginning point when feeding to monitor the amount of rise.
- Sourdough can be as simple or precise as you want it to be. It depends on your personality. After awhile you’ll get a feel for how much flour and water to use. Use measuring cups for slightly less precision. Or I highly recommend a digital scale if you have a detail-orientated personality and want accurate measurements.
- Use a wooden or stainless steel spoon when mixing sourdough starter. Avoid older aluminum or copper utensils because they react with the acids in the starter and potentially inhibit yeast activity.
- The longer you keep a sourdough starter, the stronger the yeast activity. Bread may not rise quite as high with a new starter, but be patient and keep at it.
- All sourdough starters begin with the feeding and discarding method to fully activate the fermentation process. Once you are confident it has strong yeast activity, go ahead and use the no-discard small-batch method. For reference, my starter is approximately 1/2 cup in total volume. I keep about 2-3 tablespoons of starter and feed it with 1/4 cup flour and 1/4 cup water.
- I highly recommend freezing and dehydrating your sourdough starter with discard once it has strong activity. If it accidentally gets thrown out or meets it demise (like mine), you’ll have a backup and don’t need to start all over. Simply feed it with flour and water. It will take a few feedings to reactivate when pulled from the freezer or dehydrated pieces.
- If at some point you find yourself with lots of extra discard, simply place it in the freezer. Thaw it when ready to bake and use as normal in any discard recipe.
FAQ’s
What does it mean to “feed” a sourdough starter?
Feeding a sourdough starter simply means to discard half the starter and add flour and water to reactivate the fermentation activity.
What if I use this no discard, small-batch method and need more at times for baking?
Not a problem. A sourdough starter is flexible by nature. Transfer the starter to a larger container and feed it a bigger volume of flour and water. When baking is complete, return to the no-discard method.
What if there’s no signs of activity after the first five days?
Make sure you use a non-bleached flour mixed with filtered, non-chlorinated water. Try using a whole grain flour instead of all-purpose and keep it in a warm area. It needs warmth to activate fermentation.
Sourdough Recipes From Becky’s Kitchen
The Best From-Scratch Cheesy Sourdough Pizza Rolls
The Best Christmas Sourdough Gingerbread Cinnamon Rolls
Easy Chocolate Sourdough Cookies with Espresso and Cherries
The Best Citrus Sourdough Sugar Cookies for Christmas
If you found this post helpful, come back and let me know in the comments below! Tag me with your photos on Instagram @beckybuttlesamericana
Jesus said to them, “I am the bread of life; he who comes to me shall not hunger, and he who believes in me shall never thirst.” John 6:35
Thank you for stopping by my blog! –Becky
How to Make a Sourdough Starter | No Discard, Small Batch
A sourdough starter is an old-fashioned pantry staple still perfect for the modern kitchen. My no discard, small batch starter is practical, frugal and simple to maintain. Everyone can enjoy nourishing homemade baked goods with this easy sourdough method.
Ingredients
- All-purpose, bread or whole grain flour
- Filtered, non-chlorinated water
Equipment
- Clean jar with lid or beeswax or plastic wrap
- Wooden or stainless steel spoon
- Digital scale or measuring cups
Instructions
Make a Brand New Starter
Begin by measuring flour into a clean jar. For a small batch starter, I recommend using a 1/2 cup (70g) of flour. For a large batch starter, use 1 cup (140g) of flour.
Next, add the water to the flour. Either 1/2 cup (118g) or 1 cup (236g) depending on the amount of flour used.
Mix together with a wooden or stainless-steel spoon. The mixture is runny and resembles thin pancake batter.
Cover with a lid (do not screw on tight) or a beeswax or plastic wrap. Set aside in a warm place for 24 hours.
The next day, discard half the starter into another container. Keep it for baking a sourdough discard recipe.
Repeat the same feeding and discarding process as day 1. With the remaining starter, add the 1:1 ratio of flour and water. Set aside in a warm area for another 24 hours.
Continue this same process for 5 days.
Keep a Long-Term Starter
By day 6 or 7, the starter should be active and bubbly, doubling in size. If not, be patient and continue the feeding process.
Once the starter consistently rises, feed every 12 hours to increase the yeast activity. At this point, the starter is strong enough to bake bread.
The longer you keep a starter, the stronger the yeast activity becomes (see notes below).
If you have a large family and bake a lot, I recommend regular feedings and discarding. Use the discard for cooking and baking. It won't go to waste.
If you have a small family and don't have a need for daily or weekly sourdough baked goods, it's time for this no-discard method.
When it's time to feed the starter, add enough flour to turn it into a thick paste.
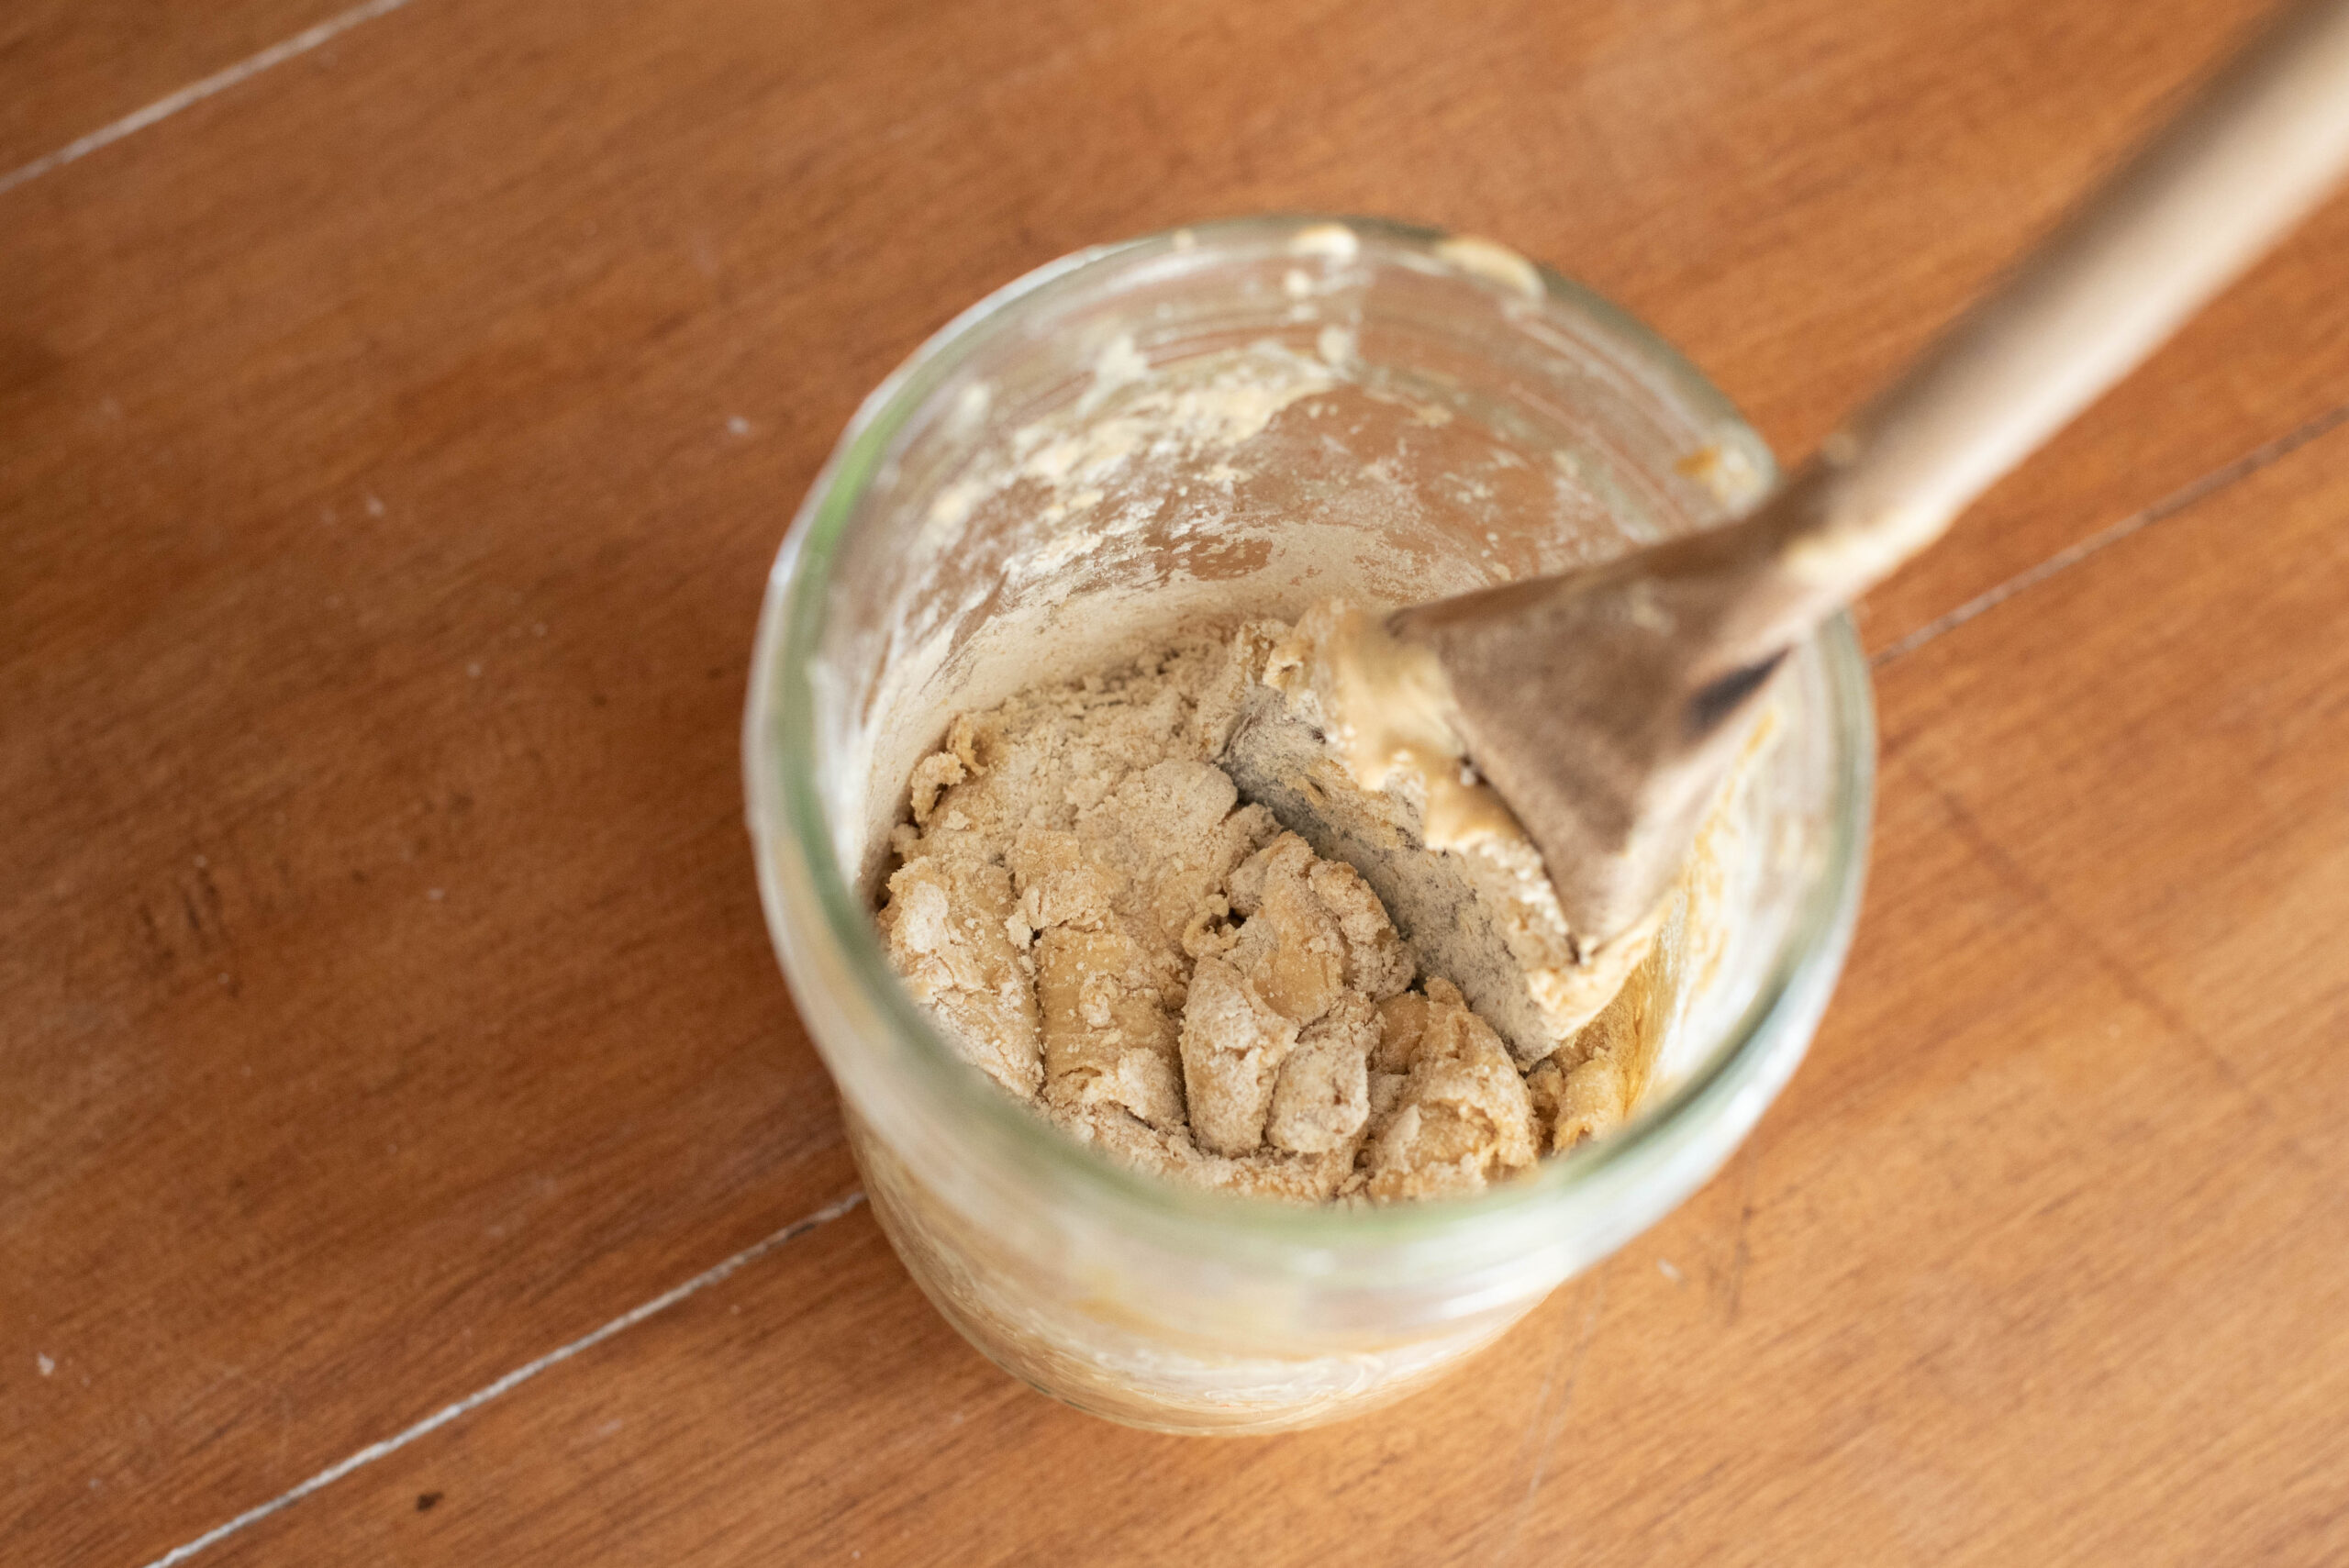
Cover with a layer of flour to help keep it dry. Do not add water.
Place the thick, un-hydrated starter in the fridge until you're ready to use it again.
When you're ready to bake again with the starter, remove from the fridge. Add enough water to hydrate it to your preferred consistency. Generally, pancake batter is the reference point.
Let it rise then proceed with baking. Return it to its resting phase with flour when baking is complete.
Notes
- When the starter is active and strong, it should double in volume. Place a rubber band or draw a line with a marker at the beginning point when feeding to monitor the amount of rise.
- Sourdough can be as simple or precise as you want it to be. It depends on your personality. After awhile you'll get a feel for how much flour and water to use. Use measuring cups for slightly less precision. Or I highly recommend a digital scale if you have a detail-orientated personality and want accurate measurements.
- Use a wooden or stainless steel spoon when mixing sourdough starter. Avoid older aluminum or copper utensils because they react with the acids in the starter and potentially inhibit yeast activity.
- The longer you keep a sourdough starter, the stronger the yeast activity. Bread may not rise quite as high with a new starter, but be patient and keep at it.
- All sourdough starters begin with the feeding and discarding method to fully activate the fermentation process. Once you are confident it has strong yeast activity, go ahead and use the no-discard small-batch method. For reference, my starter is approximately 1/2 cup in total volume. I keep about 2-3 tablespoons of starter and feed it with 1/4 cup flour and 1/4 cup water.
- I highly recommend freezing and dehydrating your sourdough starter with discard once it has strong activity. If it accidentally gets thrown out or meets it demise (like mine), you'll have a backup and don't need to start all over. Simply feed it with flour and water. It will take a few feedings to reactivate when pulled from the freezer or dehydrated pieces.
- If at some point you find yourself with lots of extra discard, simply place it in the freezer. Thaw it when ready to bake and use as normal in any discard recipe.
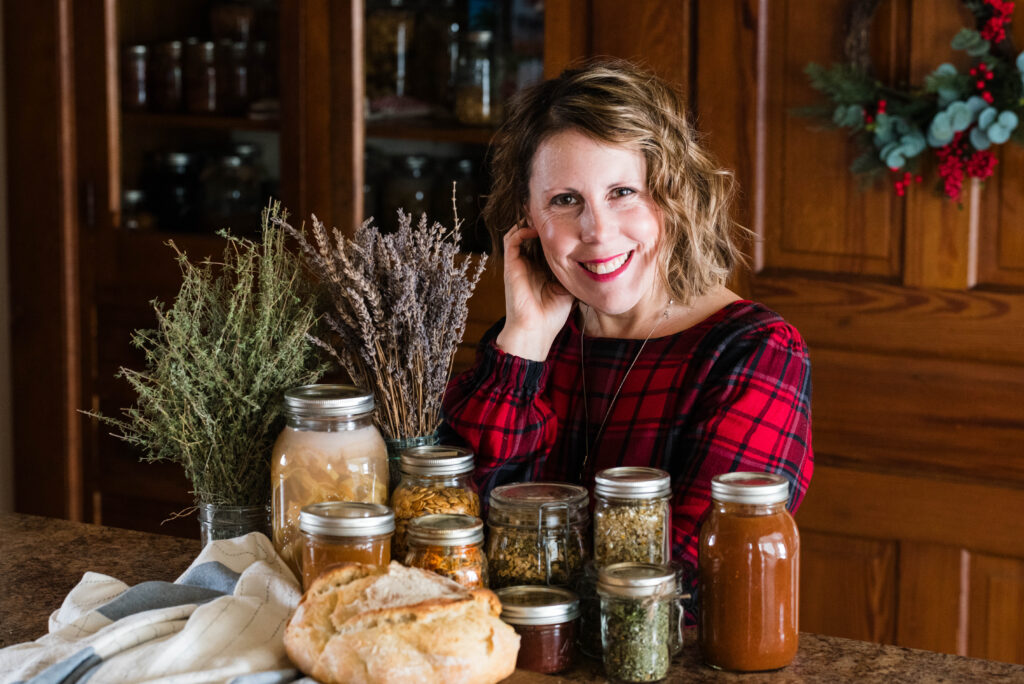
I’m a wife and homemaker inspiring old-fashioned skills for a homemade, self-sufficient lifestyle, always with a warm beverage in hand. Homemade Recipes. Gardening. Preserving. Healthy Living.
Want More Recipes from Becky?
Sign up to receive exclusive recipes only for subscribers! Plus you’ll get the latest blog posts straight to your inbox!


I like how you frame the sourdough starter as both “old-fashioned” and still really practical for a modern kitchen. The no-discard, small-batch approach sounds so much more manageable than the huge, wasteful starters I’ve seen elsewhere, and the part about self-sufficiency really stood out.
A no-discard, small-batch approach makes sourdough more accessible for smaller households while addressing the real cost and waste concerns that often discourage beginners.
Thanks for sharing! This post is really helpful.
https://accelerationcity.cc/
You’re welcome! Thank you for stopping by my blog!
Thank you for the detailed instructions.
You’re welcome! Thank you for visiting my blog!