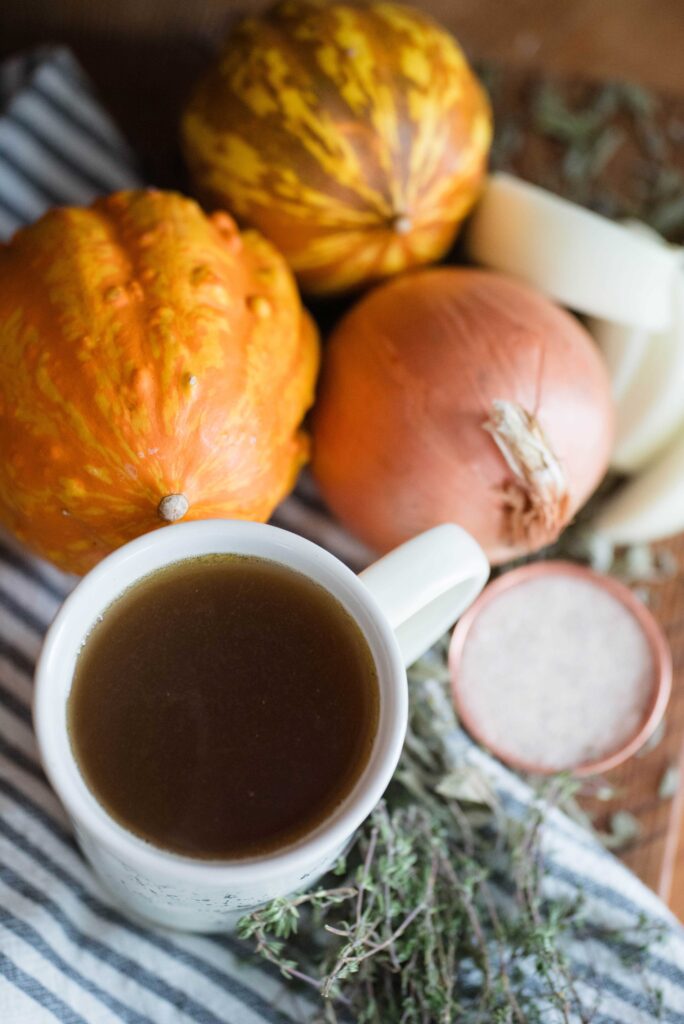
How to Make Bone Broth: A Beginner’s Guide
Homemade bone broth is a healthy pantry staple and a simple cooking skill rooted in ancestral wisdom. With its savory flavor and beneficial healing qualities, your family will love bone broth’s versatility in the kitchen. This recipe features affordable ingredients and inspires warm mugs of healthy beverages and endless possibilities of hearty meals.
Making homemade bone broth is an easy traditional skill any woman can incorporate into her culinary repertoire. Broth is a healthy beverage all on it’s own or it enriches the flavor of homemade soups, stews and one-pot skillet dishes.
For me, homemade broth was the first old-fashioned skill I learned after Luke and I got married. I felt satisfied knowing I can replace a store-bought item with a healthier homemade version.
Historically, until after WWII, every kitchen in America continuously had a pot of broth simmering. Folks used it as a base for most meals that included soups or stews. A pot of broth ensured nothing from an animal went to waste including the bones.
Today, marketing tells women that broth comes from the grocery store. I’m here to encourage you from personal experience, you can make your own and enjoy the many benefits of broth.
Whether you use an Instant Pot, slow cooker or simmer on the stove top, homemade bone broth is easy to incorporate into your meal prep routine. And without chemicals and preservatives from store-bought varieties, your family is sure to achieve wonderful health as a result!
Why You’ll Love Homemade Bone Broth
Easy to make – In less than five minutes, all ingredients are in the pot. Once you hit start, walk away and you’ll have broth in 1-2 hours in the Instant Pot or 4-12 hours in a slow cooker or stovetop simmer pot. A healthy homemade pantry staple awaits upon your return home from work or a day away with the kids.
Practical and frugal – Bone broth is a natural by-product of cooking any cut of meat with bones. Instead of cooking chicken breasts for example, buy a whole chicken, turn it into several meals and set aside the broth for future cooking. Add enough water and you’ll get about one and a half quarts to a half gallon of broth at a time.
Pull the meat off and add the bones and more water back to the pot for a second round of cooking. One purchase stretches quite far! No need to buy broth from the store. It’s even more practical and frugal if you make vegetable broth without any meat.
Better for health – Many of us live everyday with health issues we are unaware of thanks to our modern, fast-paced world. The ancient culinary skill of broth-making helps with many of our problems.
Your homemade bone broth can aid the healing of many digestive issues like leaky gut. Skin elasticity improves (aka wrinkles are smoother) and many joint and muscle problems disappear.
That’s because broth provides many minerals and amino acids that our nutrient deficient bodies need. In particular, the gelatinous texture of broth contains the melted collagen from the bones, which helps with connective tissue problems.
Healing when sick – When a person is sick, it generally means the liver needs to detoxify something. The liver removes the bacteria or virus out of the body.
Glycine is an amino acid found in homemade bone broth that helps the liver detoxify. That’s why mom made homemade chicken noodle soup when you were sick as a child.
For more information on bone broth, check out this article here from the Weston A Price Foundation.
Improved cooking skills – You’ll impress family and friends with the added depth of flavor and savory texture in your meals. They’ll think they’re eating at the local five-star restaurant in the comfort of your own home.
A nutritional boost for mere pennies of a restaurant meal; now that should satisfy you!
Also, your family will want more homemade meals as your cooking skills improve, thus bringing everyone together more at dinnertime. A stronger family bond can start over home cooked meals which began with a simple homemade bone broth.
Tips for Making Homemade Bone Broth
- Make sure your slow cooker is big enough to make a couple quarts of broth. You’ll see in the images below, mine is too small for the size chicken I used. I only ended up with a quart of broth.
- After a couple of hours, go back and stir in your veggies a little more with the water. They’ll be more wilted than when you started and easier to mix in. You’ll want to make sure the veggies are cooking with the liquid to acquire optimal flavor.
- Save veggie scraps or bones in the freezer to make broth when you have enough stored up or at a more convenient time. The best scraps to use are generally from root vegetables like onions and carrots. Broccoli and cauliflower for example, make the broth taste bitter. Eliminate the bones and only use scraps to make veggie broth.
- When you cook a cut of meat with bones like a whole chicken, you’ll end up with a gelatinous broth. Once it’s completely cooled, this is known as meat stock. Simply put, this meat stock has more collagen or healing benefits than broth made only from bones. Broth made from bones will be more water-like in nature versus meat stock. It’s still equally beneficial for your health.

How to Make Homemade Bone Broth
What You’ll Need
Ingredients
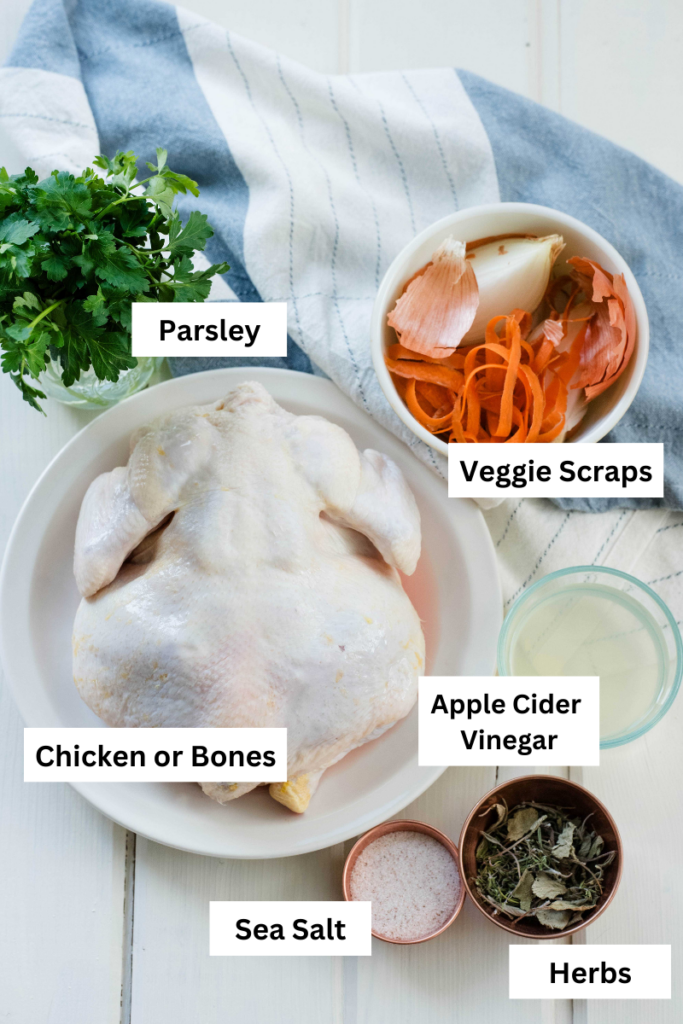
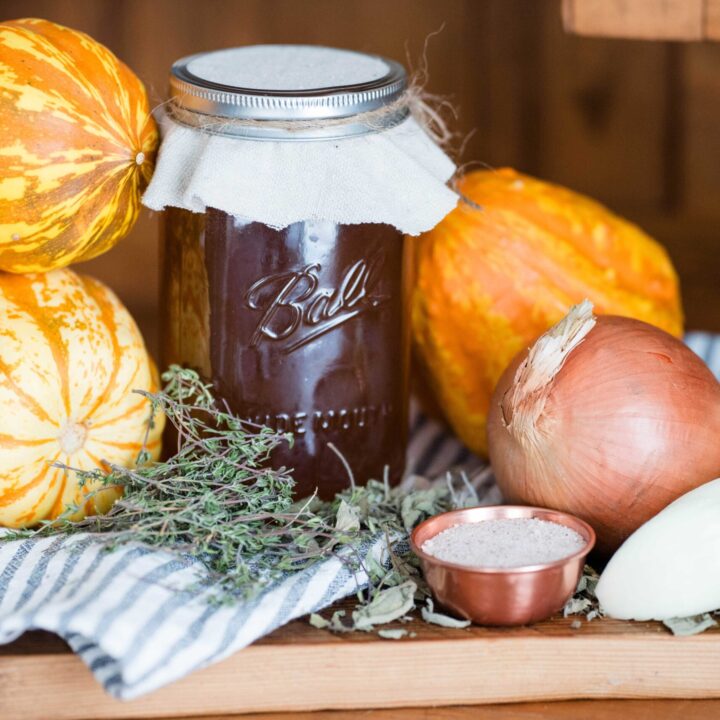
Chicken with Bones – For simplicity purposes, this recipe uses chicken with bones, either raw or cooked. I generally use a whole raw chicken for my first batch of broth. Remove the meat off the bones and make a second batch of broth with the bones and leftover scraps.
Veggie Scraps – You can use fresh chopped veggies in your broth. Or a more economical approach is to keep a Ziploc baggie of vegetable scraps in your freezer. Every time you cut the ends off of carrots or peel an onion, collect those scraps for your broth.
Apple Cider Vinegar – Optional but recommended since the acidity draws out more minerals and nutrients
Sea Salt – High quality such as Redmond Real Salt
Filtered Water – Broth is meant to be nourishing so the water you use needs to be clean and free of toxins
Herbs – Optional but I highly recommend! I enjoy sage, rosemary and thyme in my broth. Sometimes it’s all three at once, sometimes it’s just one of them.
Tools Needed
Cutting Board and Sharp Knife (if cutting veggies fresh)
Slow Cooker, Instant Pot or Enameled cast iron dutch oven – While the Instant Pot does have a slow cooker feature, I recommend pressure cooking it instead for 1-2 hours. It’s faster and doesn’t acquire a metallic taste when left in the insert too long. Also, pressure cooking is recommended for those with histamine intolerances. The longer broth simmers, the more histamines are released.
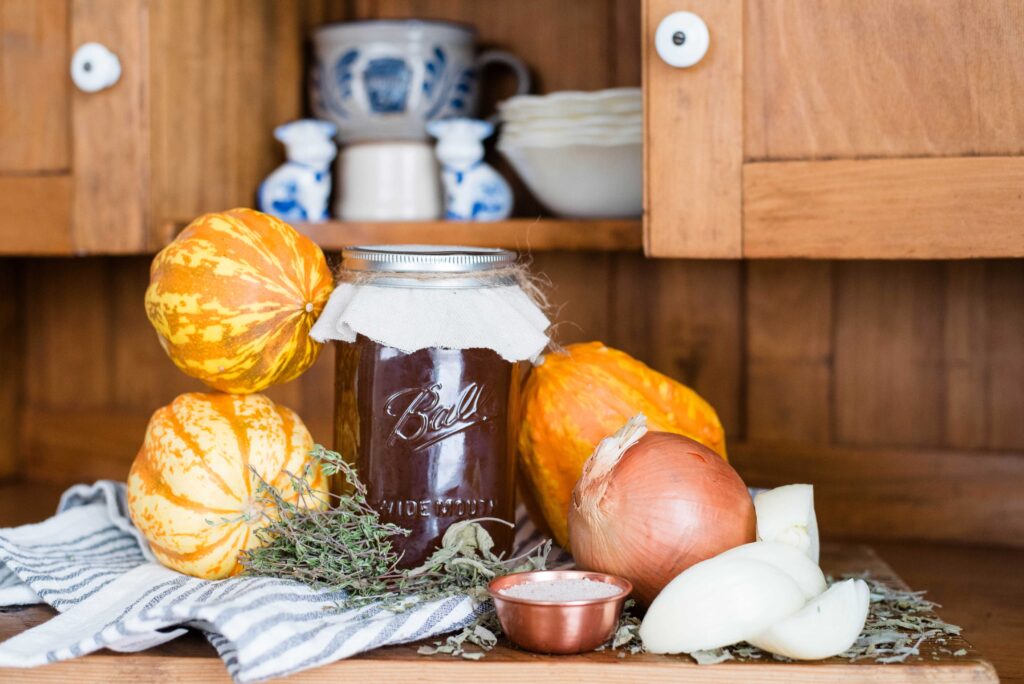
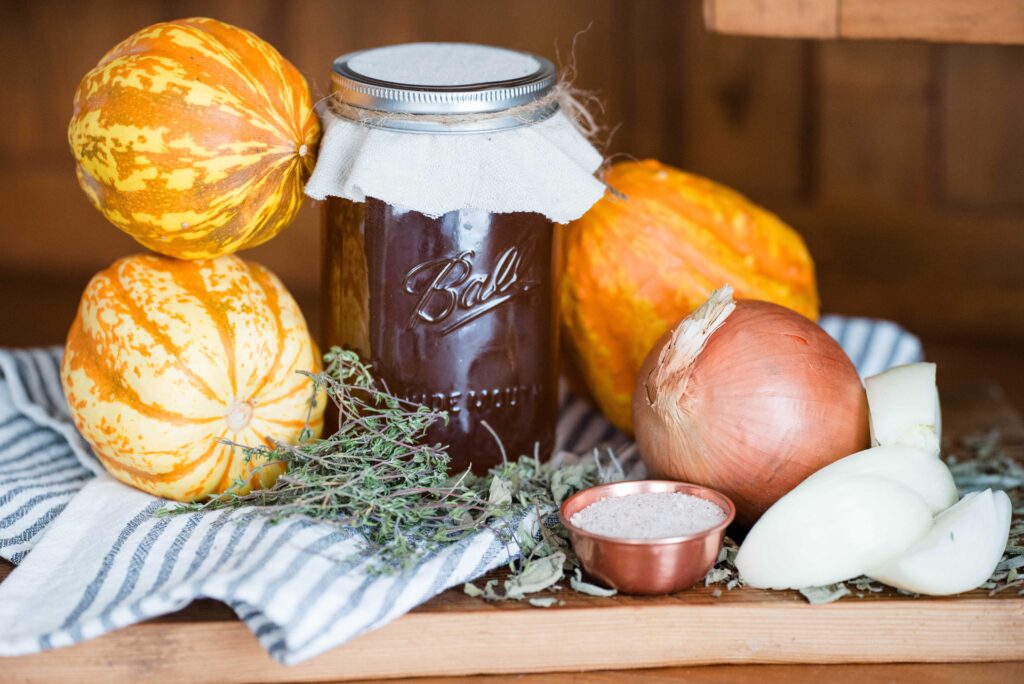
Glass jars for storage
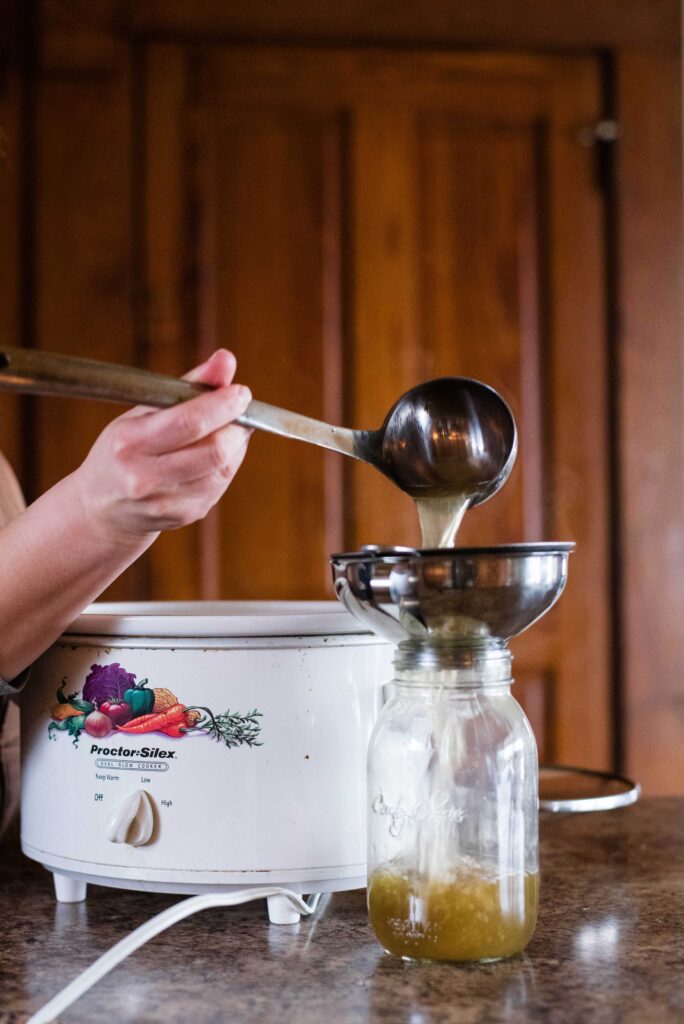
Mesh strainer, stainless steel funnel and ladle
Step-by-Step Instructions
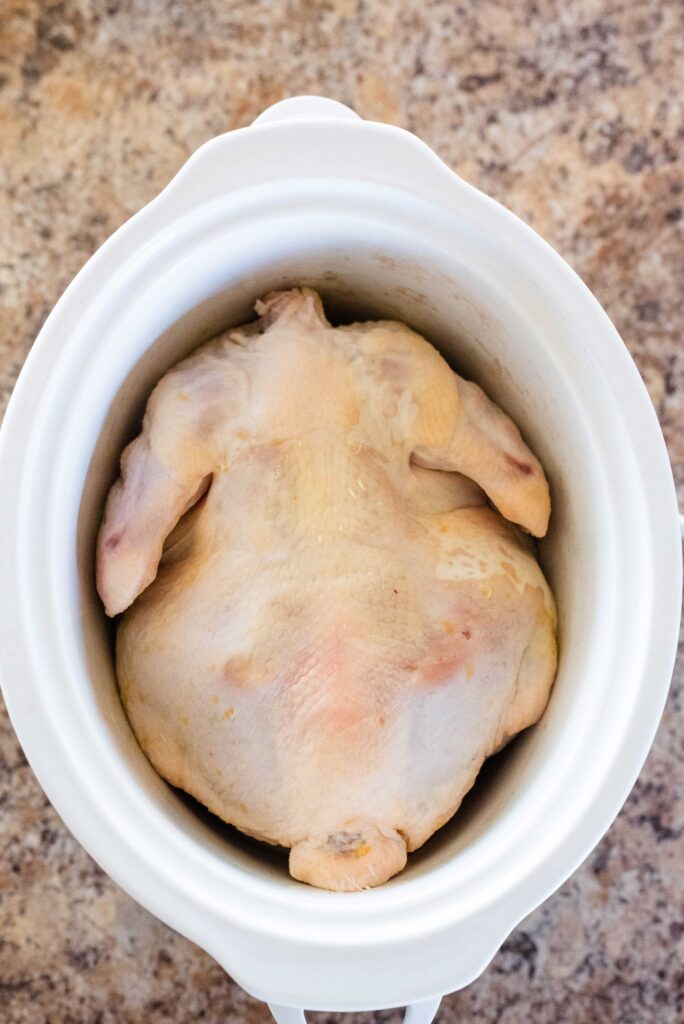
Place the raw meat or bone scraps in the bottom of the slow cooker.
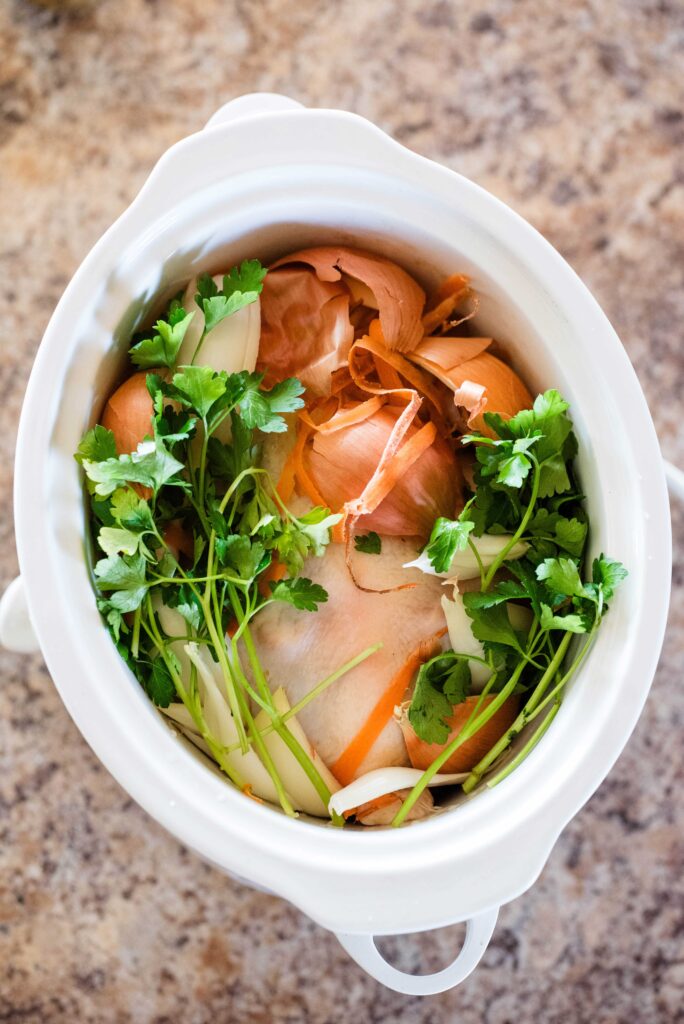
Arrange veggies and herbs if using, on top of meat or bones.
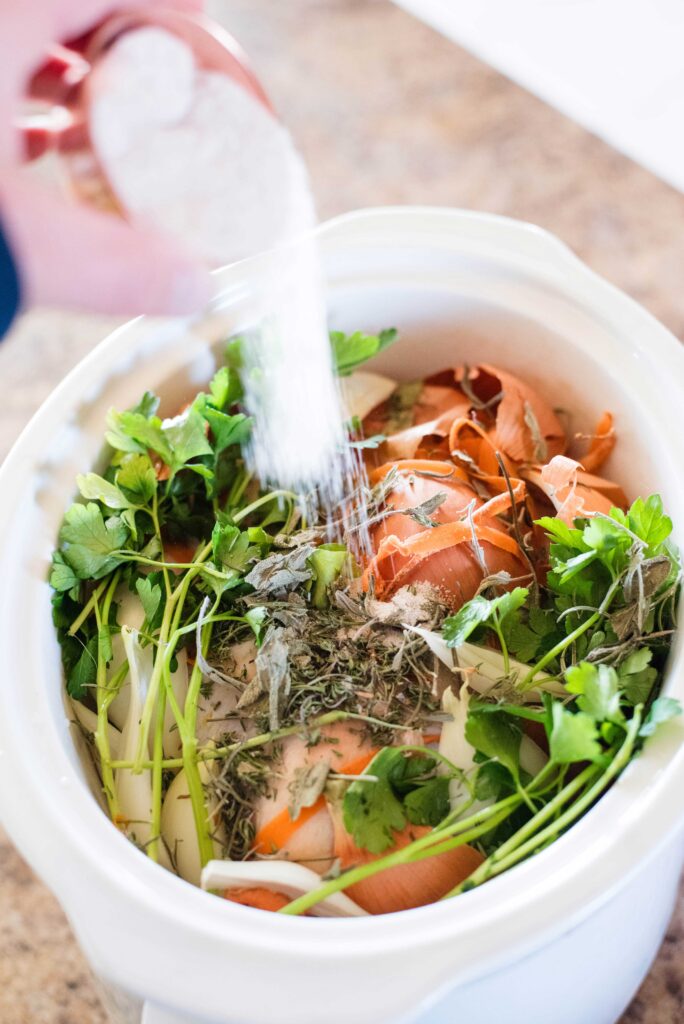
Add salt and pepper on top of vegetables.
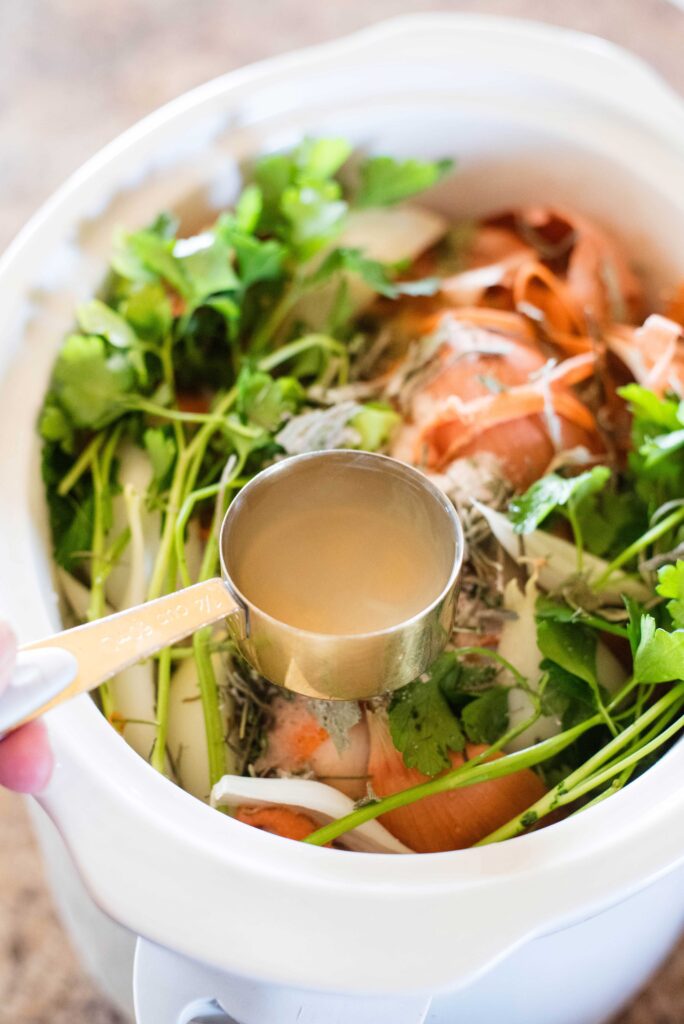
Pour in apple cider vinegar.
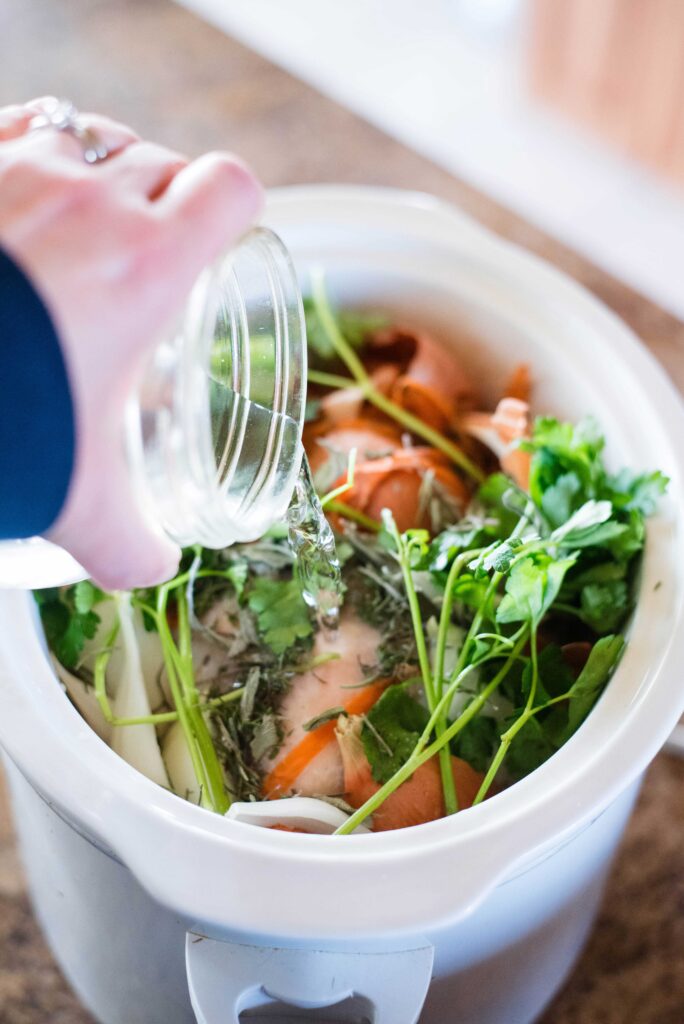
Add filtered water so that it covers about half to two-thirds of the slow cooker. For an Instant Pot, add water to just below the fill line. You’ll want to leave enough room for the juices that melt off the meat and bones.
Make sure the slow cooker is plugged in and turn it to low. Cook for 6-8 hours. Or hit the pressure cook button on the Instant Pot and set the time to 1-2 hours.
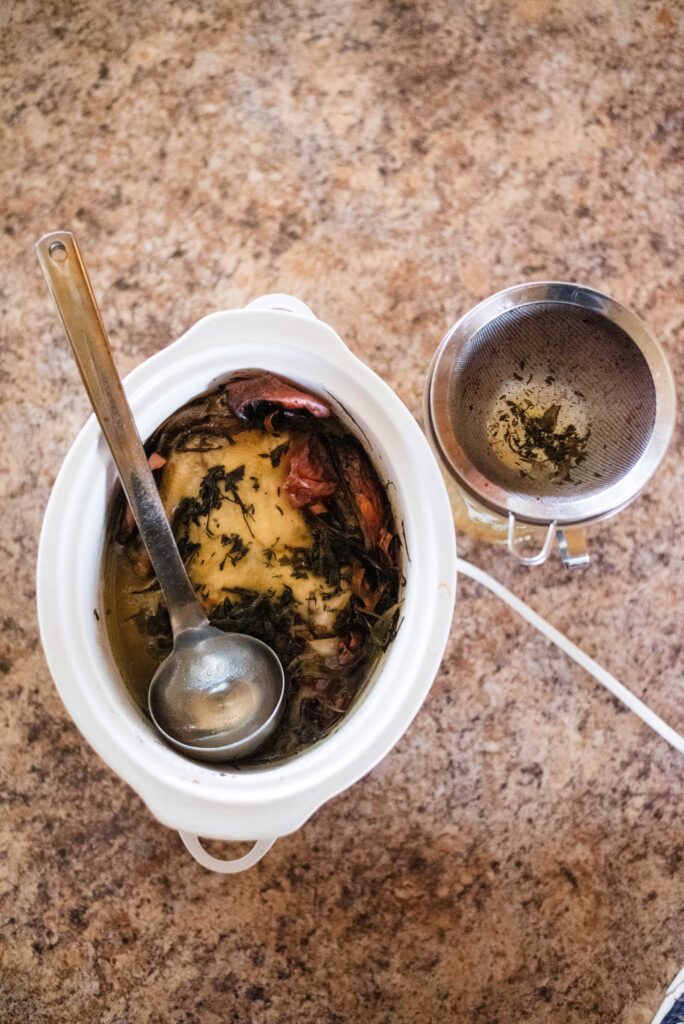
While the broth is still warm, place the mesh strainer on top of the stainless steel funnel. Insert on top of glass jar. Pour the broth through the strainer and funnel.
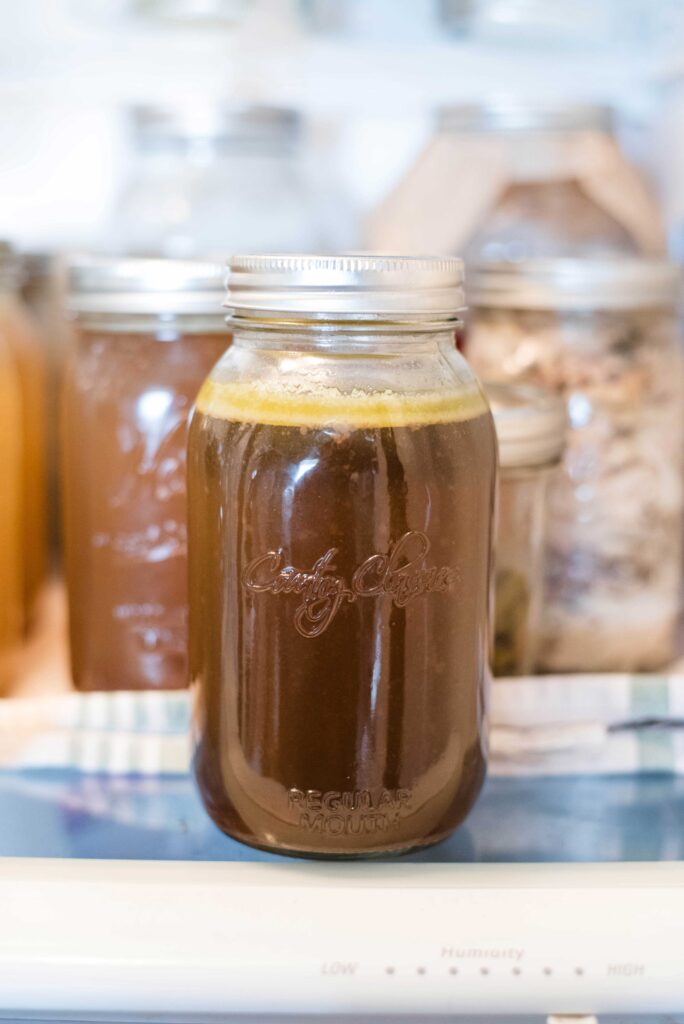
Step 8: Store in the refrigerator or freezer.
Don’t place a piping hot jar of broth in the freezer. Let it cool to room temperature first.
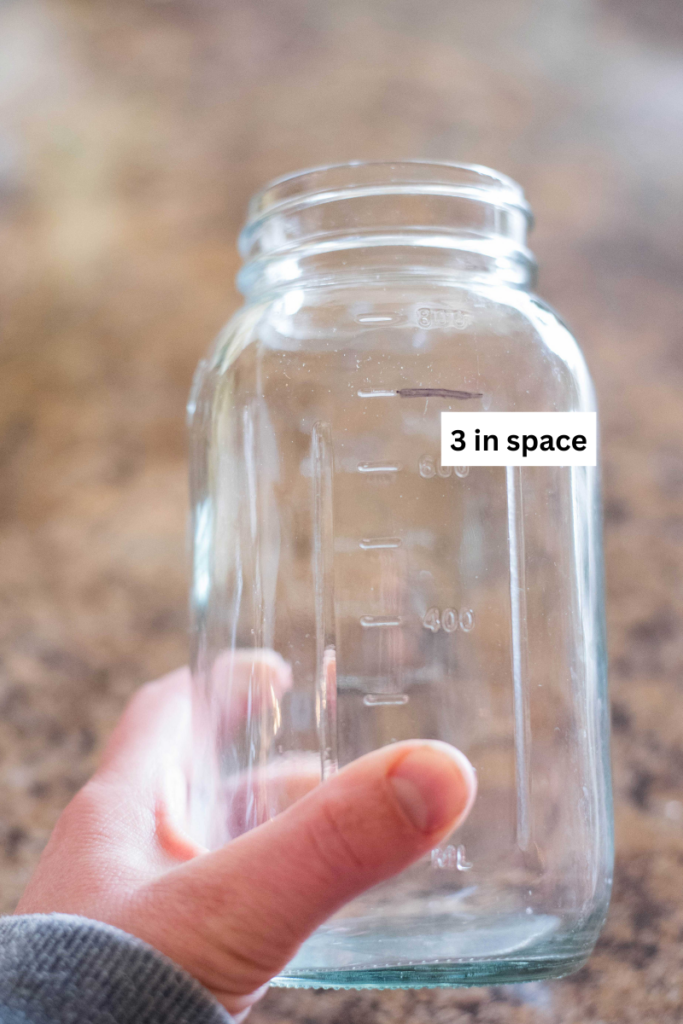
Step 9: If freezing your broth, leave about 3 inches of space below the rim of the jar. That allows for expansion and prevents breakage.
Recipe FAQ’s
Can I make this broth on the stove top or an Instant Pot instead of the slow cooker?
Yes, but if you’ll be away from home while the broth is simmering, the slow cooker is a safer choice. It’s not a good idea to leave a burner on the stove turned on if you’re not home.
The Instant Pot is also safer than the stove top in case you’re not home. But the metal insert can leave a metallic taste to the broth so if you’re unavailable to remove the broth right away, stick to the slow cooker.
How long can broth be stored?
In the freezer, I recommend no longer than six months. That prevents an old freezer burnt taste. In the refrigerator, I recommend no longer than three weeks. If it’s going to be any longer, place it in the freezer to prevent waste.
Should fat be skimmed off the top once the broth has cooled?
This is a matter of personal preference. The fat is nutritious and adds to the depth of flavor when cooking with it. If you drink it as a warm healing beverage, it provides a savory flavor and texture. If you don’t care for it, skim it off and use it for cooking.
Can homemade bone broth be pressured canned?
Technically, yes it may be pressure canned. DO NOT water bath can it because it doesn’t have a high enough acidity level like tomatoes or strawberries. But the Weston A Price Foundation does not recommend pressure canning it because the high heat decreases the healthy benefits of broth.
How can bone broth be used?
Bone broth can be used in many ways. Use it in soups and stews, cook rice or beans with it or drink as a warm healing beverage.
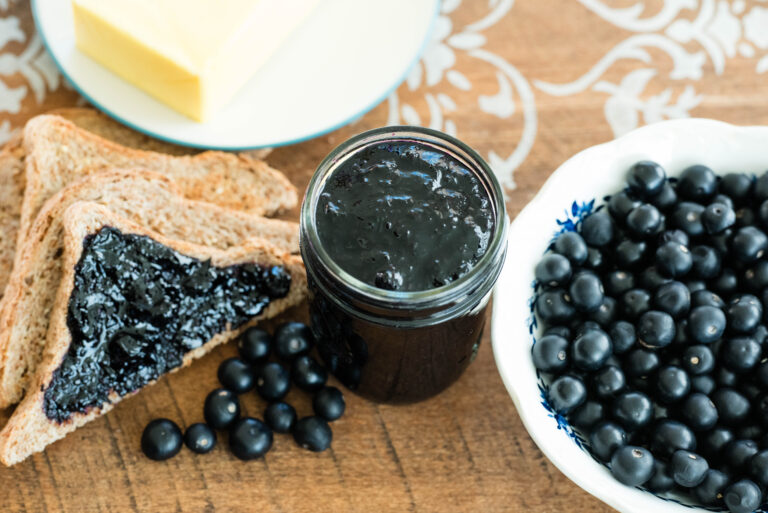
More Recipes from Becky’s Kitchen
The Best Homemade Pumpkin Sausage Soup for Fall
Sourdough Starter | How to Make a No-Discard Small-Batch
The Best From-Scratch Cheesy Sourdough Pizza Rolls
Homemade Apple Cider Vinegar | Healthy, Simple and Frugal
If you make this recipe and love it, please come back and leave it a 5-star review below! Tag me with your photos on Instagram @beckybuttlesamericana. Leave a comment below on all the ways you use broth in your kitchen.
Thanks and Happy Cooking! –Becky
Homemade Bone Broth
This easy bone broth recipe is savory in flavor and full of nutritional benefits. It's versatility in the kitchen makes it a must-have homemade pantry staple.
Ingredients
- Whole raw chicken or bone scraps
- Handful of veggie scraps-onion and carrot peels, celery scraps, pumpkin and squash skins, parsley, etc.
- 1/4 cup apple cider vinegar
- 1 tablespoon sea salt
- Pepper to taste
- 1 teaspoon various herbs - I suggest a combination of sage, rosemary, thyme, tarragon, marjoram, etc.
- 1-2 quarts of filtered water
Instructions
- Place raw chicken or bone scraps in bottom of slow cooker
- Arrange veggie scraps around the chicken or bones
- Add herbs and salt and pepper on top of chicken and veggie scraps
- Add apple cider vinegar
- Add the filtered water until it fills about 2/3 of the cooker or leave about 3 inches of space for the juices that melt off the chicken.
- Simmer in a slow cooker or stovetop simmer pot for 4-12 hours. Pressure cook in an Instant Pot for 1-2 hours.
- When broth is still warm, strain into glass containers and let cool.
- Store in the freezer or fridge. Remove the layer of fat if you prefer once it's hardened and set aside for future cooking.
Notes
Make sure your slow cooker is big enough to make a couple quarts of broth. My slow cooker is too small and I only ended up with a quart of broth.
After a couple of hours, go back and stir in your veggies a little more with the water. They'll be more wilted than when you started and easier to mix in. You'll want to make sure the veggies are cooking with the liquid to acquire optimal flavor.
If you choose to freeze your broth, leave about 3 inches of space below the rim of your jar. That should be enough room to allow for expansion and prevent breakage of the jar.
When broth is completely cooled, you can scrape off the layer of fat and use for cooking later. But I generally don't do that and cook with the fat and broth all together. Either way, your recipes aren't affected.
After removing all the meat from the carcass, make a second batch of broth with the leftover bones and scraps. Once finished, discard bones and compost veggie scraps.
Save veggie scraps or bones in the freezer to make broth when you have enough stored up or at a more convenient time. The best scraps to use are generally from root vegetables like onions and carrots. Broccoli and cauliflower for example, make the broth taste bitter. Eliminate the bones and only use scraps to make veggie broth.
When you cook a cut of meat with bones like a whole chicken, you'll end up with a gelatinous broth. Once completely cooled, this is known as meat stock. Simply put, this meat stock has more collagen or healing benefits than broth made only from bones. Broth made from bones will be more water-like in nature versus meat stock. It's still equally beneficial for your health.
I’m a wife and homemaker inspiring old-fashioned skills for a homemade, self-sufficient lifestyle, always with a warm beverage in hand. Homemade Recipes. Gardening. Preserving. Healthy Living.
Want More Recipes from Becky?
Sign up to receive exclusive recipes only for subscribers! Plus you’ll get the latest blog posts straight to your inbox!