The Best Americana Mixed Berry Pie | Cheers to 250!
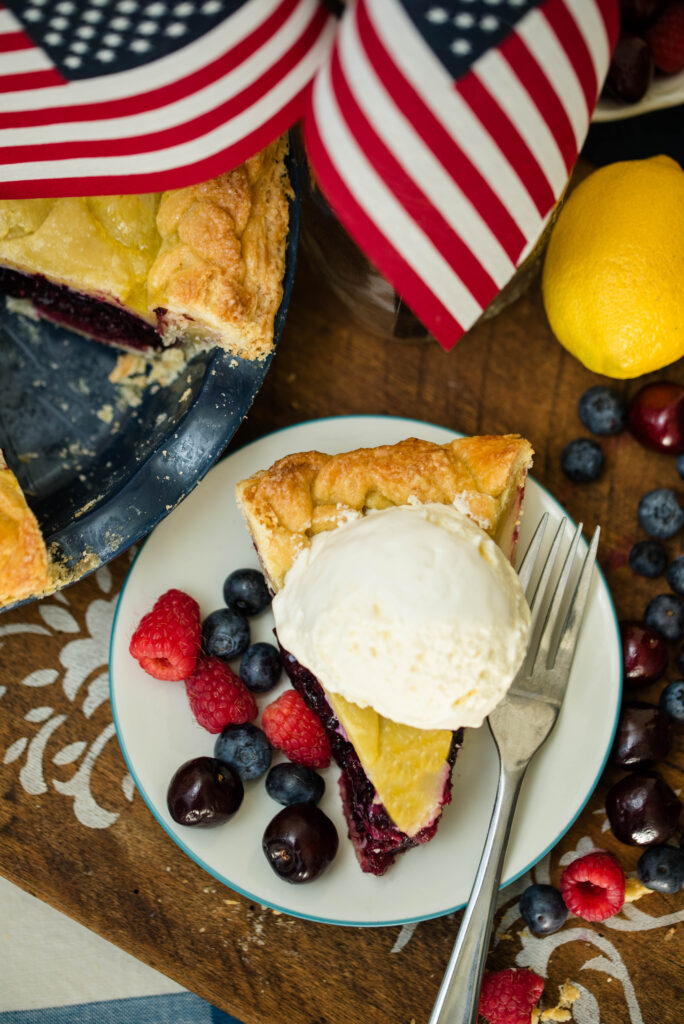
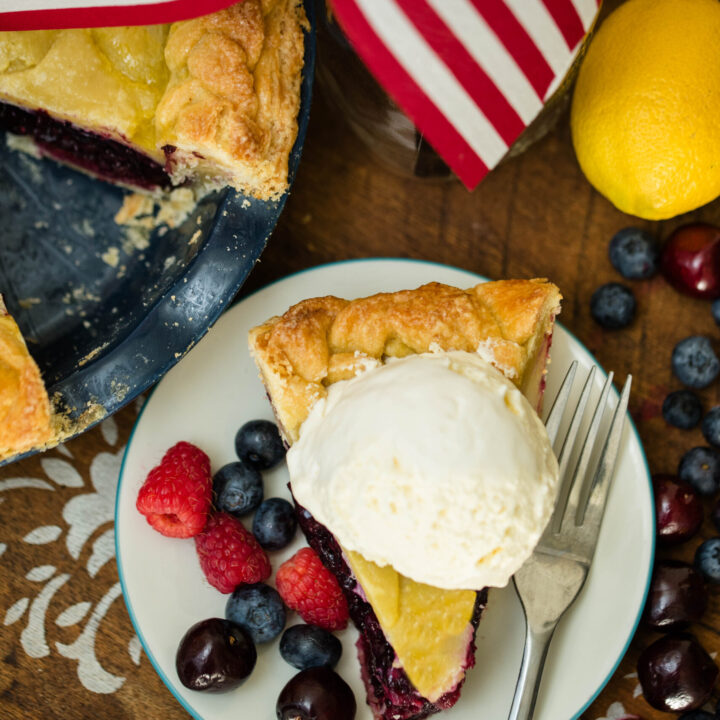
Homemade mixed berry pie with honey is the perfect old-fashioned dessert to celebrate America’s 250th Fourth of July. It’s tender, buttery crust and lightly sweetened berry filling invites delicious nostalgic memories from years gone by with every bite. Topped à la mode with vanilla ice cream or traditional whipped cream, celebrate freedom with the classic taste of homemade pie. Now that’s truly Americana!
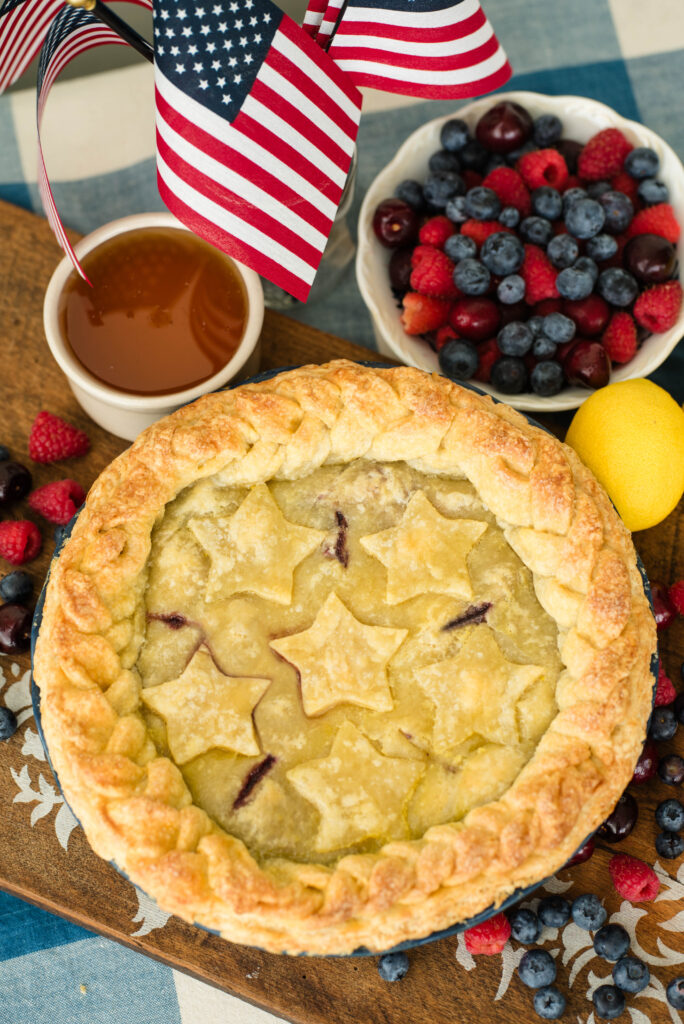
Here in America, we are celebrating a momentous occasion this Fourth of July with the 250th year since the signing of the Declaration of Independence. At Becky Buttles Americana, I wanted to create a good old-fashioned pie recipe to inspire folks to make something homemade for their pot-luck celebrations.
A traditional fruit pie is as old as well…America herself. Perhaps older! For our ancestors, it was another way of preserving the fruit harvest since there wasn’t refrigerators or freezers.
A mixed berry pie seemed perfect for the season since blueberries, cherries and raspberries are ripe for the picking this time of year in most areas of the country. If you can, this is a great opportunity to make memories with your loved ones, especially the kids, and take them fresh berry picking.
In our fast-paced, convenience filled world, berry picking invites us back outdoors and introduces kids to where food really comes from. When you leave the technology behind and get your hands out in nature and listen to the birds happily singing along, you’ll instantly feel relaxed and closer to God. I can’t think of a better way to spend a summer day.
When you get home, your fresh picked berries will taste even better in this pie recipe knowing your hands had an extra loving touch in its delicious journey. Homemade might not seem quicker or more convenient at first, but it’s far healthier and tastes much better than a fake factory version.
So go ahead and try this mixed berry pie with honey for your picnic celebrations this Fourth of July! Perhaps you might even suggest a pie contest amongst family and friends?! Now that would really be an Americana thing to do!
Why You’ll Love this Homemade Mixed Berry Pie with Honey
Made with real ingredients – This homemade mixed berry pie with honey is made with all real ingredients. No fillers and unhealthy, unpronounceable chemical additives. Real berries, butter, flour and honey all come together to make a classic American pie with a flaky crust just like Grandma used to make.
Low-sugar – This pie recipe is made with only one cup of honey so that the natural flavors of the berries shine through. I personally don’t care for pies that are overly sweet and my hope is that you don’t either! The berries, honey and lemon zest make a super refreshing filling that won’t stick to your teeth.
Versatile – If pie isn’t your thing, the filling can be used all on its own for a delicious dessert topped with whipped cream or homemade vanilla ice cream. The crust can also be substituted with a gluten-free recipe and the types of berries used is also based on personal preference. Make it your own!
Helpful Hints for a Successful Pie
- The gelatin is used to thicken the filling so it’s not a soupy mess when serving. If you prefer, substitute 1/4 cup of cornstarch or arrowroot powder if you don’t have gelatin on hand.
- This recipe calls for only one cup of honey in the filling, but if you prefer it a little sweeter, go ahead and add more.
- When making the pie crust, it’s important to use very cold butter and ice water. Baking cold butter structurally assists the flaky layers. That’s also why once the pie is assembled, it needs to be chilled again before baking. Especially in the summer, butter quickly comes to room temperature when rolling and assembling.
- Handle the dough as little as possible. Use the called for amount of liquid so that it quickly comes together. The more it’s handled, the tougher and drier the final texture will be. Over mixing develops the gluten, which is our friend when baking bread, but not for a tender, flaky pie crust.
- I highly recommend using a kitchen scale when making the crust. I have all measurements listed by volume and grams in the recipe card. You will have better results when baking in grams because the measurements are more accurate and baking is a precise art.
How to Make Homemade Mixed Berry Pie with Honey
What You’ll Need
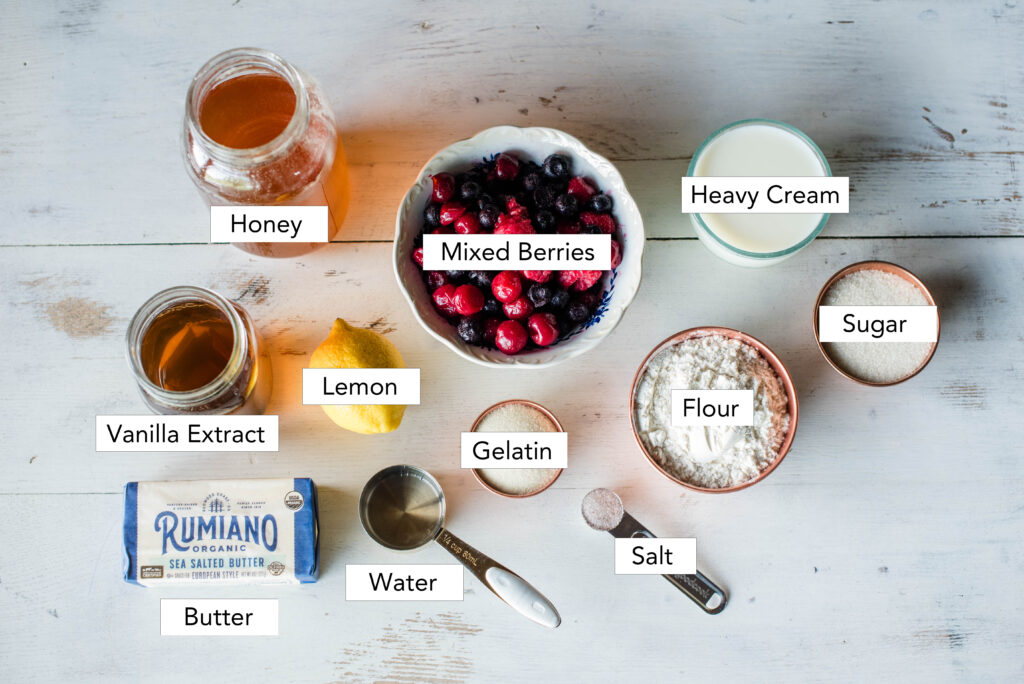
Ingredients
Mixed berries – Any combination of fresh or frozen berries works for the filling. For example, use blackberries if you prefer them more than raspberries.
Honey – Raw local honey is best since it’s a real food ingredient. Yes, you’ll lose some of the raw properties of it, but it’s still a high-quality sugar for this recipe.
Gelatin – I prefer to use gelatin since it’s gluten-free, adds protein and avoids the use of a corn product.
Heavy cream – This is optional if you prefer pie crusts with a glossy finish after baking. I chose not to use it for my pie here.
A full list of ingredients is listed in the recipe card down below.
Equipment
9-inch pie plate and rolling pin
Scissors, whisk, fork and mixing spoon
Pastry cutter and bench scraper
Cookie cutters (optional)
Kitchen scale, sauce pan and mixing bowl
Step-by-Step Instructions
For the Filling
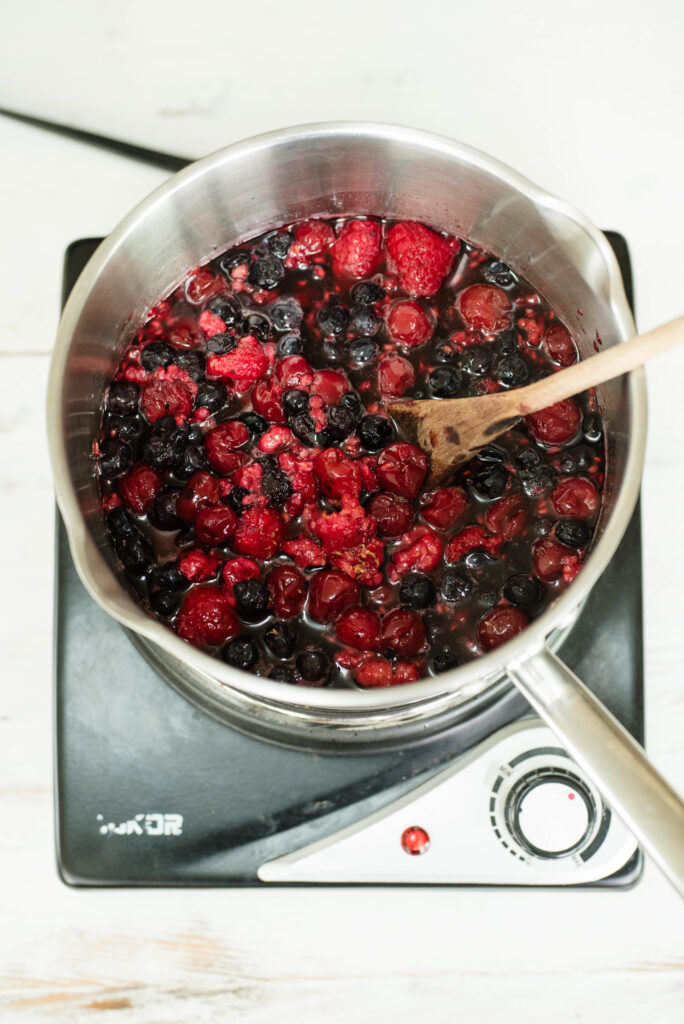
In a saucepan, bring berries, honey and lemon zest to a slow boil on medium heat.
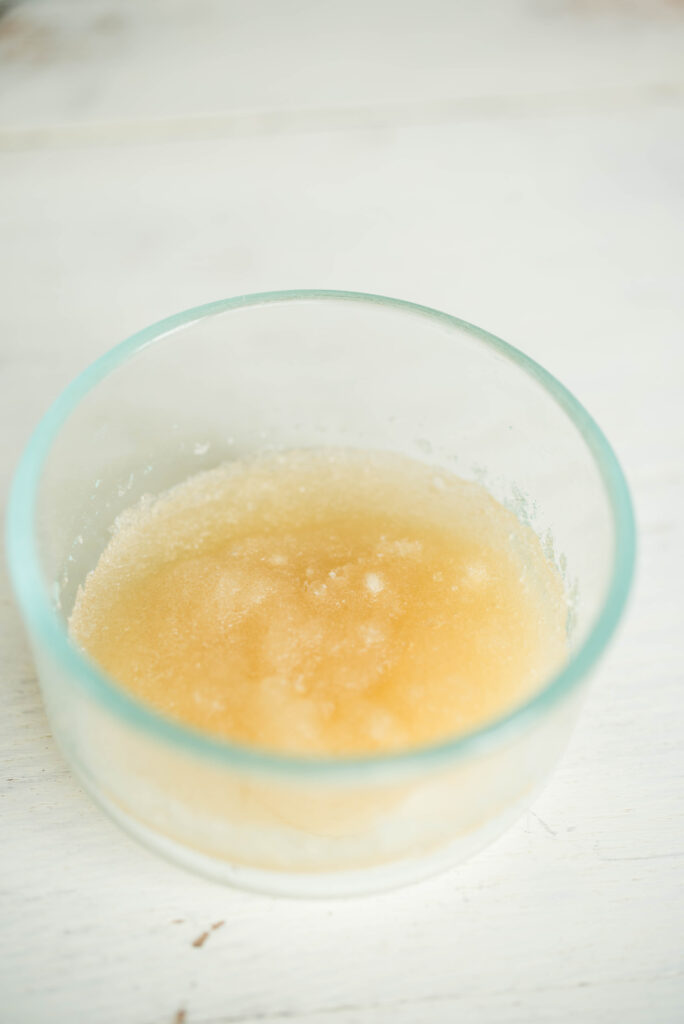
Meanwhile, mix the water and gelatin powder together in a small dish.
It will become a tight jello-like mass and come out of the container in one piece.
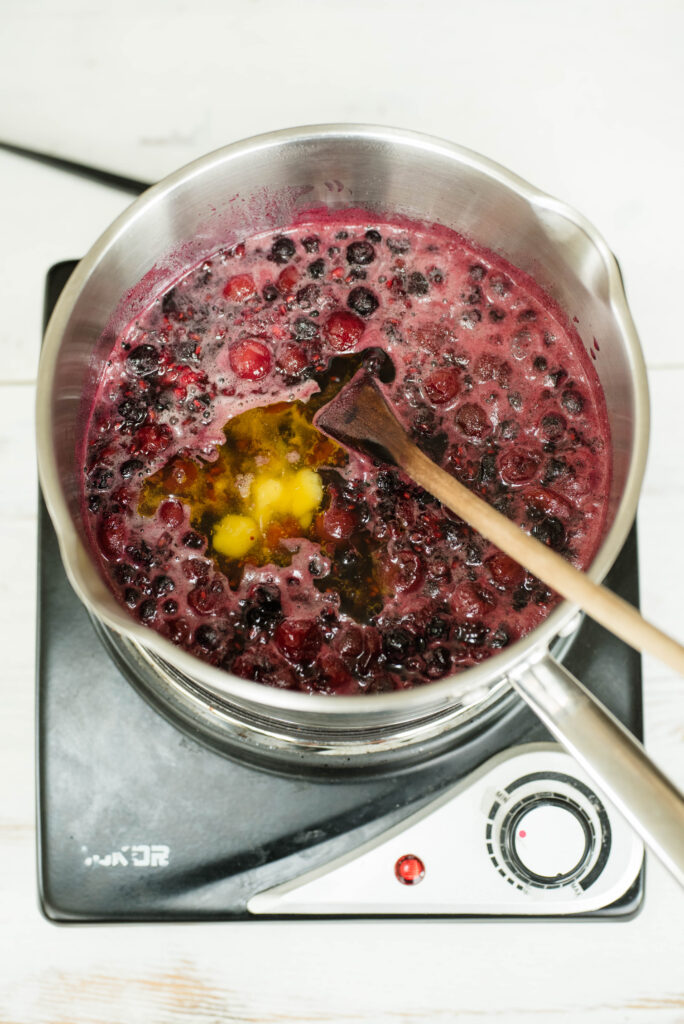
Once the berries boil, turn the heat down to low and add the gelatin mix, vanilla and butter. Stir until the butter and gelatin completely melt and dissolve.
Remove from the stovetop and pour into a container to cool off for a minimum of one hour.
For the Crust
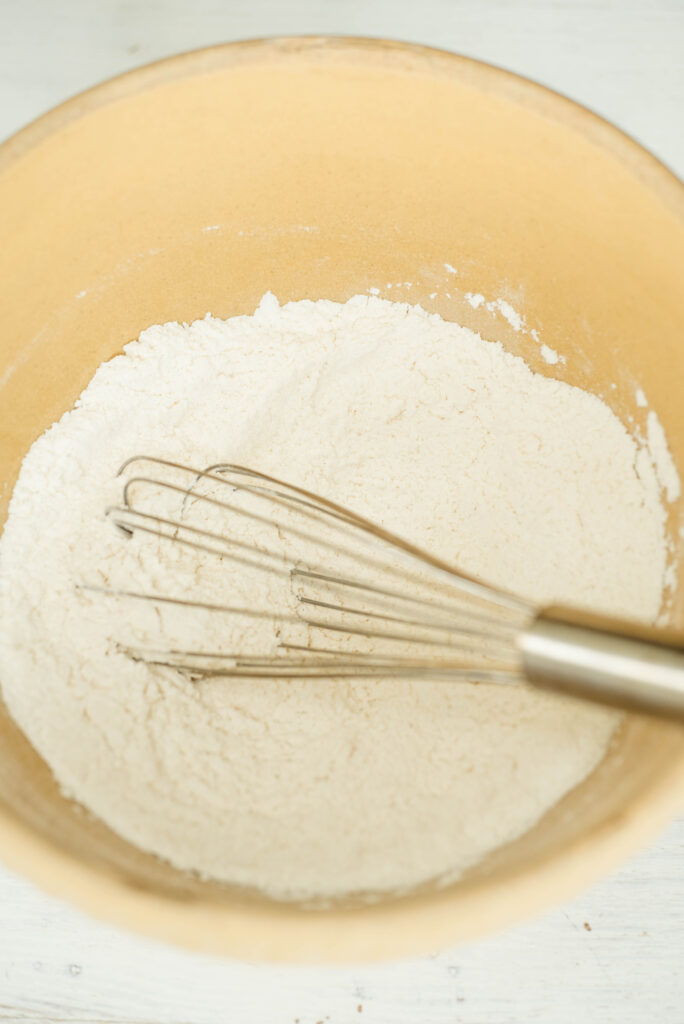
In a medium-sized mixing bowl, whisk together flour, sugar and salt.
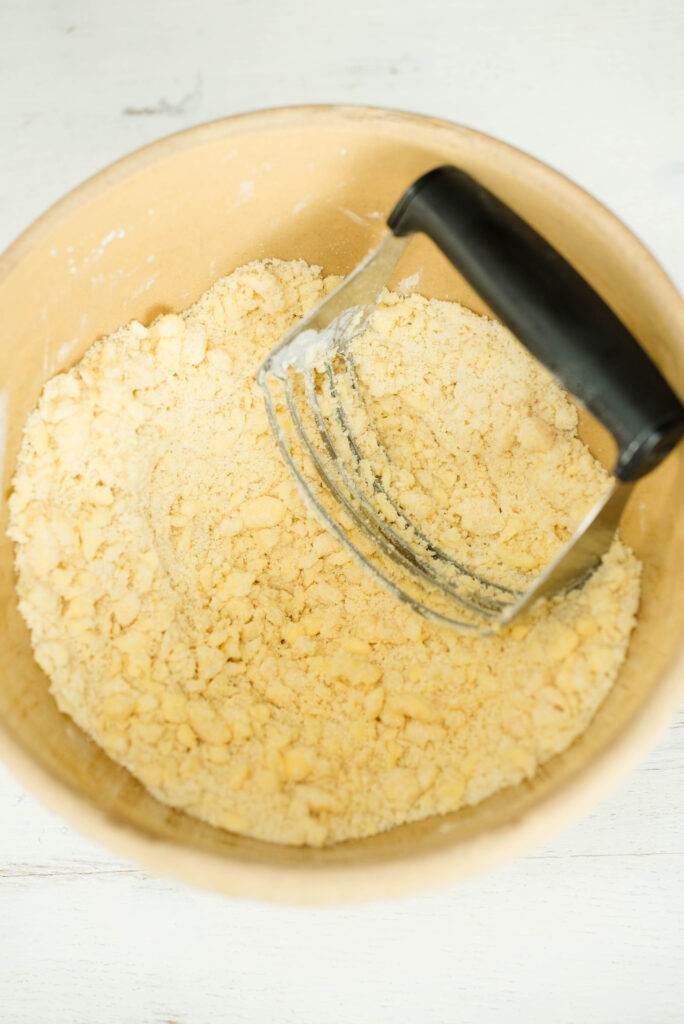
Then, add the butter and cut in to the flour mixture with a pastry cutter or your hands.

Next, pour in the water and vinegar and using your hands, combine the dough just until it comes together in a ball. Do not over mix or your crust will become tough and dry.
Wrap tightly in plastic wrap or beeswax cloth and refrigerate for one hour.
After an hour, remove from the fridge and cut the dough in half.
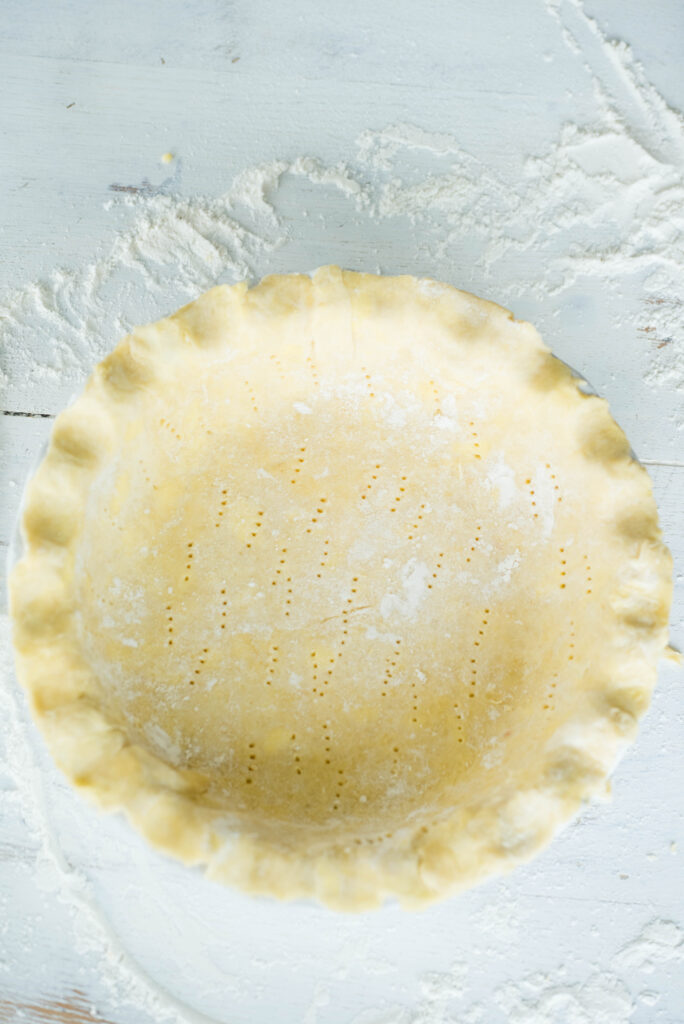
Roll one half into a flat disc to fit the size of the pie plate. Use the rolling pin to guide the dough into the plate.
Next, prick the dough with a fork all over the bottom and sides.
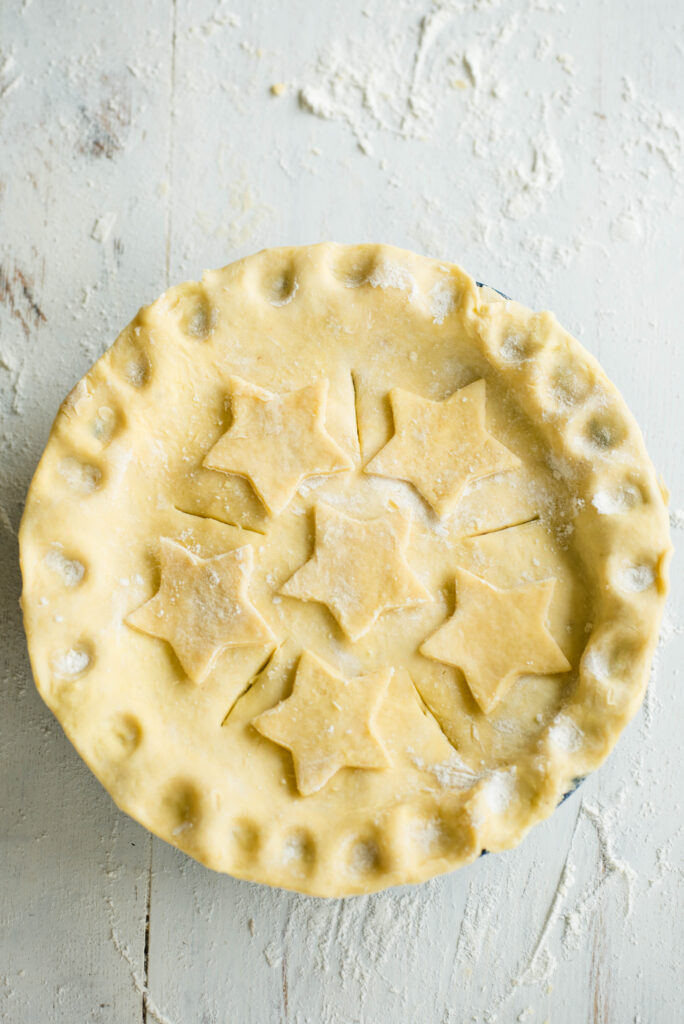
Scoop the cooled filling onto the bottom crust. Roll out the top crust and trim the excess dough with a scissors from the sides. Crimp the edges with your fingers.
With a sharp knife, cut slits into the top crust to vent the steam. If desired, cut shapes with the extra dough and arrange before baking.
Return the pie to the fridge for a minimum of one hour before baking. Then, bake at 400 degrees for 10 minutes. Reduce the heat to 350 degrees and bake for another 35 minutes.
Cool completely in the refrigerator until the filling is set firm.
When ready to serve, bring the pie to room temperature first. Serve alone or with whipped cream or vanilla ice cream. Enjoy!

FAQ’s
Are fresh or frozen berries better for the pie filling?
Either one is acceptable for this pie filling. Choose your favorite berry combination and you won’t be disappointed with the final flavor outcome!
Why is the berry pie filling runny?
The filling needs to be pre-cooked with a thickener like gelatin, cornstarch or arrowroot powder. When the pie is done baking, it needs to cool off in the fridge for 3-4 hours before serving so it can set firm. Warm to room temperature before serving. Also, use a higher ratio of blueberries to the other berries because they are naturally higher in pectin, which thickens. Do leave the strawberries to the smoothies though. Their high water content makes the filling too runny.
How should a soggy pie crust be avoided?
First, make sure the dough is well chilled when rolling and place the assembled pie in the refrigerator for a minimum of one hour before baking. You want the butter to be ice cold. Second, when baking, start at 400 degrees for 10-15 minutes and then reduce the heat to 350 degrees. Bake for another 35-40 minutes.
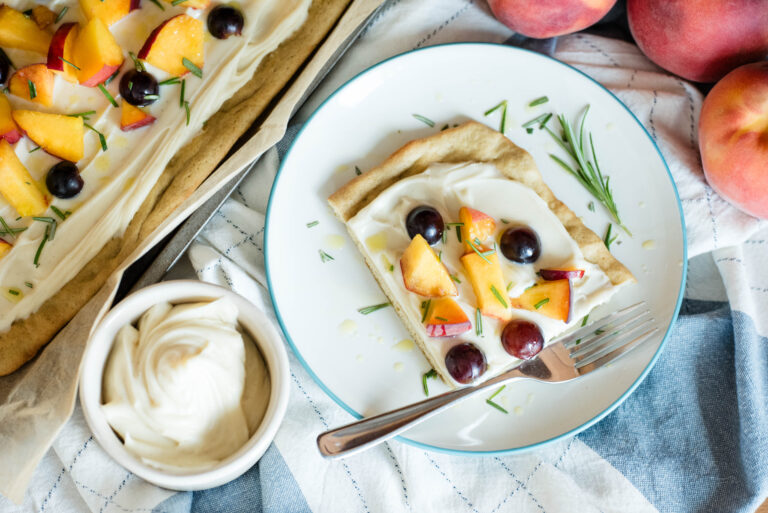
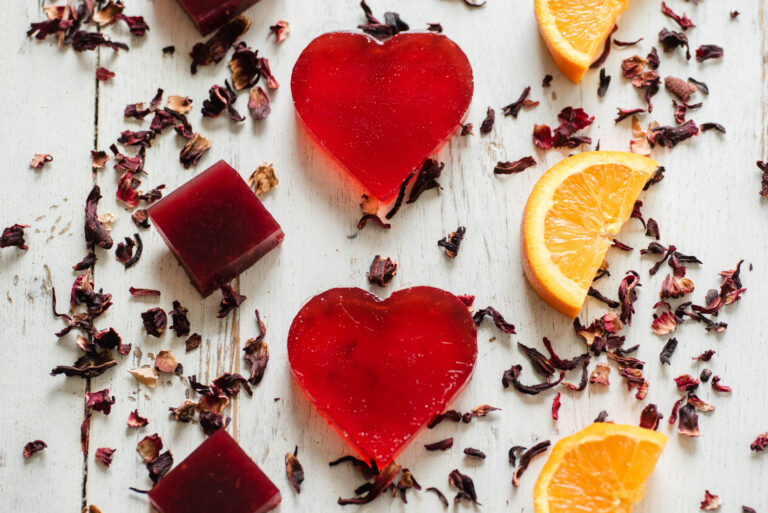
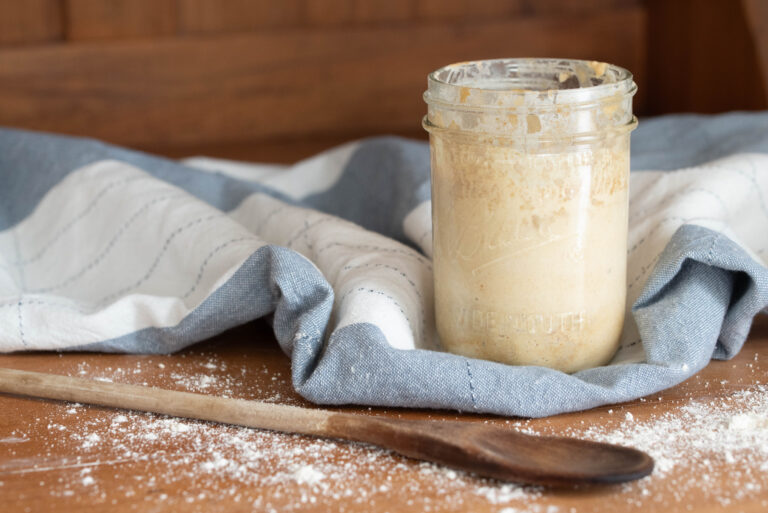
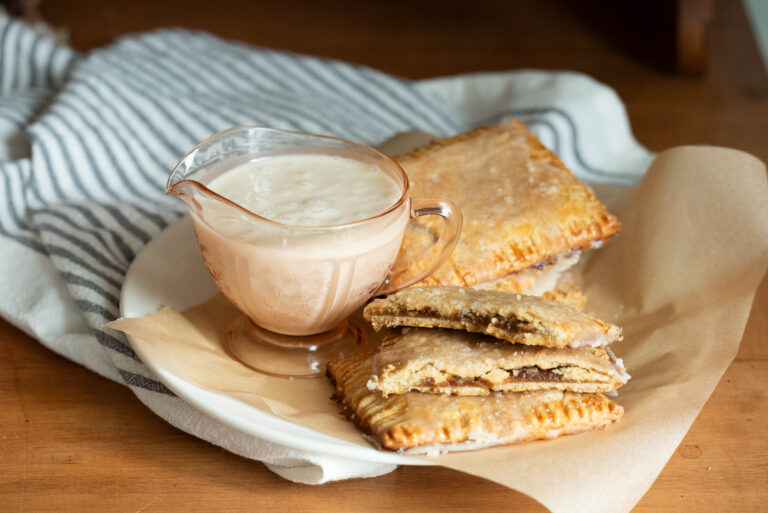
More Summer Recipes From Becky’s Kitchen
How to Make No-Churn Homemade Vanilla Ice Cream
How To Make Low-Sugar Strawberry Jam
Simple and Refreshing Watermelon Soup with Chamomile-Infusion
Easy Fermented Strawberries with Honey | 3 Methods to Preserve
The Best Americana Mixed Berry Pie with Honey
Homemade mixed berry pie with honey is the perfect old-fashioned dessert to celebrate America's 250th Fourth of July. It's tender, buttery crust and lightly sweetened berry filling invites delicious nostalgic memories from years gone by with every bite. Topped à la mode with vanilla ice cream or traditional whipped cream, celebrate freedom with the classic taste of homemade pie. Now that's truly Americana!
Ingredients
For the Filling
- 3 cups (570g) blueberries
- 2 cups (300g) raspberries
- 1 1/2 (210g) cups cherries
- 1 cup (340g) honey
- zest from 1 lemon
- 2 teaspoons (8g) vanilla
- 2 tablespoons (28g) butter
- 3 tablespoons (27g) or 3 packages of unflavored gelatin powder
- 4 tablespoons (60g) water
For the Crust
- 2 1/2 cups (300g) plus more for rolling all-purpose flour
- 1 tablespoon (13g) sugar
- 1 teaspoon (6g) salt
- 1 cup + 2 tablespoons (255g) butter
- 1 tablespoon (8g) vinegar
- 7 tablespoons (105g) ice cold water
- 2 tablespoons heavy cream (optional for a wash)
Instructions
For the Filling
In a saucepan, bring berries, honey and lemon zest to a slow boil on medium heat.
Meanwhile, mix the water and gelatin powder together in a small dish. It will become a tight jello-like mass and come out of the container in one piece.
Once the berries boil, turn the heat down to low and add the gelatin mix, vanilla and butter. Stir until the butter and gelatin completely melt and dissolve.
Remove from the stovetop and pour into a container to cool off for a minimum of one hour.
For the Crust
In a medium-sized mixing bowl, whisk together flour, sugar and salt.
Then, add the butter and cut in to the flour mixture with a pastry cutter or your hands.
Next, pour in the water and vinegar and using your hands, combine the dough just until it comes together in a ball. Do not over mix or your crust will become tough and dry.
Wrap tightly in plastic wrap or beeswax cloth and refrigerate for one hour.
After an hour, remove from the fridge and cut the dough in half.
Roll one half into a flat disc to fit the size of the pie plate. Use the rolling pin to guide the dough onto the plate.
Next, prick the dough with a fork all over the bottom and sides.
Scoop the cooled filling onto the bottom crust. Roll out the top crust and trim the excess dough with a scissors from the sides. Crimp the edges with your fingers.
With a sharp knife, cut slits into the top crust to vent the steam. If desired, cut shapes with the extra dough and arrange before baking.
Return the pie to the fridge for a minimum of one hour before baking. Then, bake at 400 degrees for 10 minutes. Reduce the heat to 350 degrees and bake for another 35 minutes.
Cool completely in the refrigerator until the filling is set firm.
When ready to serve, bring the pie to room temperature first. Serve alone or with whipped cream or vanilla ice cream. Enjoy!
Notes
The gelatin is used to thicken the filling so it's not a soupy mess when serving. If you prefer, substitute 1/4 cup of cornstarch or arrowroot powder if you don't have gelatin on hand.
This recipe calls for only one cup of honey in the filling, but if you prefer it a little sweeter, go ahead and add more.
When making the pie crust, it's important to use very cold butter and ice water. Baking cold butter structurally assists the flaky layers. That's also why once the pie is assembled, it needs to be chilled again before baking. Especially in the summer, butter quickly comes to room temperature when rolling and assembling.
Handle the dough as little as possible. Use the called for amount of liquid so that it quickly comes together. The more it's handled, the tougher and drier the final texture will be. Over mixing develops the gluten, which is our friend when baking bread, but not for a tender, flaky pie crust.
I highly recommend using a kitchen scale when making the crust. I have all measurements listed by volume and grams in the recipe card. You will have better results when baking in grams because the measurements are more accurate and baking is a precise art.
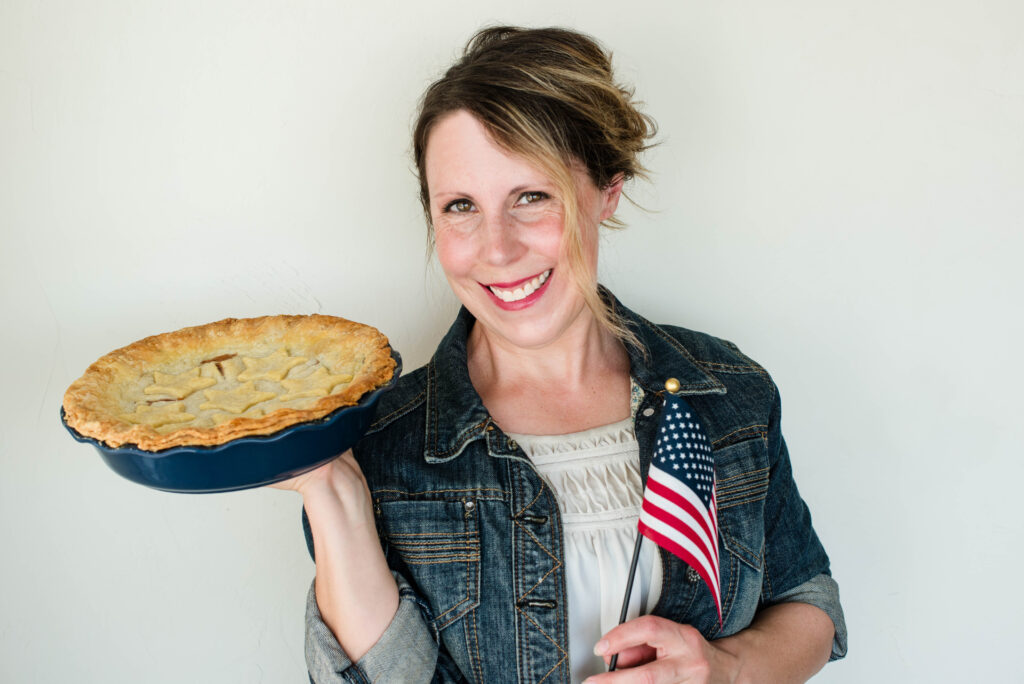
I’m a wife and homemaker inspiring old-fashioned skills for a homemade, self-sufficient lifestyle, always with a warm beverage in hand. Homemade Recipes. Gardening. Preserving. Healthy Living.
Want More Recipes from Becky?
Sign up to receive exclusive recipes only for subscribers! Plus you’ll get the latest blog posts straight to your inbox!