How to Make Wooden Seed Starting Boxes for Healthier Gardening
Wooden seed starting boxes make for a beautiful, more natural setting for tiny seedlings. They’re plastic-free for a healthier start to life and they’ll last a lifetime with this traditional Japanese wood preservation method called Shou Sugi Ban. It’s an old-fashioned technique that’s fun and practical and full of rustic farmhouse charm.
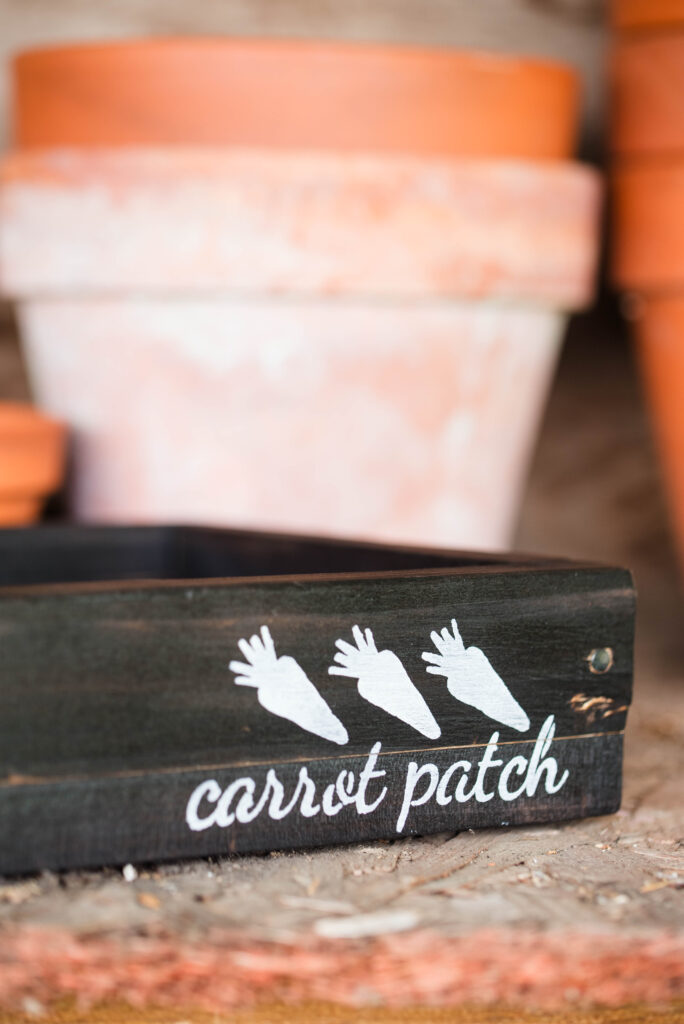
Gardening fills my heart with a lot of joy with its beauty, its health benefits and miraculous charm. But it also collides with my desire for simple clutter-free living.
If you’re a hobby gardener maybe the shed only has a small pile of tools like a clippers and trowel. But for gardeners who grow for production, the supply of tools and materials is endless.
A couple years ago, I got bit by the clutter bug and decided all the black plastic seed starting containers had to go. After all, our ancestors grew gardens without all the things we have today. So how did they do it?
With a light web search, I discovered that they used wooden seed starting boxes. Well, I have a lot of wood scraps laying around and this idea furthered my decluttering efforts.
I also learned about an ancient Japanese wood preservation method called Shou Sugi Ban. It involves charring the wood with fire, leaving behind a beautiful deep patina, which suits today’s rustic decor look.
But my decluttering kick also lead me down another rabbit hole that I’m passionate about; plastic-free living. Just when I think I’m the queen of plastic-free, my research efforts told me I’m not, especially in the garden.
Before we get started, let’s take a deeper look at why you should consider wooden boxes over those black plastic seedling containers.
Why is Plastic Bad for Human Health?
As the years go by, the evidence against plastic use increases. The research regarding the negative impacts on the human body and the environment are alarming.
At the root of all plastic materials are fossil fuels. The three most common are crude oil, petroleum and natural gas.
These natural elements turn into many kinds of different plastics when certain chemicals are added depending on the desired texture of an object. Ziplock bags, milk jugs, cutting boards and plastic containers of all kinds require different chemicals to achieve their shapes.
When these chemical processes take place, the naturally occurring elements aren’t so natural anymore. Eventually, each plastic item needs to break down. When that happens, a plastic object sheds and breaks down into tiny particles unseen by the naked eye into micro and nano plastics.
Remember, each of these particles contain the toxic chemical additives needed to turn the object into plastic in the first place. An item like a glass jar or a wooden seed starting box simply contain the natural element it’s made from.
MicroPlastics and NanoPlastics in the Human Body
Scientists continually research the effects of these particles and how they end up in the human body and the environment. Right now, the evidence points to ingestion, inhalation and skin contact as the main sources of bioaccumulation in a human.
This is a vast topic, so for now I’ll stick to ingestion of these particles since we’re talking about seed starting and growing food. This is a highly simplified explanation.
We ingest these tiny plastics through our food and drinking water by a process called leaching or dissolving. Microplastics and their chemical additives leach into food by thermal activity (heat), direct contact, the chemical make up of food (acidic and fatty foods) and physical means (like scraping plastic cutting boards).
Once inside our bodies, essentially our cells absorb these particles and the chemical additives of the particular plastic ingested like Bisphenol-A (BPA), a commonly known chemical in reusable water bottles. Our bodies see these things as toxic and as a result, we get cellular damage and dysregulation.
This includes cancer, liver damage, leaky gut or gut dysbiosis, hormone irregularities, reproductive issues, neurological diseases and so many more.
With all of this in mind, let’s talk more specifically about plastic seed starting supplies and why wooden seed starting boxes are a healthier alternative.
Why Should Wooden Seed Starting Boxes be Used vs. Plastic Trays?
It’s true, plastic is everywhere. You won’t be able to completely avoid it, but knowing when, where and why to use plastic alternatives greatly improves your health, the environment and your garden soil. So let’s talk about why wooden seed starting boxes are better than those black plastic containers.
What Are the Negative Effects of Using Plastic Seed Starting Containers?
Are Chemicals in Plastic Trays Absorbed by Seedlings?
The combination of chemicals added to the fossil fuel depends on if it’s soft and flexible like the four compartment containers or hard and rigid like a carrying tray. Either way, each contain polystyrene (PS), polypropylene (PP) and high density polyethylene (HDPE).
Each chemical contributes to many health issues for humans and animals like the ones listed above. As for garden seedlings, yes, they absorb these plastics and their chemicals.
Basic contact alone sheds micro plastics into the soil mix especially when you handle the container for watering and transplanting into the garden. Since heat is another mechanism by which micro plastics release, heat mats and grow lights accelerate the amount of chemicals ingested by seedlings.
They primarily attach themselves to the roots of seedlings and remain there even when they get planted into the garden. Scientific research isn’t clear yet if these micro plastics uptake into the leaves and produce itself, but it’s clear they lodge themselves into the roots.
These plastics block the plant from absorbing essential nutrients and leave themselves behind in the soil when the plant is uprooted at the end of the season. Then next year’s crops absorb these plastics and the cycle continues over and over again. This is especially problematic for root crops like onions, carrots, beets, parsnips, etc. because that is the food itself.
These plastic containers also shed their chemicals into anyone handling them. Our body heat alone encourages absorption into the skin, contributing to the toxic bioaccumulation inside the human body.
Plastic Seed Trays Contribute to Landfill Waste
The latest Environmental Protection Agency (EPA) statistics state that as of 2018, 35.7 million tons of plastic made its way into the trash. Of this, only 3 million tons were recycled. The rest permanently remain in landfills.
Just think, if all gardeners and greenhouses in the United States switched to wooden seed starting boxes how much less plastic would make its way to landfills. They’re sturdier too compared to the soft seedling containers from the nursery.
With less durability, these plastic containers often become single use, landing themselves straight into the garbage can. Even if you reuse them, eventually they tear and crumble apart.
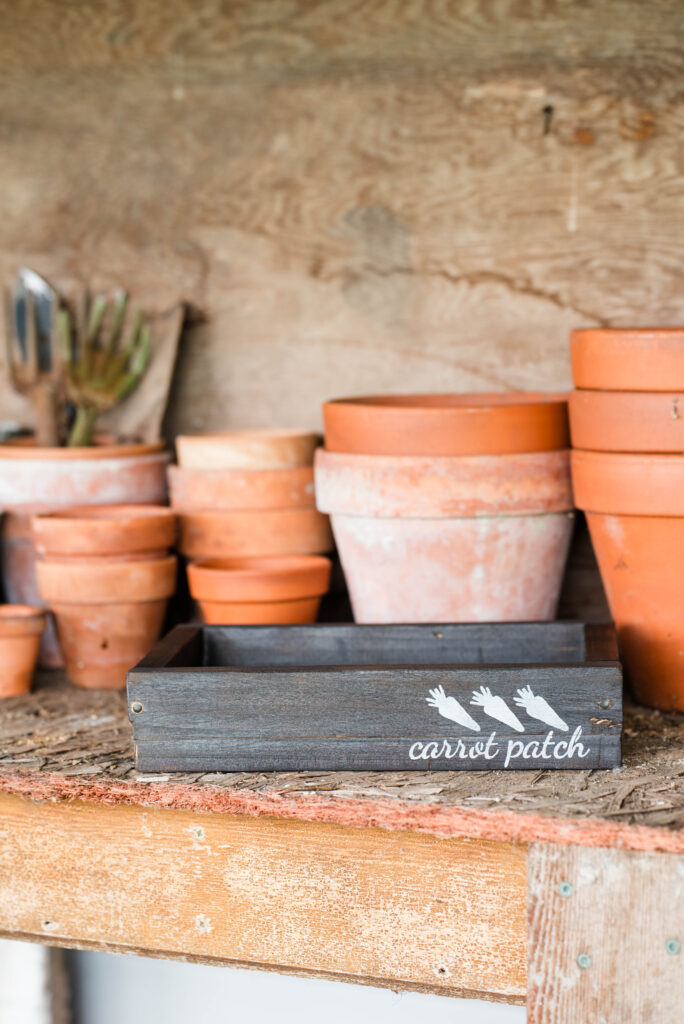
With the Shou Sugi Ban method for wooden seed starting boxes, they’re waterproof, eco-friendly and guaranteed to last for years. Especially since they’re only used for a few short weeks each year. They’re super cute too!
Seedlings Grow Better in Wooden Boxes
Besides being chemical free, wooden seed starting boxes offer other healthy benefits to seedlings.
Wood naturally creates better moisture control for the soil and seedlings. It absorbs extra moisture and releases it back as the soil dries out. This process prevents root rot and the fungal disease dampening-off.
Being a porous material, wood provides better airflow, which affects the moisture control. Wood also protects the soil from temperature fluctuations, unlike the plastic containers. This is especially important if you start seedlings in an outdoor greenhouse.
7 Tips for Building a Long-Lasting Wooden Seed Starting Box
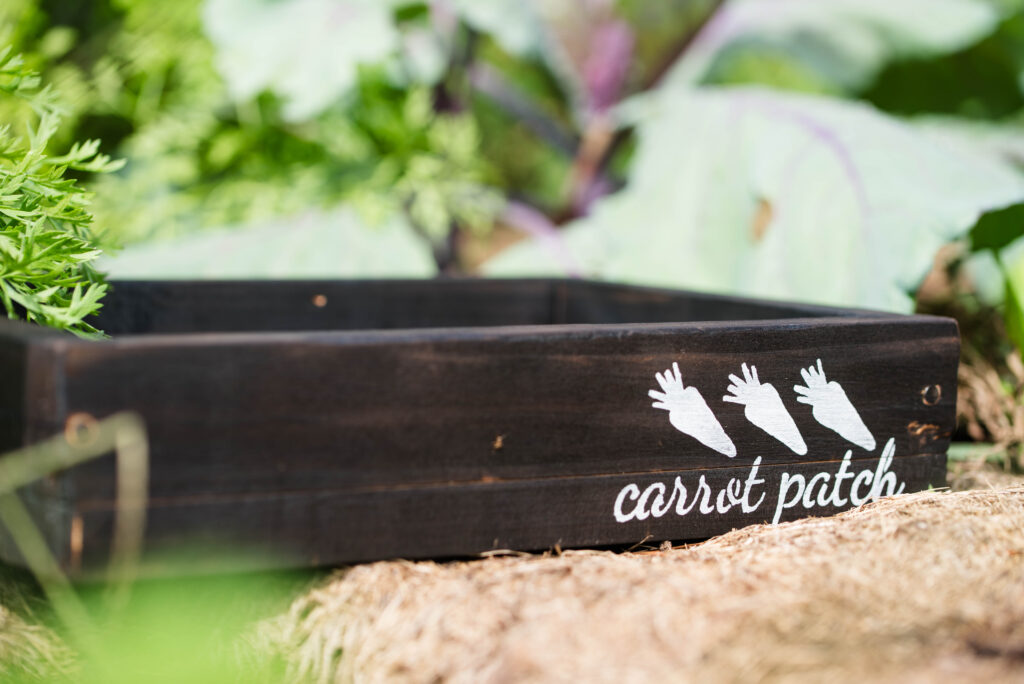
What Types of Wood Work Best for Wooden Seed Starting Boxes?
With the Shou Sugi Ban method of wood preservation, any type of wood is acceptable with a couple exceptions. Avoid pressure treated wood because it’s coated with chemicals that leach into the soil mix and seedling roots. Be careful with old lumber scraps like barn boards since they have lead paint and varnishes, which both contain chemicals.
Pallet boards make excellent boxes, but make sure it says heat treated (HT) and not chemical treated. If you buy new raw wood, cedar and redwood make good choices because they naturally resist moisture and decay without chemical sealants.
But honestly, any wood variety works, especially the free kind as long as they don’t contain chemicals.
Use the Shou Sugi Ban (Yakisugi) Method to Preserve Wood
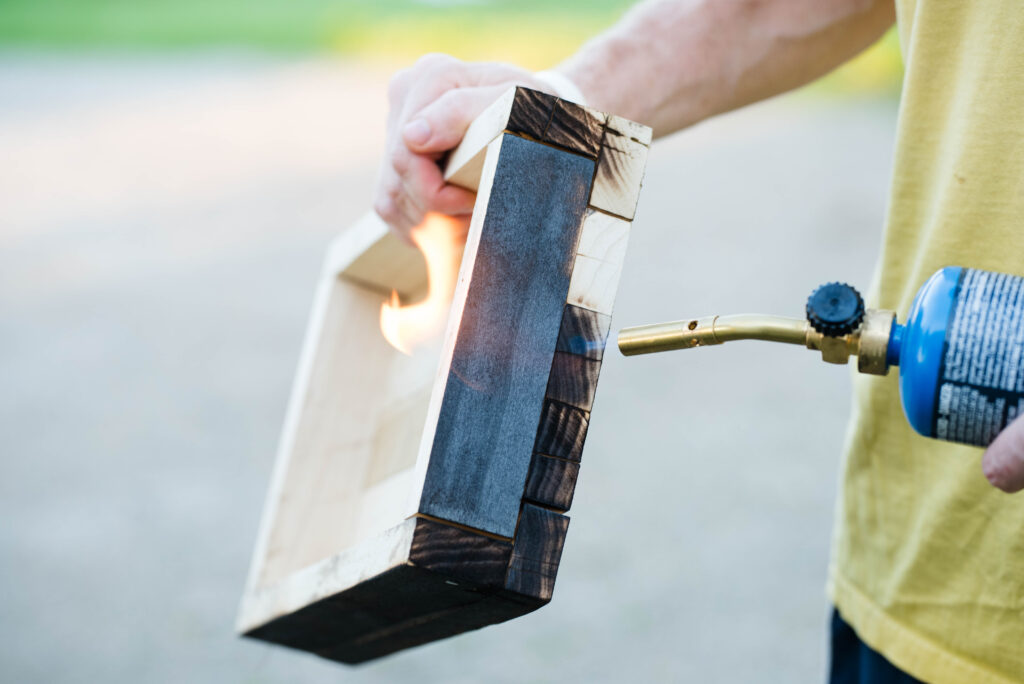
This is a traditional Japanese method that naturally preserves wood. The outside layer of the wood is charred by fire giving it a rustic weathered look.
The charred wood is insect and termite resistant and less flammable than raw untreated lumber. It also protects from weather damage like moisture rot and UV fading.
Here in this tutorial, I show you how to char the box using a small hand held propane burner. Please use EXTREME CAUTION. When a flame is present, a fire is always possible. Clear the work area of all other materials that could catch fire. Pull your hair back, secure loose clothing and wear safety goggles when assembling the box and charring.
How Big Should These Boxes Be?
It depends on how you seed start. If you use an outdoor greenhouse, measure for the size of the shelves. If you start indoors and nestle containers inside a foil pan or on top of a cookie sheet to catch water, measure for the size of that item. Leave about an inch around the box to pour water in for bottom watering seedlings.
Protect Boxes with a Natural Sealer
Extend the life of the boxes even more by sealing with a natural oil like tung oil or boiled linseed oil. Either one dries hard and provides waterproof protection.
Safely Dispose of Materials
When the propane torch empties, do a local search where you can take empty bottles for disposal. Do not throw them in the garbage or toss on a fire.
The same goes for rags or paper towels used with the oil for sealing. This video here shows you how to properly dispose of oil soaked rags without the risk of fire.
Tools and Materials You’ll Need
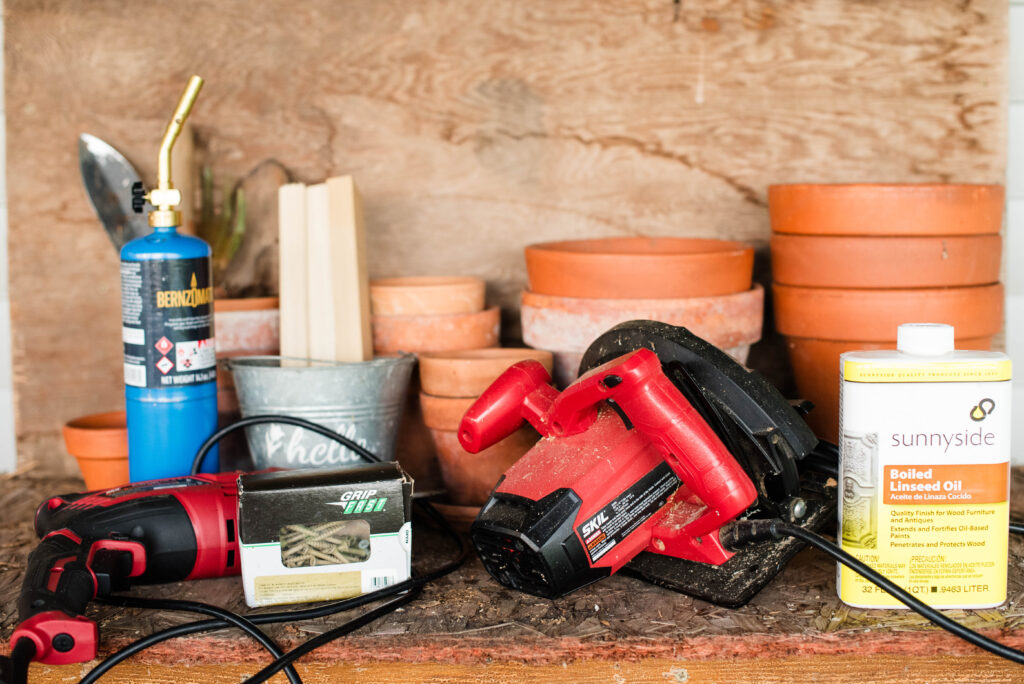
Wood – See notes above for the best types of wood to use.
Propane burner and matches or striker
Nails and hammer or screws and screwdriver – Use whichever you have on hand. Either one nicely holds the box together. Make sure the screws are long enough to hold the boards tightly together.
Tape measure and pencil
Circular saw and workbench
Metal brush or copper scrubby
Paintbrush or rag and boiled linseed oil
How to Make Wooden Seed Starting Boxes
Step-by-Step Instructions
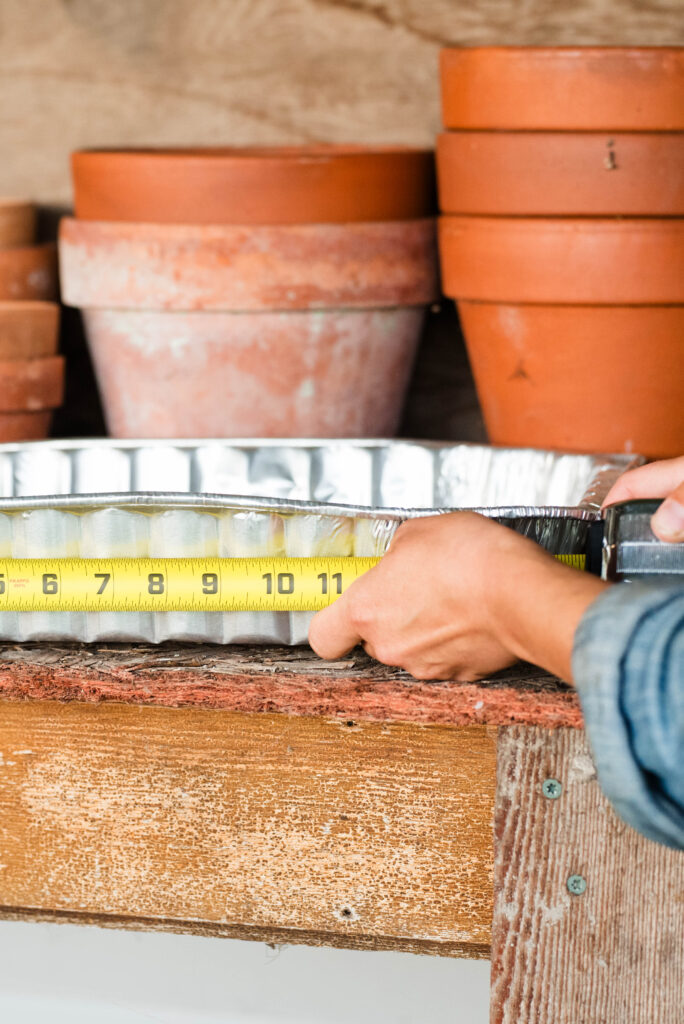
1.) Gather all necessary tools and materials. Begin by measuring the size of the container where the box rests during seed starting season, if you start seeds indoors.
To determine the final size of the box, leave about an inch around it inside the container. This allows space for pouring water in for bottom watering seedlings.
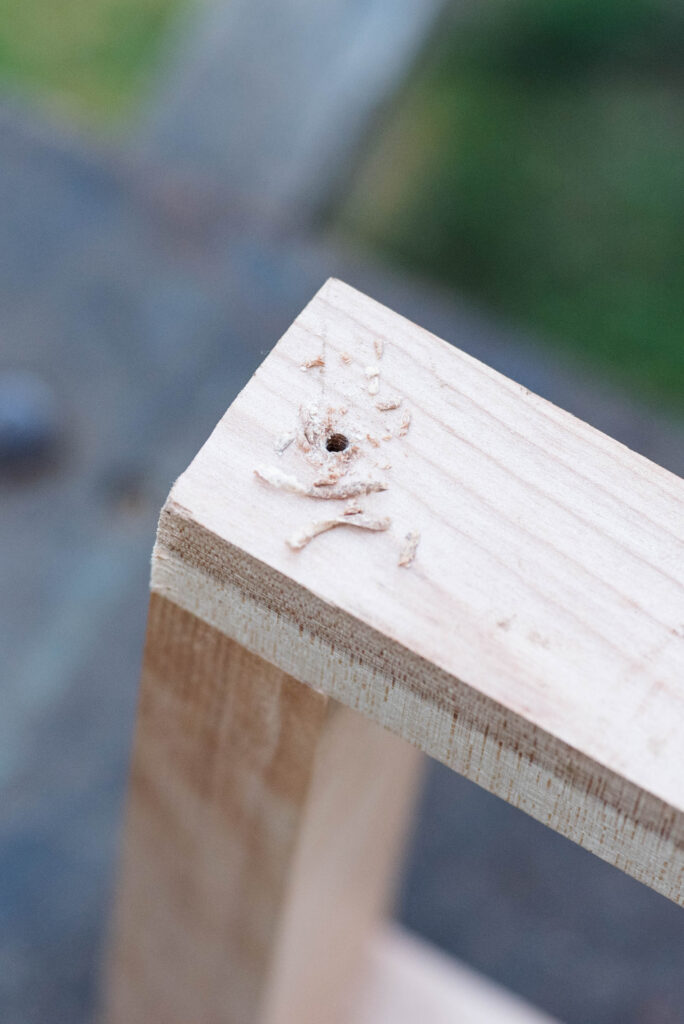
2.) Measure and cut the wood pieces according to what size the box will be.
When cutting the end pieces, they sit in between the longer outside boards. Remember, the total width includes the thickness of the outside boards. The length of the end piece is shorter than you might think.
When you’re ready to assemble the box, drill pilot holes where the screws will be located.
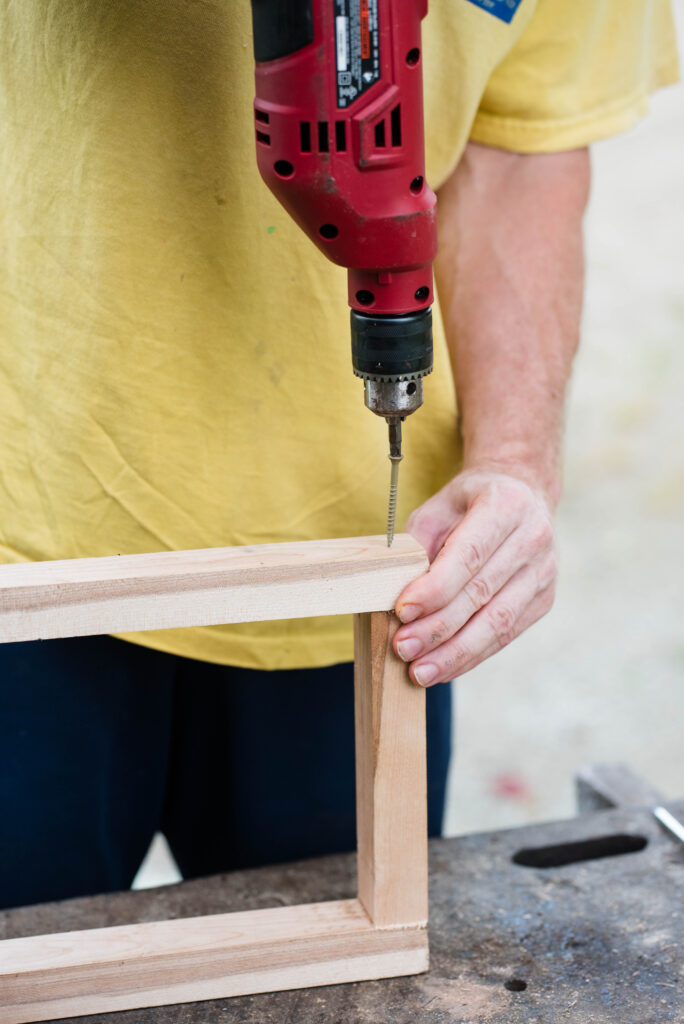
3.) Next, use the drill and drive the screws into the pilot holes.
Work slow and careful and ask for help holding boards in place.
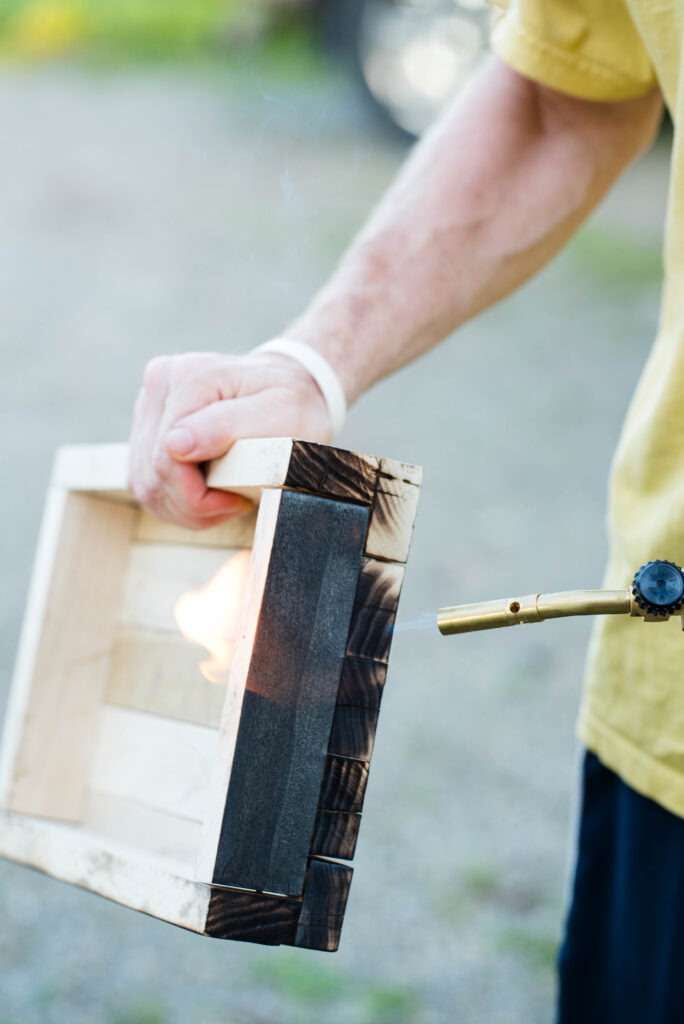
4.) Once the box is assembled, use the propane torch to char the entire box inside and out.
Use extreme caution to avoid injury and a fire. See notes for tips.
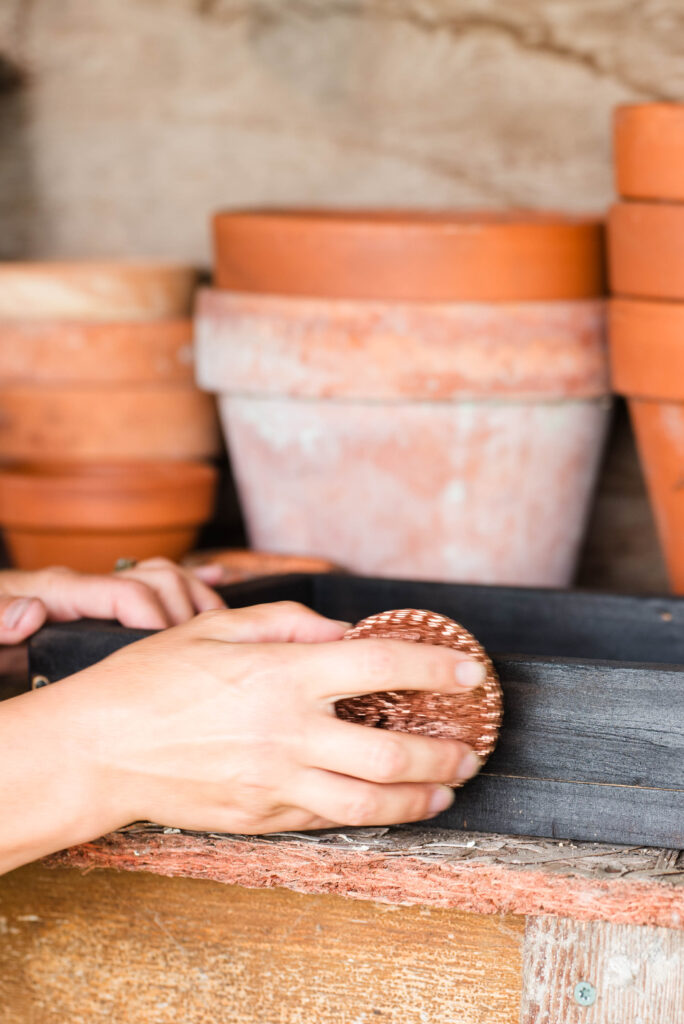
5.) After the box cools, take a metal brush or copper scrubby and very gently exfoliate the top layer of char off the box.
Wipe off the dust with a damp rag or cloth. Remember it will stain whatever material is used.
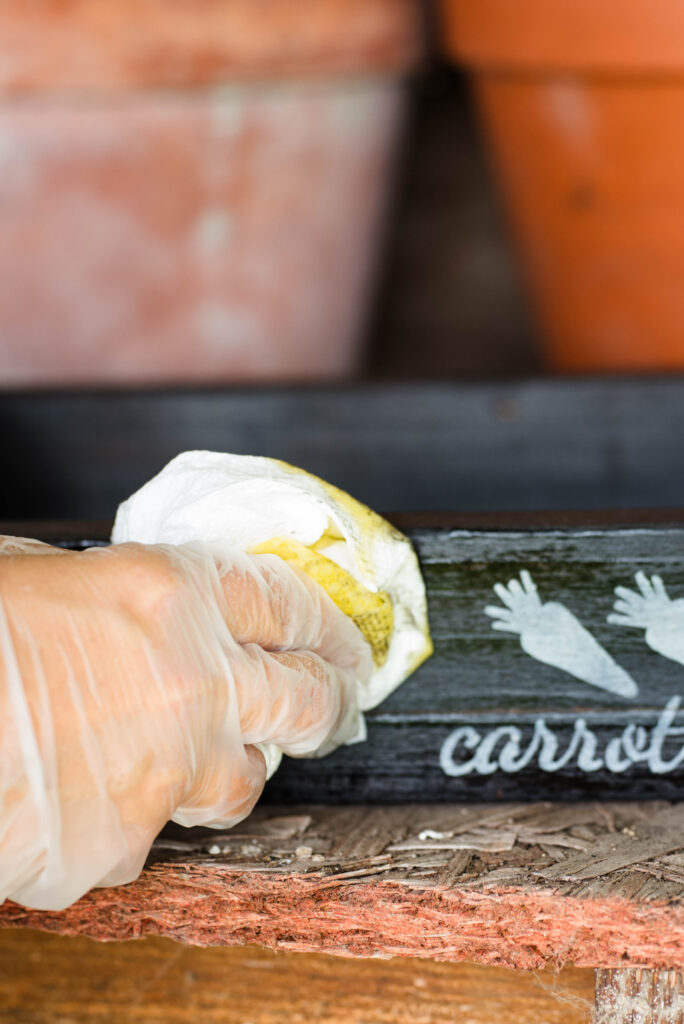
6.) Finally, seal the box with a natural finish like tung oil or boiled linseed oil.
Let it dry for 24 hours before using. After that, the box is ready for use.
Remember to properly dispose of the rag including paper towels to avoid a fire by spontaneous combustion.
FAQ’s for Wooden Seed Starting Boxes
How long do wooden seed starting boxes last?
Wooden boxes last for many years when used for seed starting. They’re only used for a few short weeks every year so there isn’t much wear and tear on them. If you use the Shou Sugi Ban method of wood preservation, they will last even longer.
How do I start seeds in a wood box?
Line the bottom with a natural material like sheep’s wool, cotton fabric or flannel. Add wet soil and use a soil blocker to create squares where individual seeds will be planted. Or use a putty knife to create the separate soil blocks. Then plant seeds as you would in a plastic container.
What does watering look like for seeds in wooden boxes?
Top watering is okay once the seedlings grow big and sturdy, but to start, water from the bottom. If you didn’t leave gaps in the bottom of the box, drill drainage holes instead so soil easily uptakes water.
More Ideas From Becky’s Garden
How to Seed Start Indoors | Budget Gardening
How To Make Biochar For The Garden
Repurpose a Whole Fresh Pumpkin with 5 Easy Frugal Ideas
How to Design A Yearly Garden Plan
How to Make a Simple Herbal Salve for Dry Skin
Thank you for stopping by my blog! I hope I’ve inspired you to try making these beautiful boxes for the next seed starting season. If you make them and love it, come on back and leave this tutorial a 5-star review! Tag me with your photos on Instagram @beckybuttlesamericana
With Love, Becky
How to Make Wooden Seed Starting Boxes (Shou Sugi Ban Method)
Wooden seed starting boxes make for a beautiful, more natural setting for tiny seedlings. They're plastic-free for a healthier start to life and they'll last a lifetime with this traditional Japanese wood preservation method called Shou Sugi Ban. It's an old-fashioned technique that's fun and practical and full of rustic farmhouse charm.
Materials
- Wood - See notes for the best types of wood to use.
- Paintbrush or rag and boiled linseed oil
Tools
- Propane burner and matches or striker
- Nails and hammer or screws and screwdriver - Use whichever you have on hand. Either one nicely holds the box together. Make sure the screws are long enough to hold the boards tightly together.
- Tape measure and pencil
- Circular saw and workbench
- Metal brush or copper scrubby
Instructions
1.) Gather all necessary tools and materials. Begin by measuring the size of the container where the box rests during seed starting season, if you start seeds indoors.
To determine the final size of the box, leave about an inch around it inside the container. This allows space for pouring water in for bottom watering seedlings.
2.) Measure and cut the wood pieces according to what size the box will be.
When cutting the end pieces, they sit in between the longer outside boards. Remember, the total width includes the thickness of the outside boards. The length of the end piece is shorter than you might think.
When you're ready to assemble the box, drill pilot holes where the screws will be located.
3.) Next, use the drill and drive the screws into the pilot holes. Work slow and careful and ask for help holding boards in place.
4.) Once the box is assembled, use the propane torch to char the entire box inside and out.
Use extreme caution to avoid injury and a fire. See notes for tips.
5.) After the box cools, take a metal brush or copper scrubby and very gently exfoliate the top layer of char off the box.
Wipe off the dust with a damp rag or cloth. Remember it will stain whatever material is used.
6.) Finally, seal the box with a natural finish like tung oil or boiled linseed oil. Let it dry for 24 hours before using. After that, the box is ready for use.
Remember to properly dispose of the rag including paper towels to avoid a fire by spontaneous combustion.
Notes
What Types of Wood Work Best for Wooden Seed Starting Boxes?
With the Shou Sugi Ban method of wood preservation, any type of wood is acceptable with a couple exceptions. Avoid pressure treated wood because it's coated with chemicals that leach into the soil mix and seedling roots. Be careful with old lumber scraps like barn boards since they have lead paint and varnishes, which both contain chemicals.
Pallet boards make excellent boxes, but make sure it says heat treated (HT) and not chemical treated. If you buy new raw wood, cedar and redwood make good choices because they naturally resist moisture and decay without chemical sealants.
But honestly, any wood variety works, especially the free kind as long as they don't contain chemicals.
Use the Shou Sugi Ban (Yakisugi) Method to Preserve Wood
This is a traditional Japanese method that naturally preserves wood. The outside layer of the wood is charred by fire giving it a rustic weathered look.
The charred wood is insect and termite resistant and less flammable than raw untreated lumber. It also protects from weather damage like moisture rot and UV fading.
Here in this tutorial, I show you how to char the box using a small hand held propane burner. Please use EXTREME CAUTION. When a flame is present, a fire is always possible. Clear the work area of all other materials that could catch fire. Pull your hair back, secure loose clothing and wear safety goggles when assembling the box and charring.
How Big Should These Boxes Be?
It depends on how you seed start. If you use an outdoor greenhouse, measure for the size of the shelves. If you start indoors and nestle containers inside a foil pan or on top of a cookie sheet to catch water, measure for the size of that item. Leave about an inch around the box to pour water in for bottom watering seedlings.
Protect Boxes with a Natural Sealer
Extend the life of the boxes even more by sealing with a natural oil like tung oil or boiled linseed oil. Either one dries hard and provides waterproof protection.
Safely Dispose of Materials
When the propane torch empties, do a local search where you can take empty bottles for disposal. Do not throw them in the garbage or toss on a fire.
The same goes for rags or paper towels used with the oil for sealing. This video here shows you how to properly dispose of oil soaked rags without the risk of fire.
I’m a wife and homemaker inspiring old-fashioned skills for a homemade, self-sufficient lifestyle, always with a warm beverage in hand. Homemade Recipes. Gardening. Preserving. Healthy Living.
Want More Recipes from Becky?
Sign up to receive exclusive recipes only for subscribers! Plus you’ll get the latest blog posts straight to your inbox!